
Schedule several appointments in a row
Book several services back to back for one customer at one place, by one colleague or a team — with one confirmation for the whole row.
A car detailer doing five of the same customer's cars one after the other. An installer booking a maintenance service with a breakdown call-out straight after it. Those are several appointments for one customer, at one place, back to back. Rather than filling in the appointment form five times, you book them in one go on the Book several appointments page.
Three things hold for the whole row:
- One customer.
- One place: one of your locations, or one address at the customer's.
- One colleague or one team does every appointment, back to back from the start.
In short
- Start a new appointment and fill in the first service.
- Click Add another service.
- Choose the next services, in the order they happen.
- Under When, choose who does it and when the first appointment starts.
- Click Create appointments and decide whether the customer gets a confirmation.
How you get there
The page has no place of its own in the menu. There are two ways in:
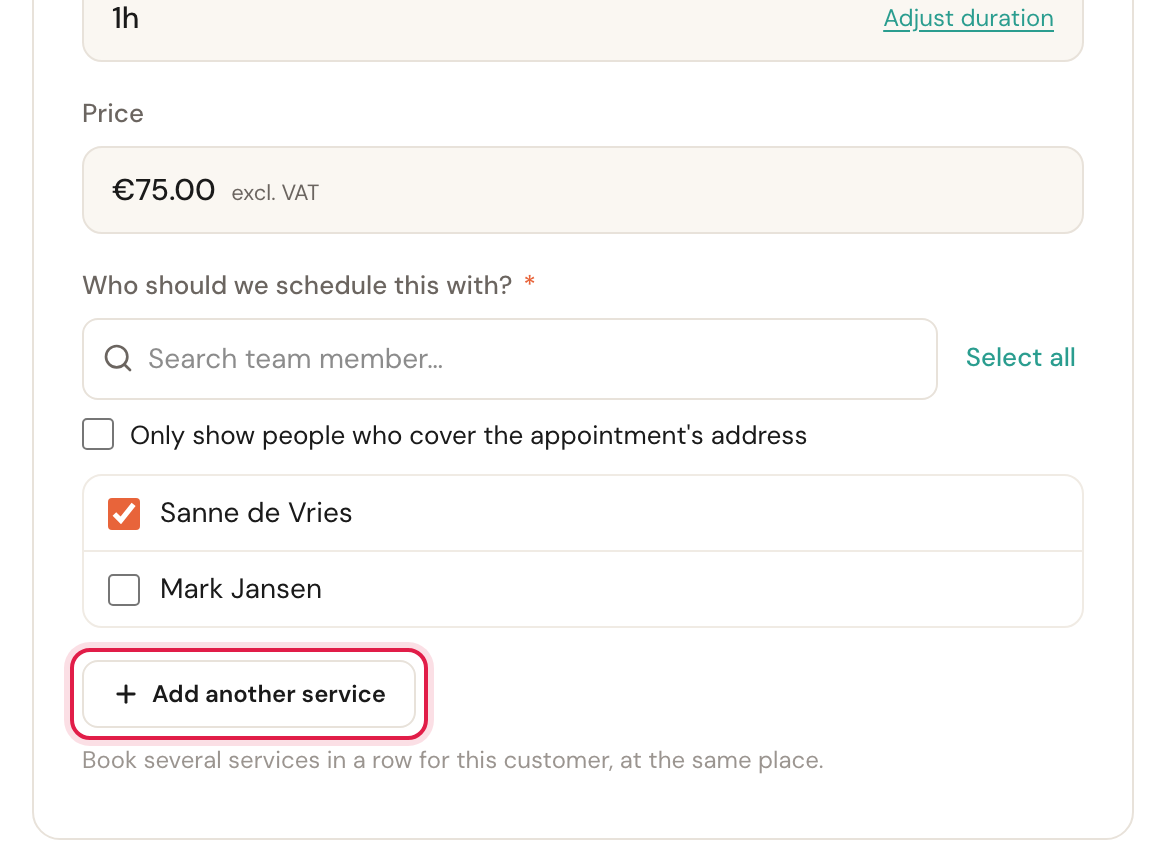
- From the appointment form. While you are creating a new appointment, the bottom of Appointment details has an Add another service button. Everything you had filled in goes along, and a second service is waiting for you.
- From the planner. If you search Appointment options for several services, a click on an option opens this page with every service, the colleague and the start time filled in. See From option to appointment.
Step by step
Start from the appointment form
Create a new appointment as usual — see Schedule an appointment — and fill in the customer, the first service and, if you like, the colleague and the time. Then click Add another service at the bottom.
Choose the next service
The Book several appointments page opens. Your first service is there as a folded line; the second is open with Choose a service.
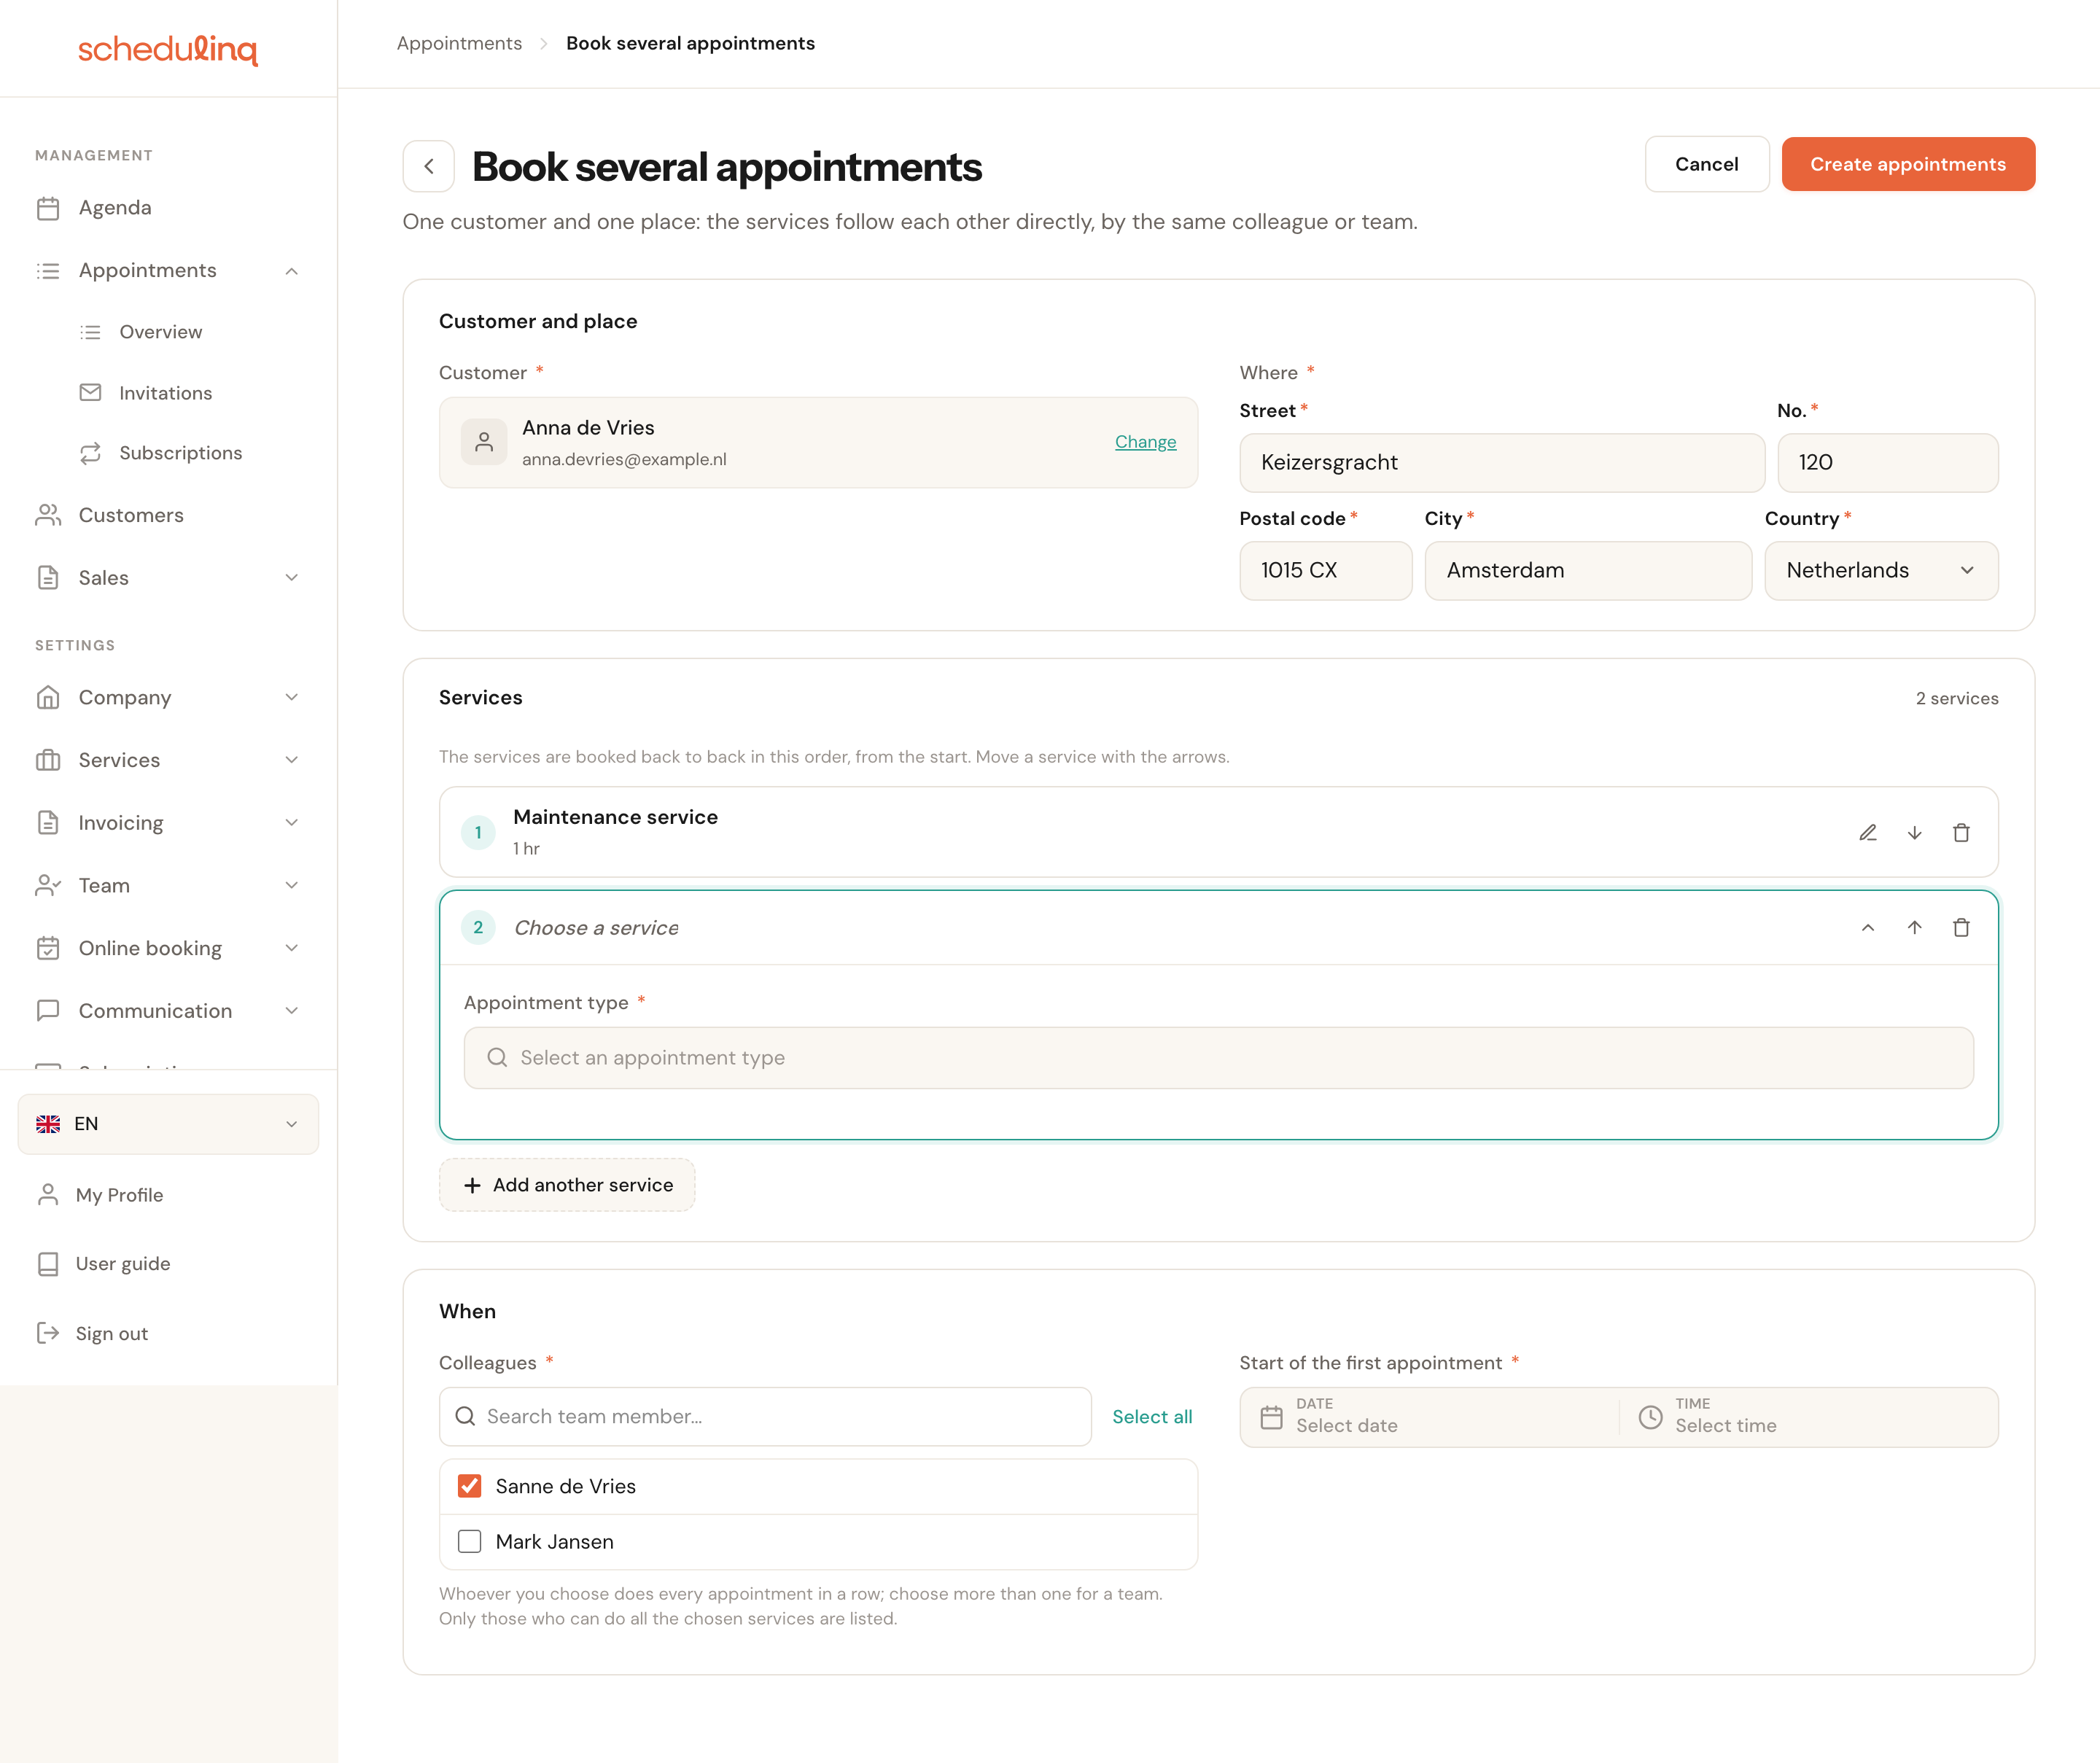
Choose the appointment type. You only see services offered at the same place as the first. If more need adding, click Add another service again: the new line opens and the previous one folds.
Choose who does it and when
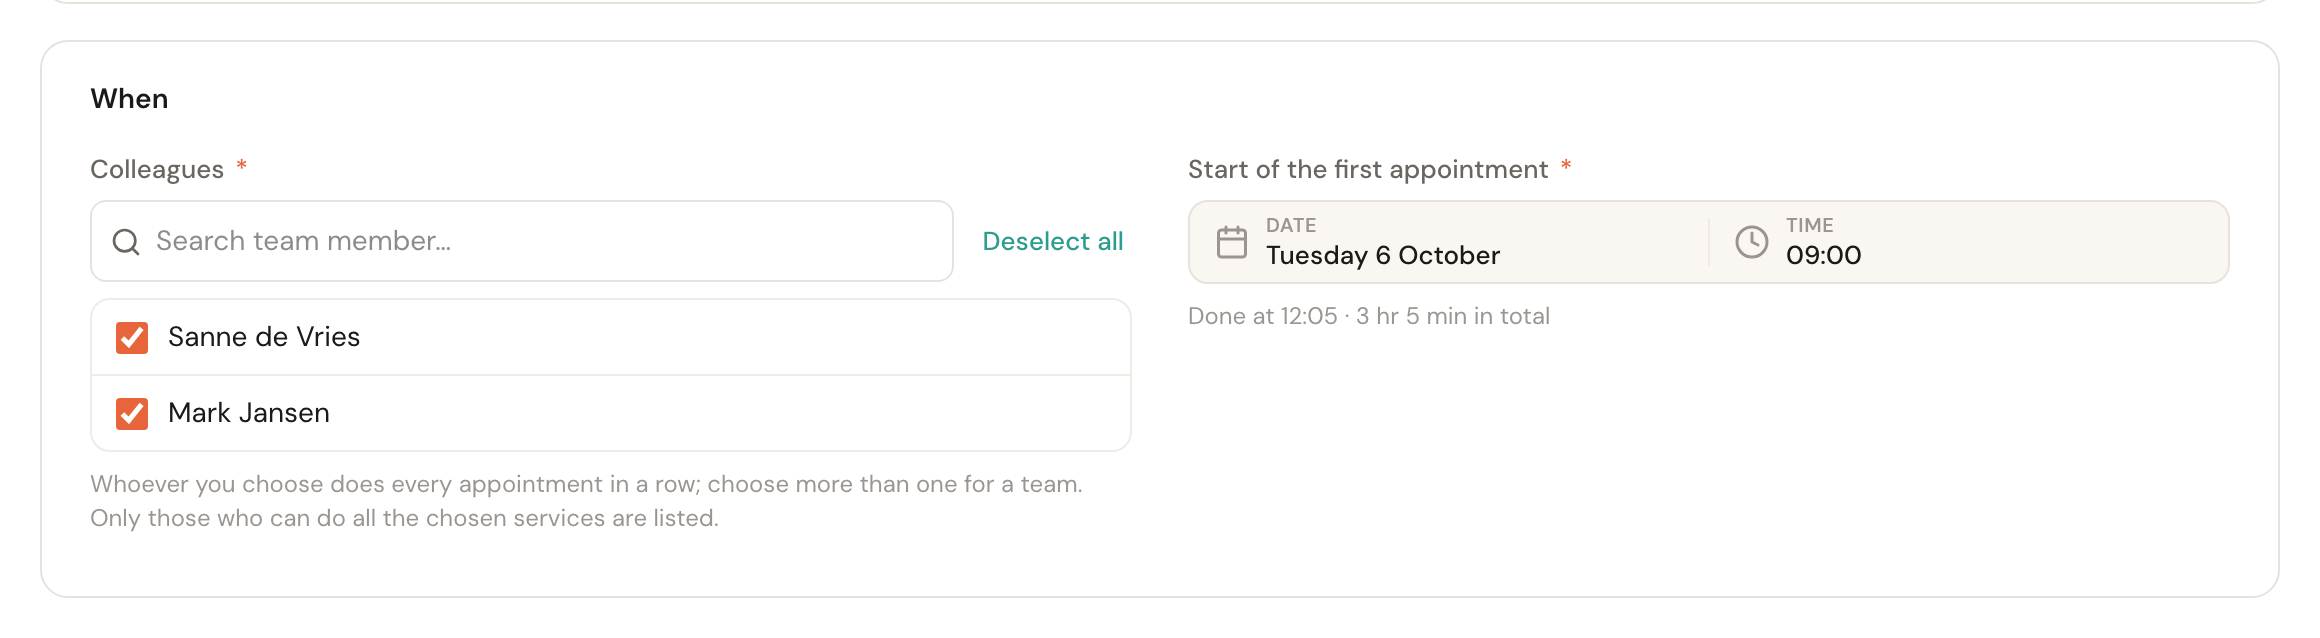
Under Colleagues, tick who does the appointments and choose the Start of the first appointment. Every service then gets its own time, straight after the one before.
Create the appointments
Click Create appointments at the top right. Schedulinq first checks whether the row clashes with what is already in the calendar, then asks whether the customer gets a confirmation — see Saving.
The page
Customer and place
Customer
RequiredWho all the appointments are for. Change picks another customer.
A row belongs to one customer: the appointments become a single booking, with a single confirmation to that customer.
Where
RequiredThe first service decides where: pick it at one of your locations and that location shows here; at the customer's, this shows the address, taken from the customer record and editable. While no service is chosen yet, it says The first service decides where: at a location or at the customer's.
Every appointment happens at this one place. An address you change here applies to these appointments; the customer record does not change with it.
Services
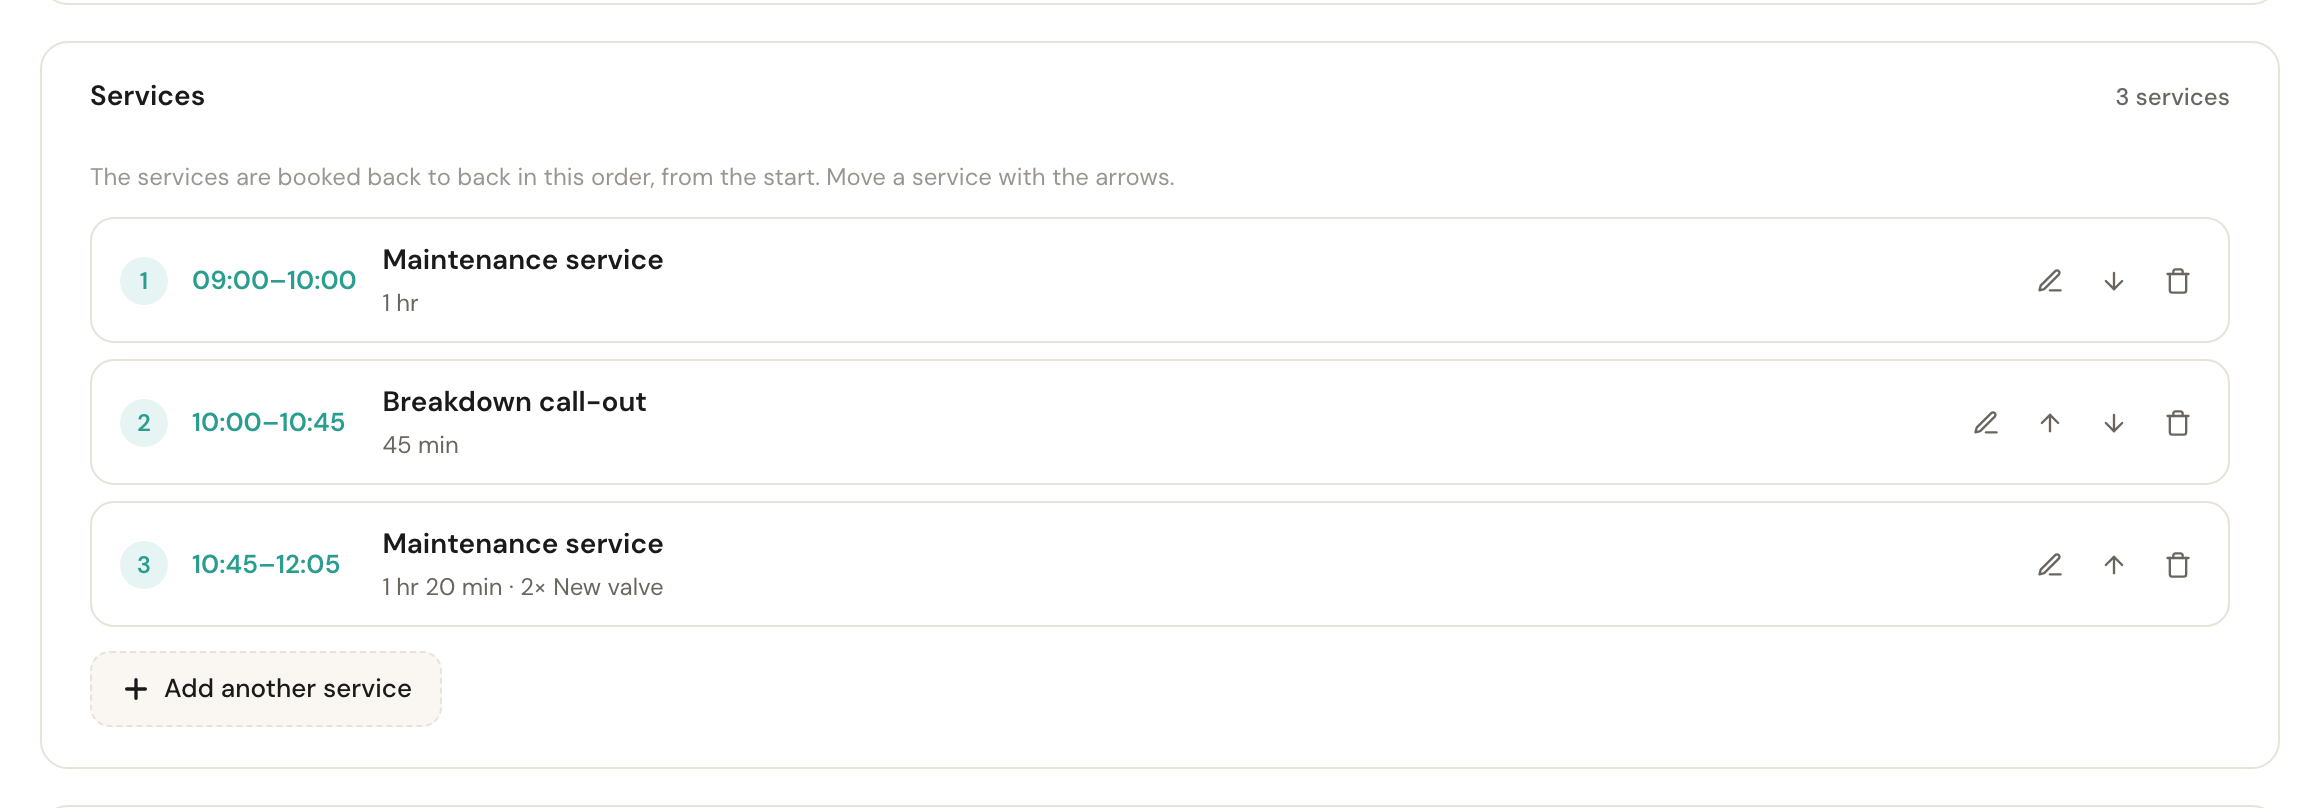
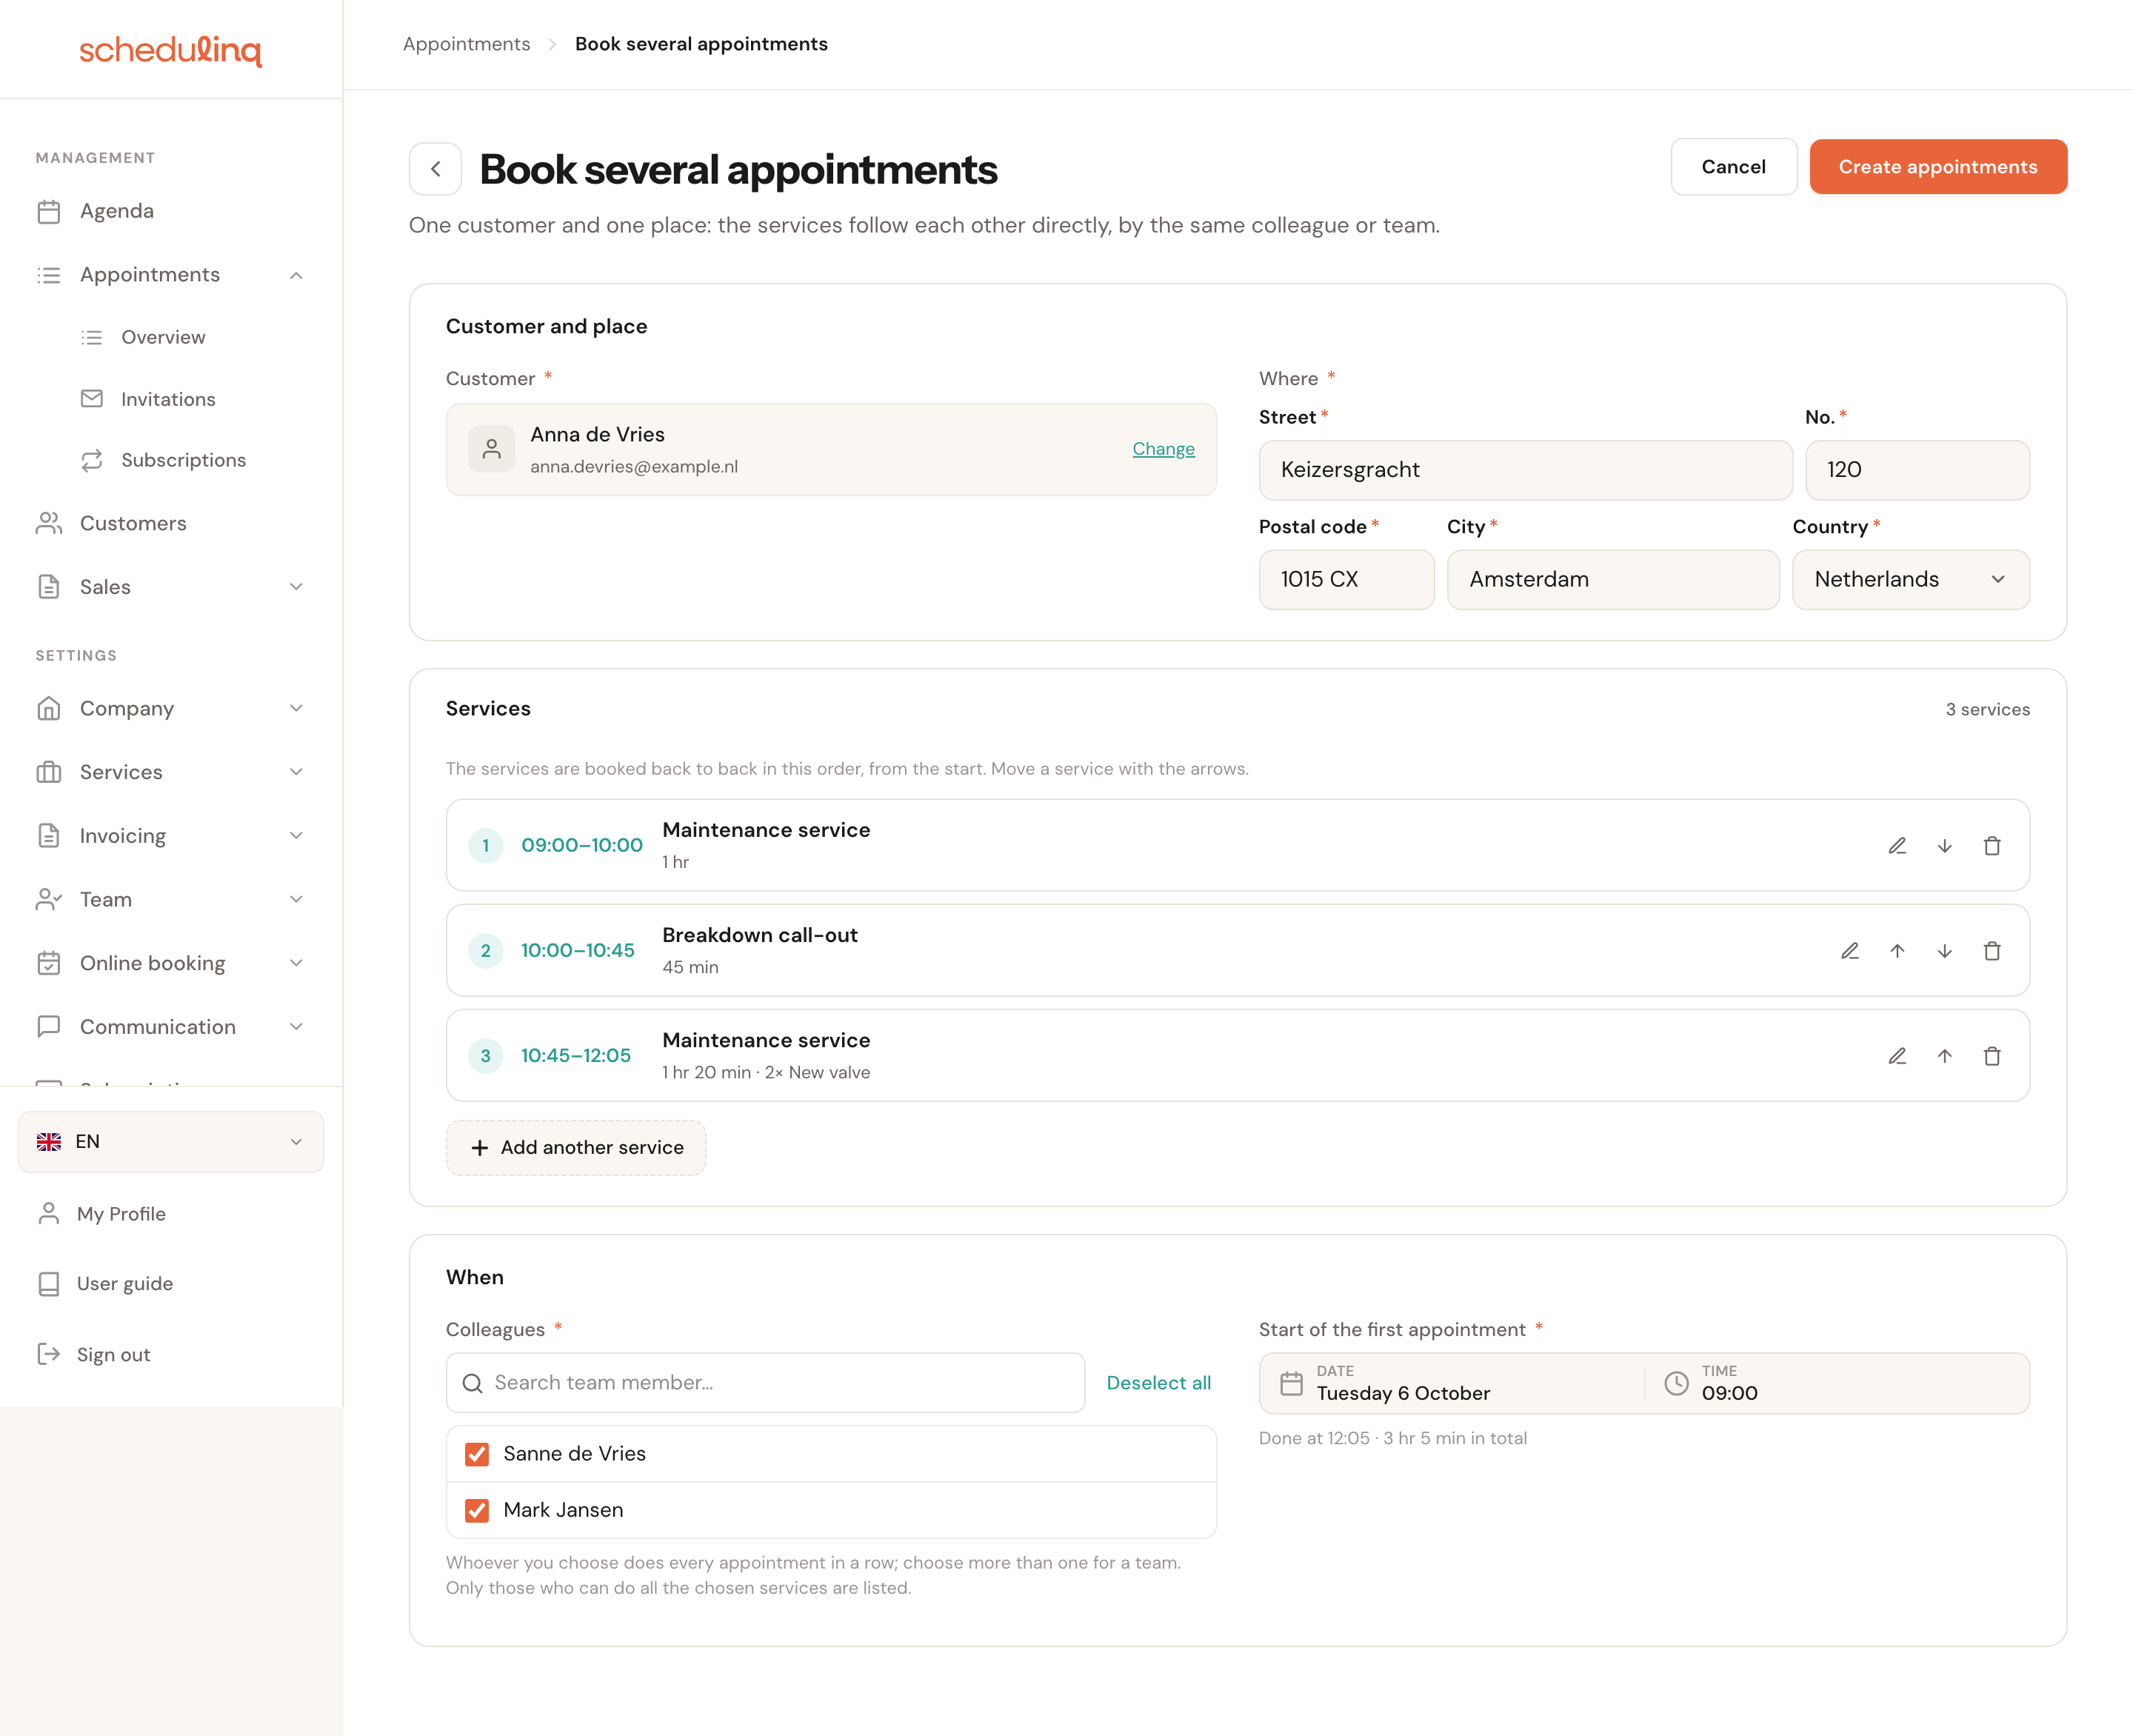
Each service is one line: its number, its time (once a start is chosen), its name and — if the customer has objects — the object, with its duration and add-ons underneath. On the right of the line:
- The pencil opens the service for editing, and folds it again. Only one service is open at a time; clicking the line itself does the same.
- The arrows move a service up or down one place. The order is the order they happen in, so the times move with them.
- The bin removes the service. You cannot remove the last one.
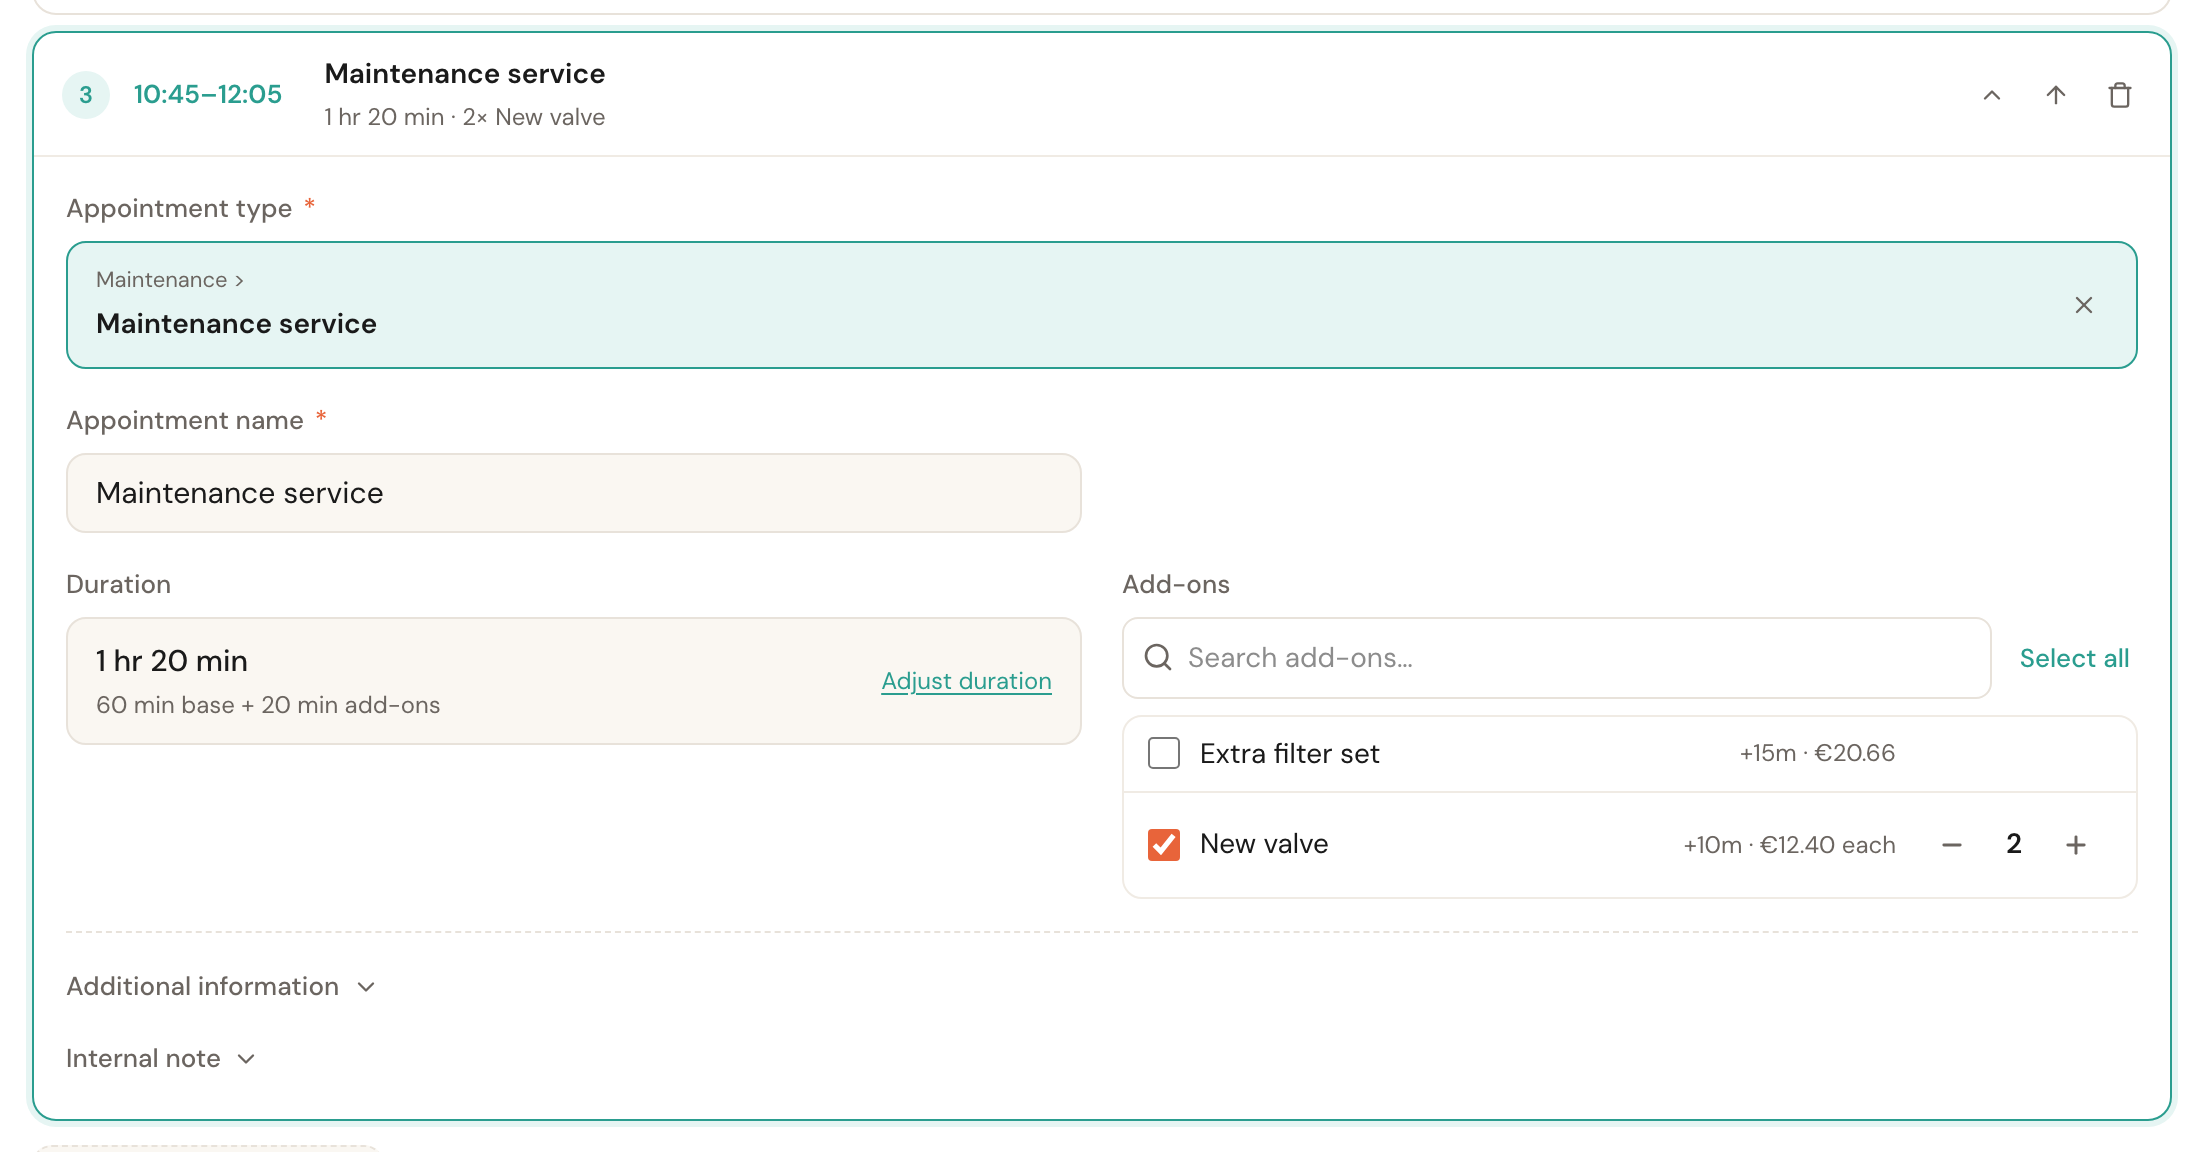
Opened, a service has the same fields as the appointment form: Appointment type, Appointment name, the object if the customer has one — per service, so that with five cars every appointment has its own car —, Duration (with Adjust duration for this one appointment) and Add-ons. At the bottom are Additional information — your own fields for appointments — and Internal note, folded until you need them.
Additional information and Internal note
FoldedClick the heading to open it.
They stay closed so ten services do not become ten empty forms. A required field, a filled-in answer or a note is never tucked away: the block is then open by itself.
Number of services
At most 10At ten services, the Add another service button gives way to You can combine at most 10 appointments in one booking.
When
Colleagues
RequiredOnly people who can carry out every chosen service and its add-ons are in this list. Tick one colleague, or more for a team: every appointment in the row then lands in all their calendars.
The row is one visit by one crew, from start to finish. Add a service a ticked colleague cannot do, and Schedulinq unticks them and names them in a message. If you may only plan your own calendar, you are the one colleague; if you cannot do every service yourself, the page says so.
Start of the first appointment
RequiredThe date and time the first service begins. The rest follows straight on, and under the field it says when the last one is done: Done at 12:05 · 3 hr 5 min in total.
There is no break or driving between the services: they happen at the same place, one after the other. If you need room in between, adjust a service's duration.
Saving: overlaps and the confirmation
When you click Create appointments, Schedulinq checks whether the row clashes with what is already there: an appointment of one of the chosen colleagues, something in their connected calendar, or another appointment of this customer. If it does, you see every clash in one window.
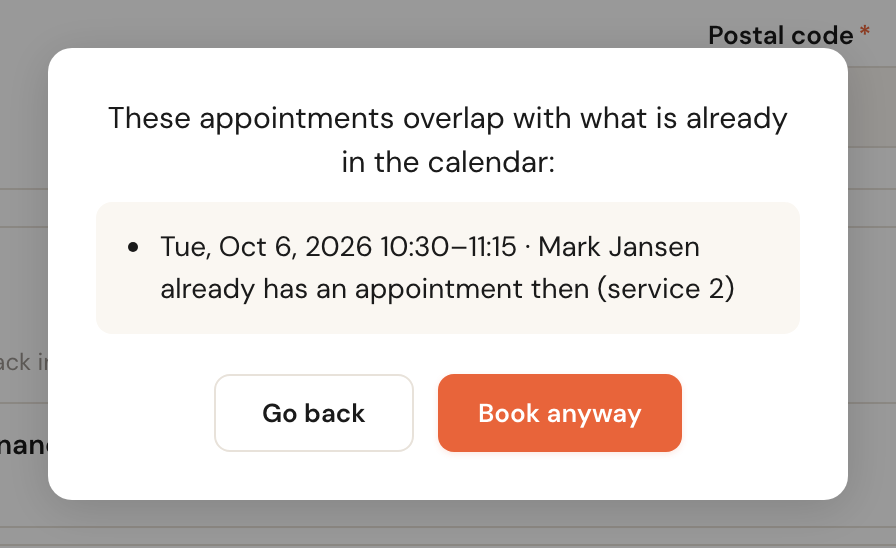
Go back lets you change the row; Book anyway puts it in regardless. That choice is yours — Schedulinq does not stop you.
Schedulinq then asks whether the customer gets a confirmation: one email with every appointment in it, and a calendar file for each.
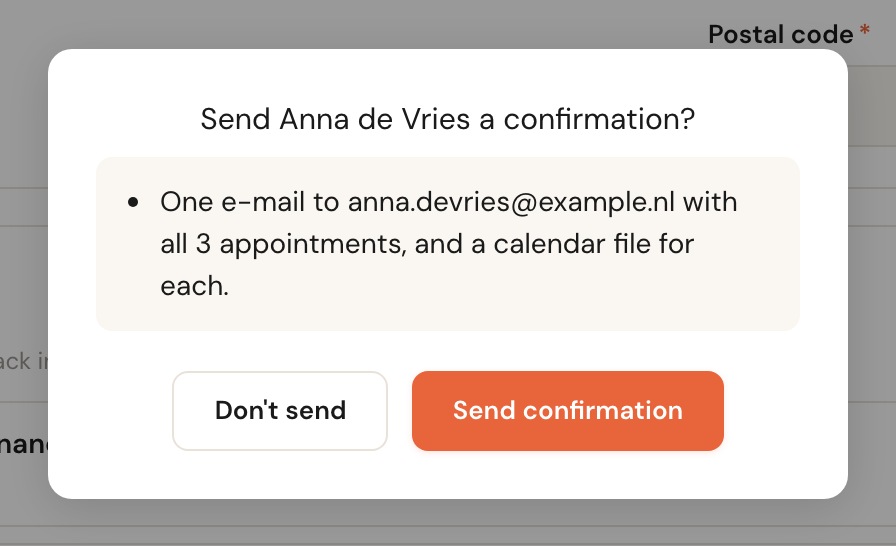
- Send confirmation — the customer gets that one email.
- Don't send — the appointments are in the calendar, the customer hears nothing.
Your team and your organisation get their messages either way, one per appointment. If the customer has no email address, Schedulinq skips the question. The first appointment of the row then opens.
After booking
The appointments are one booking together. In the calendar every block carries a small icon with its place in the row, such as 2/3 — see Using the calendar. After that you open, change or cancel each appointment on its own, like any other.
Cancel one, and the ones after it can move up so there is no gap. That depends on Compact booking group on cancel under Booking rules.
Frequently asked questions
Can I put services at different addresses in one row? No. Every appointment is at the same place. For another address, create a separate appointment or row.
Why is my colleague not in the Colleagues list? They cannot carry out every chosen service or add-on. Check who may do the appointment type and the add-on, or remove the service that rules them out.
I clicked Create appointments and the connection dropped. Just click again. If the appointments were already made the first time, they are not booked twice — the page says so too.
Can I open the page myself, without starting an appointment first? No, there is no menu item. Start from the appointment form or the planner.