
Schedule an appointment
Put an appointment in the calendar yourself — customer, service, time, staff, location and price.
Not every appointment arrives through your booking page. A customer calls, you agree something on site, or you book a follow-up there and then. For those you put the appointment in the calendar yourself — with the same details as an online booking, but without the rules that apply to customers.
In short
- Click an empty slot in the Calendar, or use New in the appointments overview.
- Choose the customer and the appointment type.
- Set the date and time, and check the duration.
- Tick who the appointment belongs to.
- Click Create, then choose whether the customer gets a confirmation.
Choosing the appointment type
Picking the service takes three steps: first where it takes place, then the category, then the service itself. That is because the same service can be offered in more than one place — at the customer or at one of your locations — and that choice decides which address ends up on the appointment.
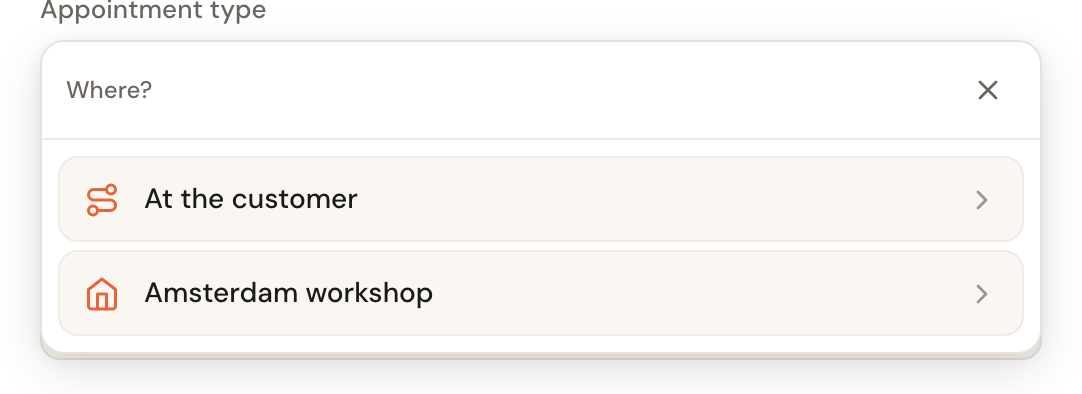
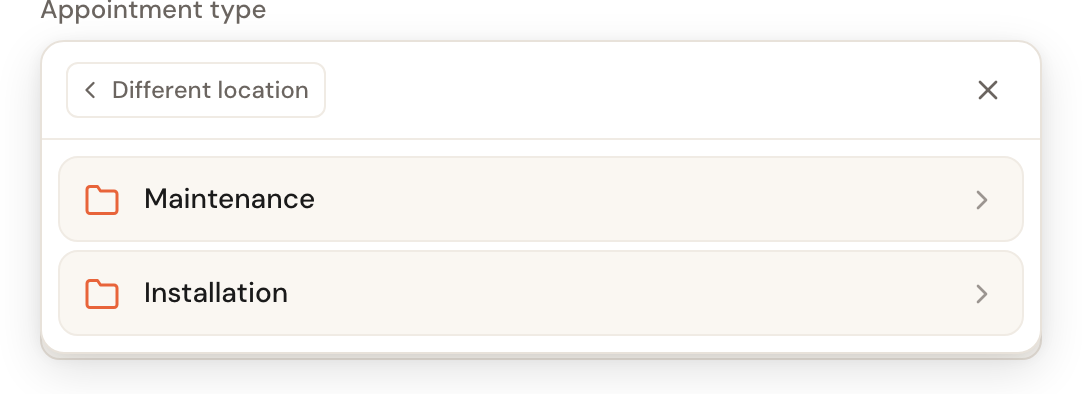
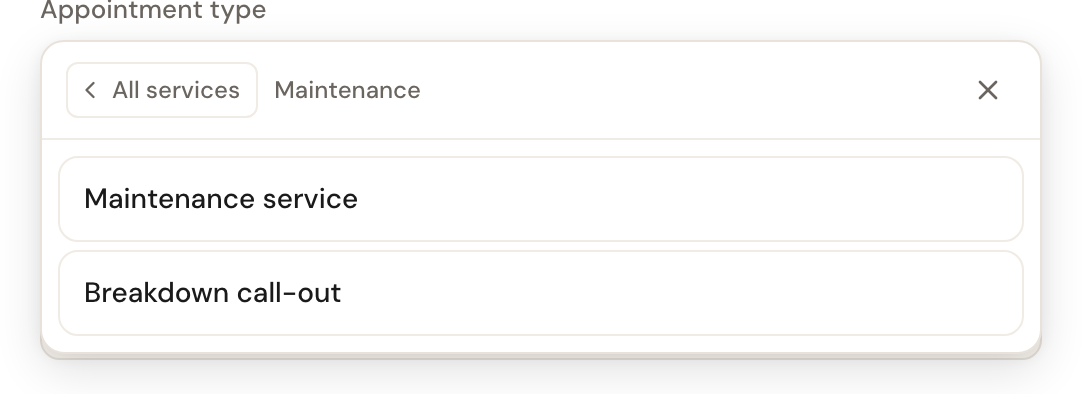
1First choose where the appointment takes place.
Step by step
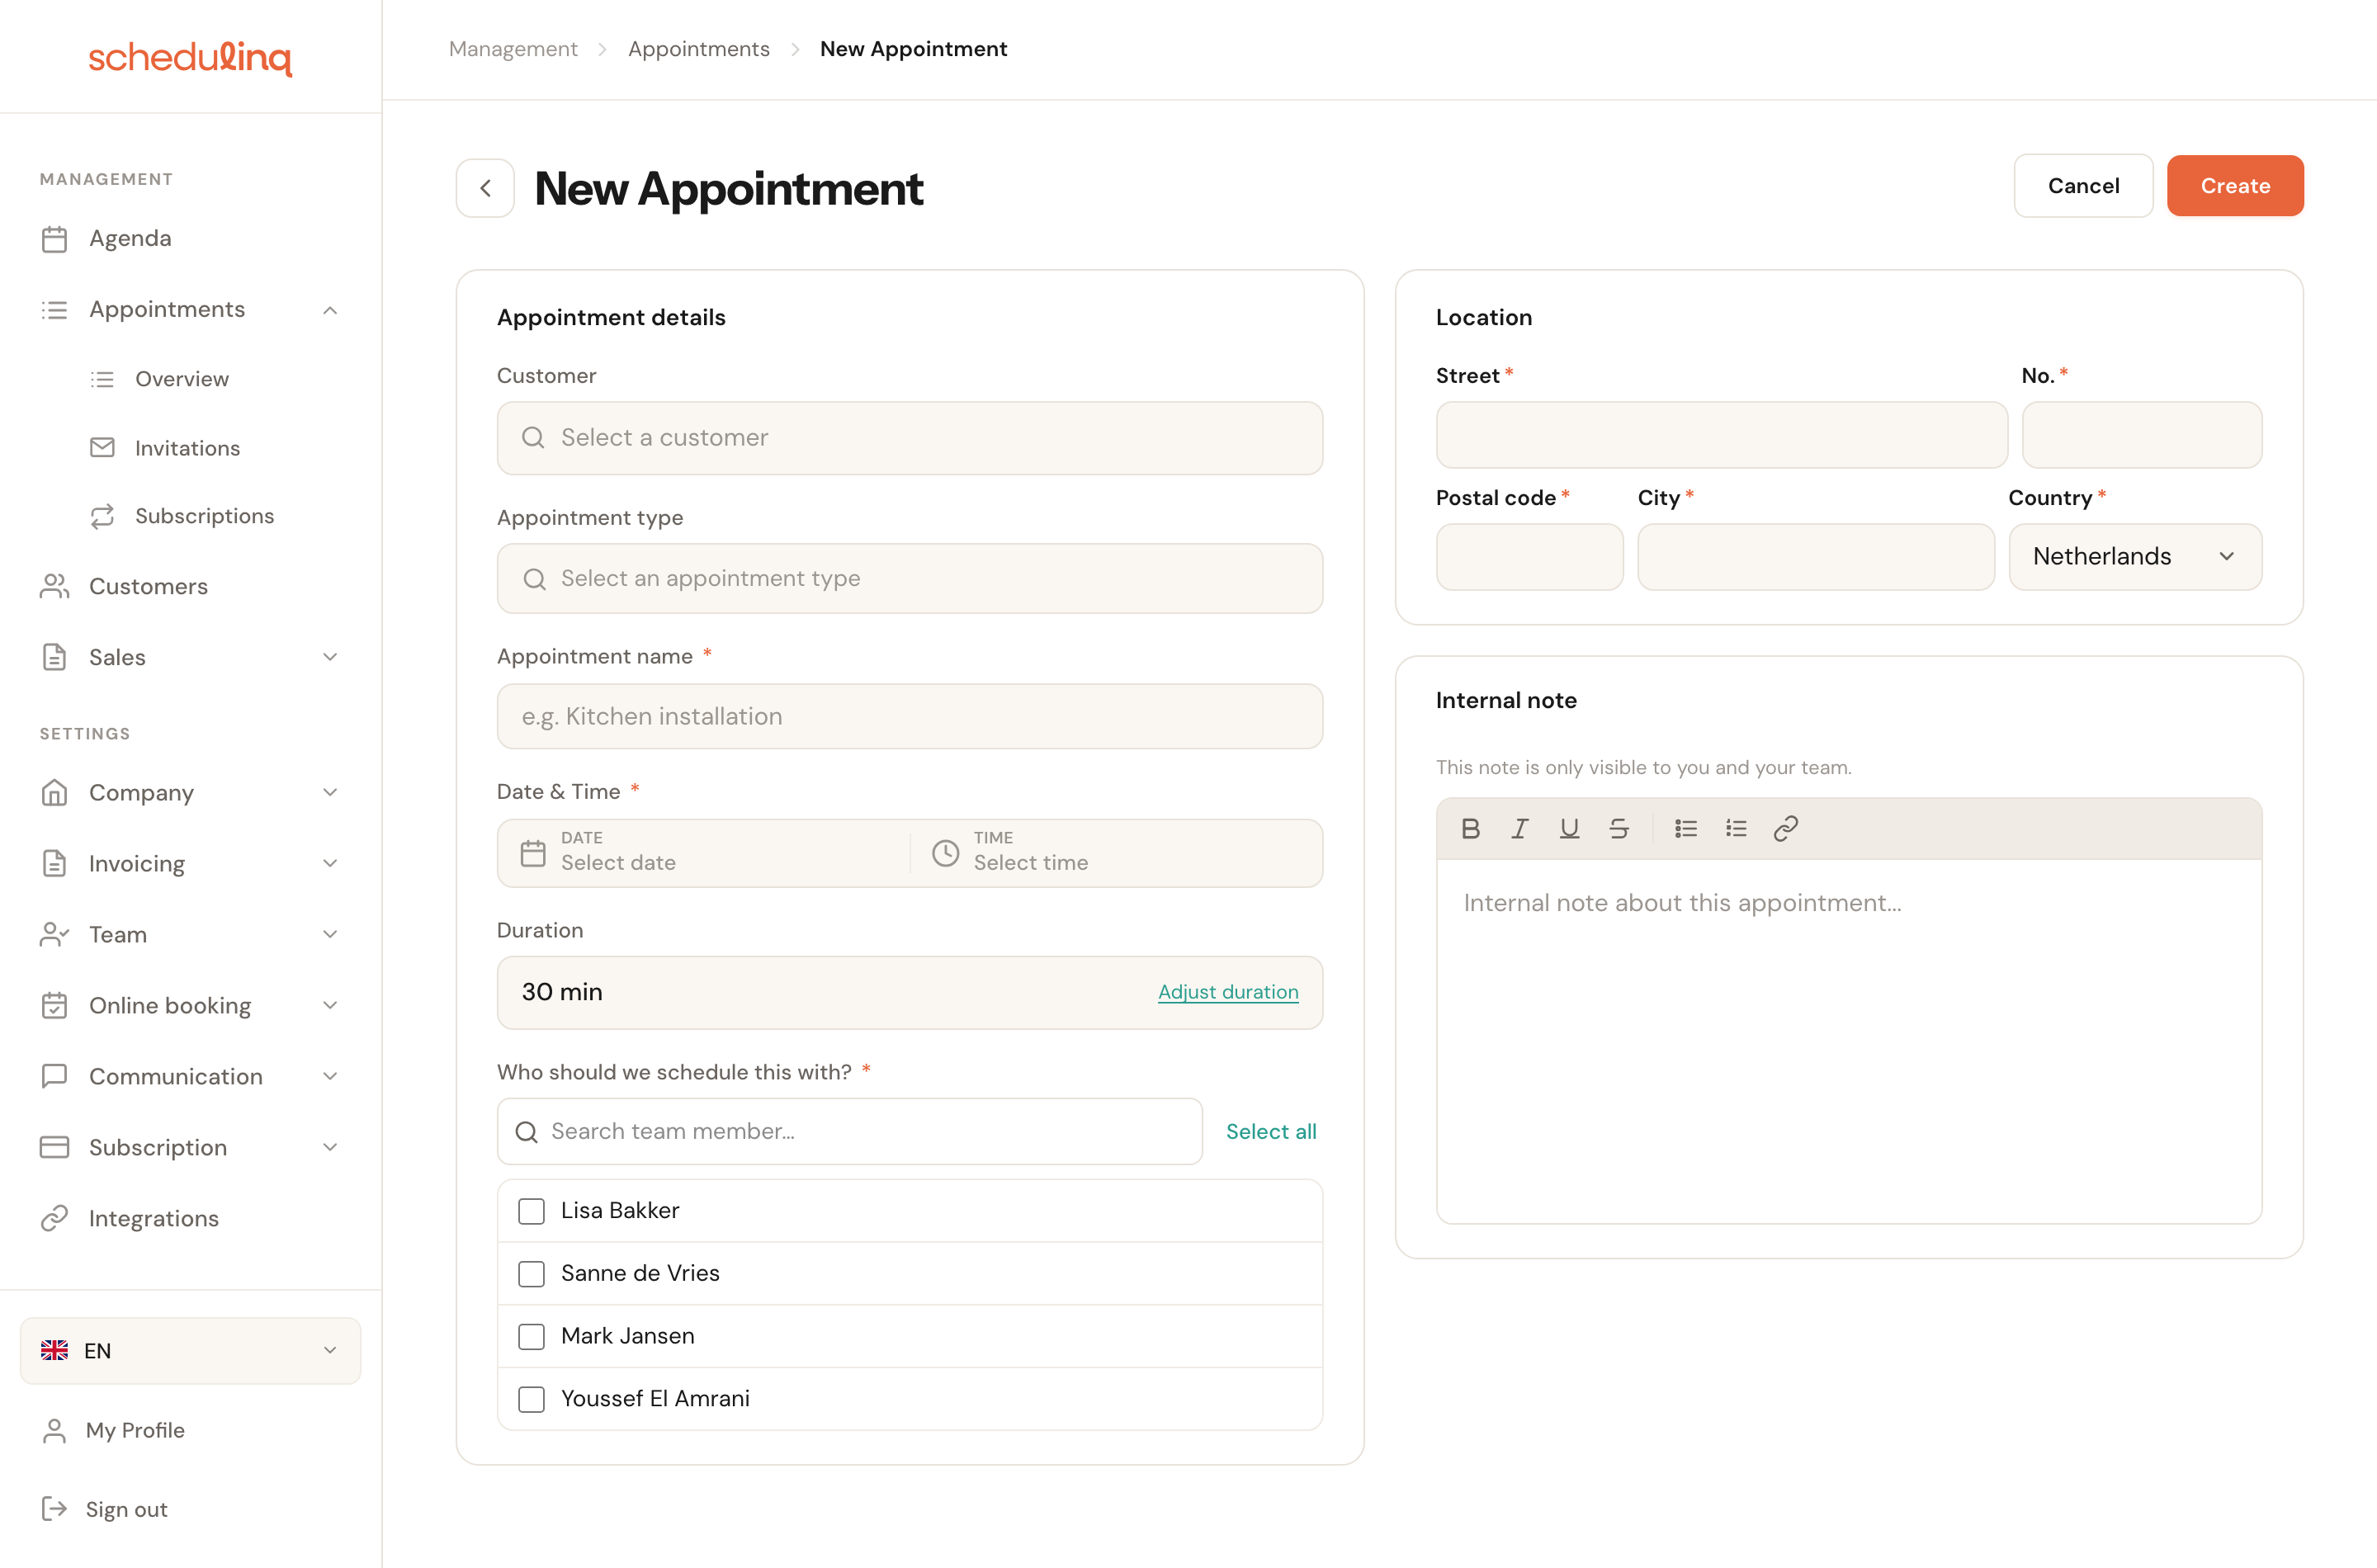
Open a new appointment
Click an empty slot in the calendar — the date, time and staff member are then already filled in. Or go to Appointments → Overview and click New to start from an empty form.
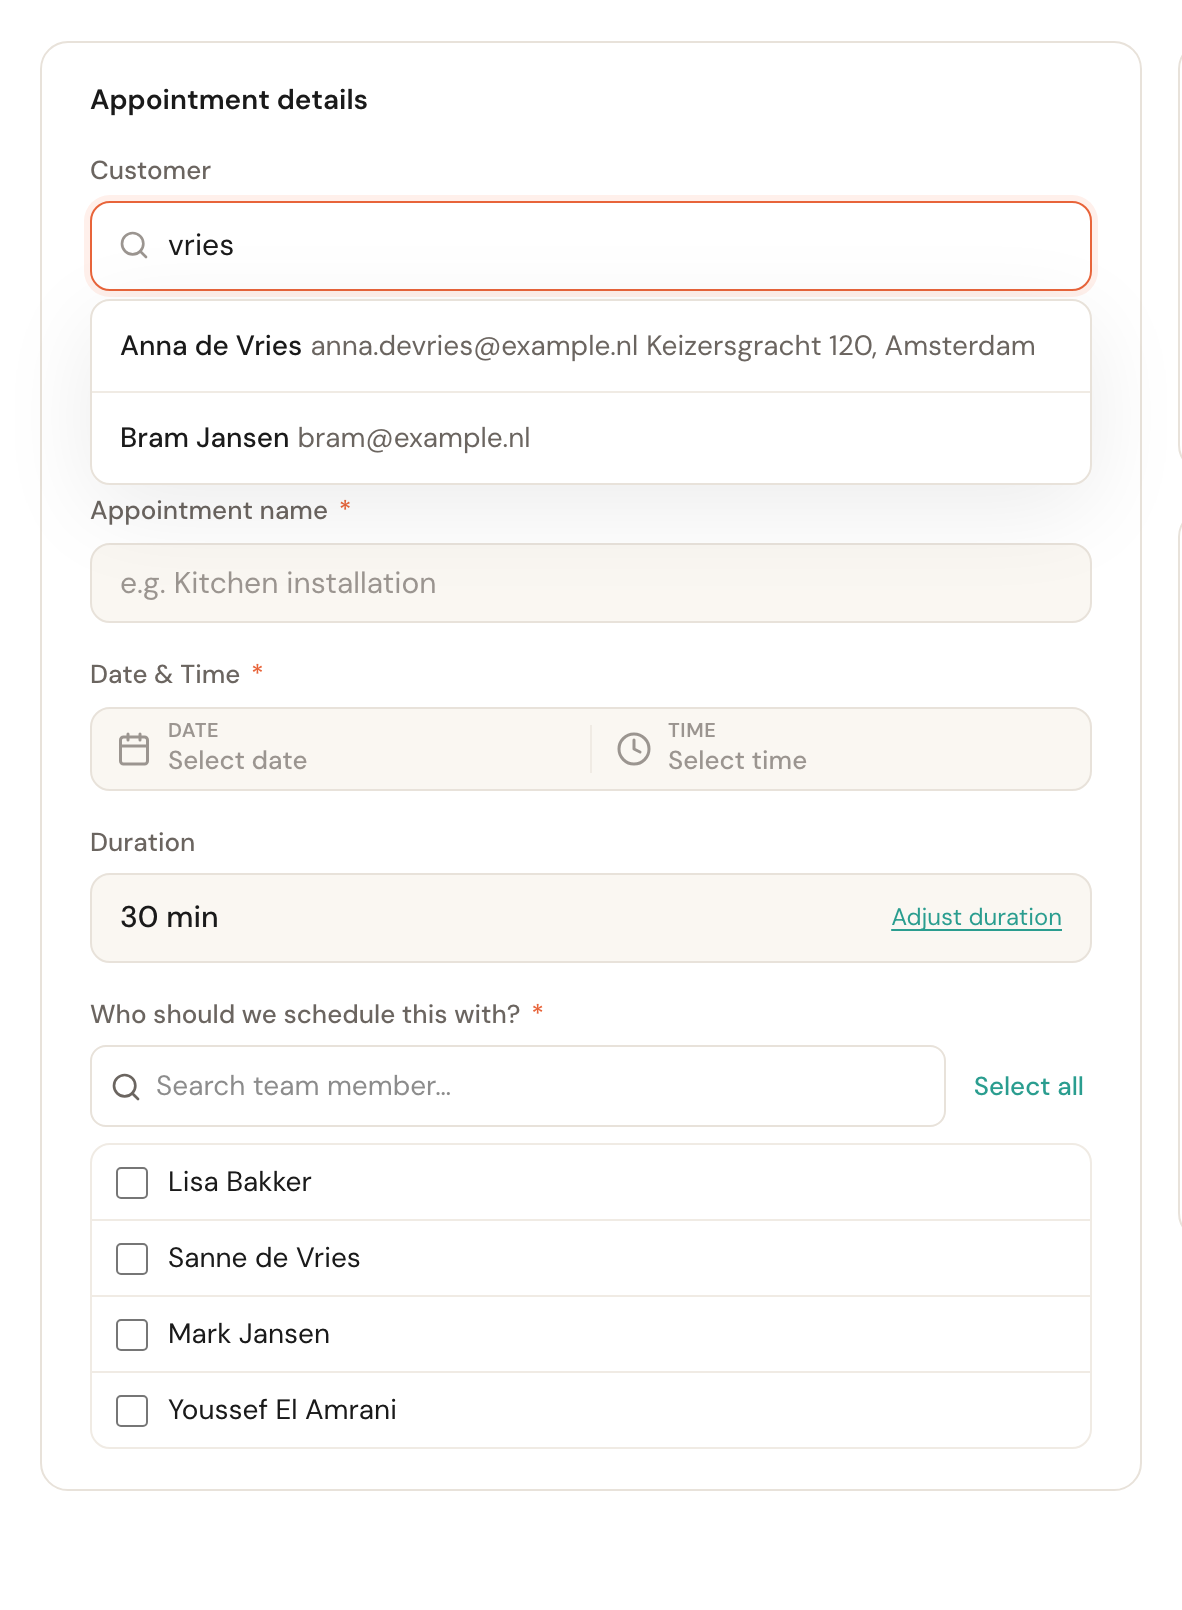
Choose the customer
Type a name or email address and pick someone from the list. Their address is then carried over automatically into the Location card.
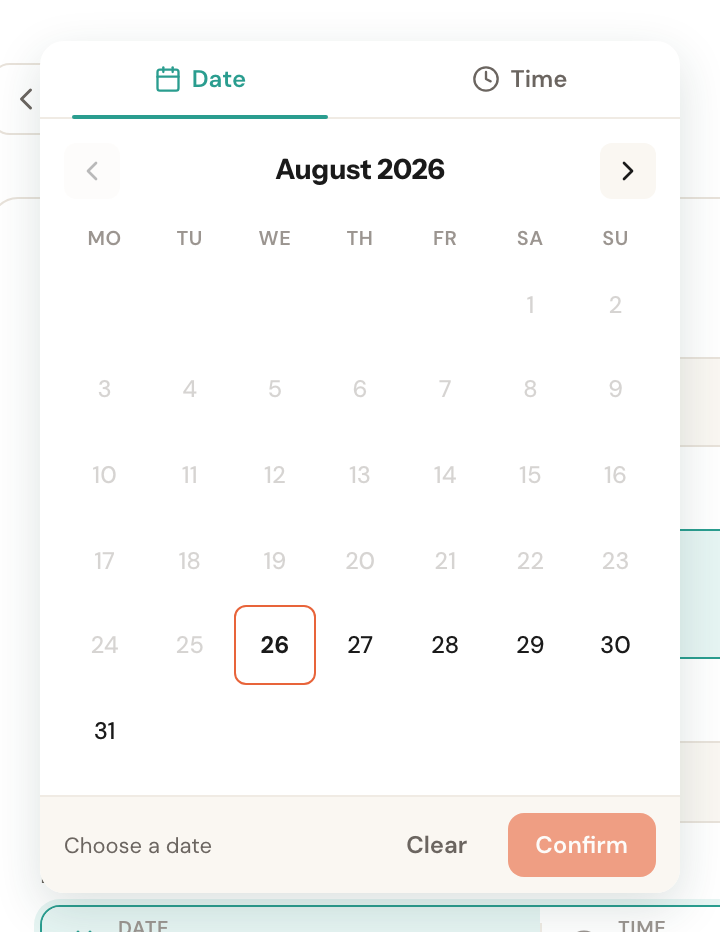
Set the date, time and duration
Pick a date in the calendar and then a time. The duration comes from the appointment type and adds any selected add-ons automatically.
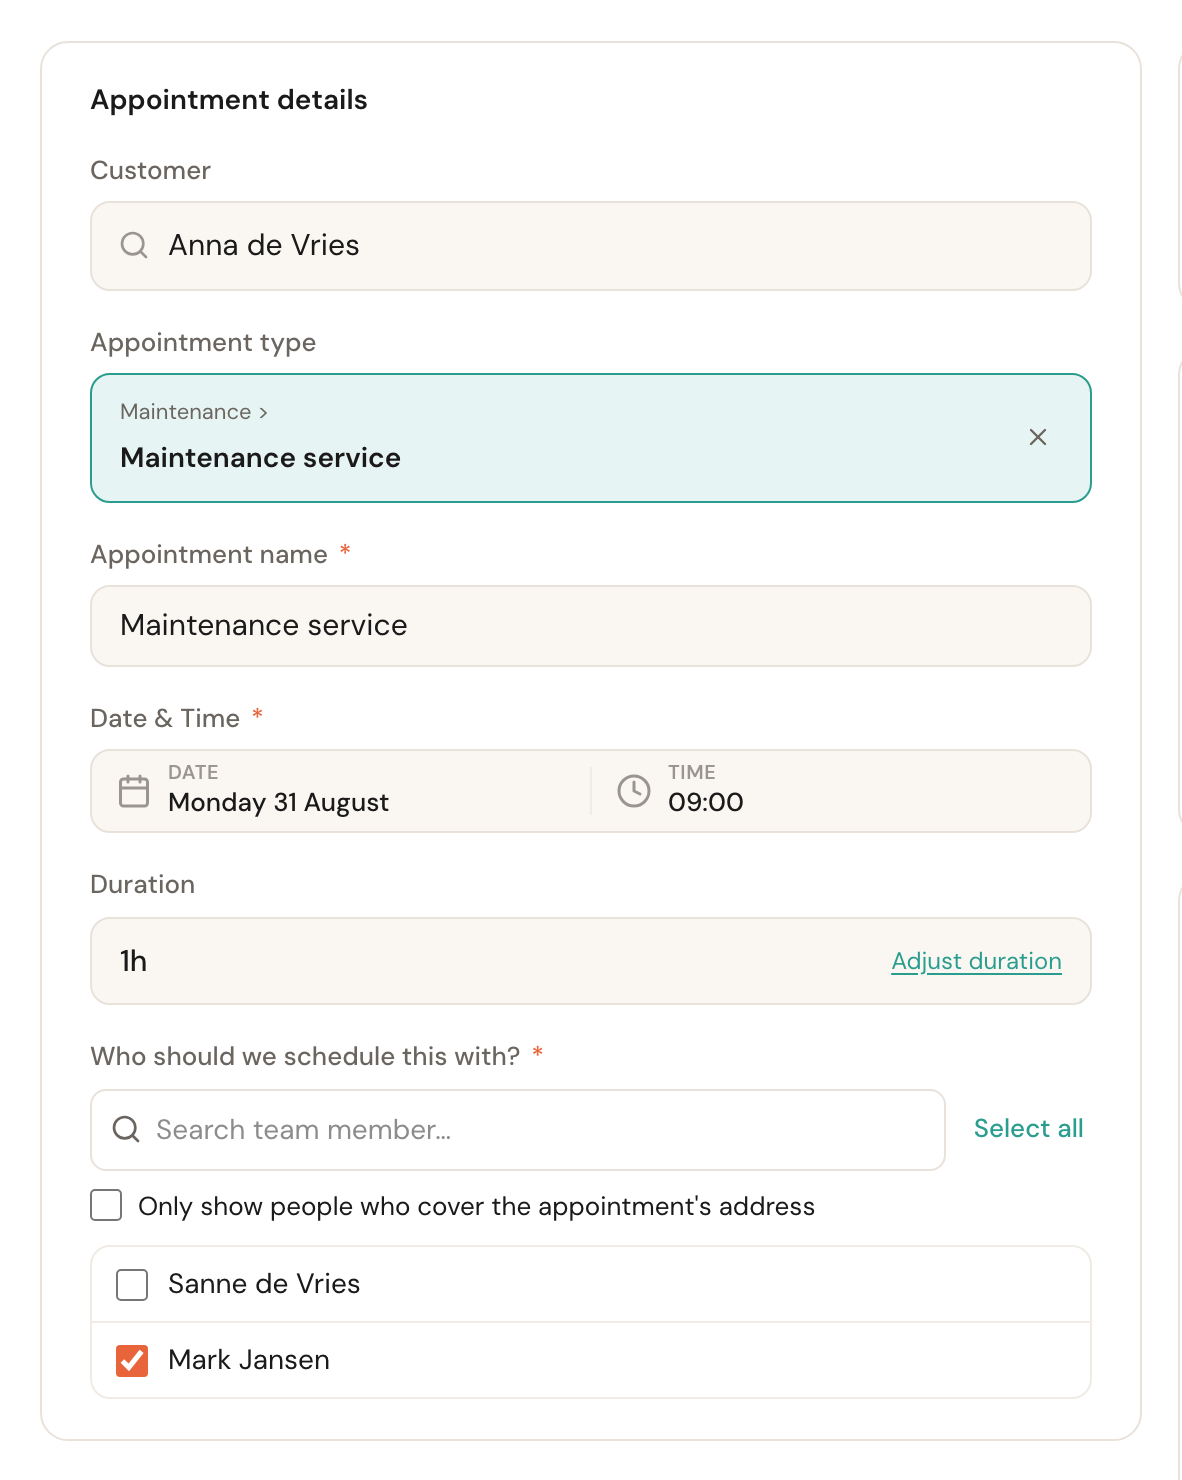
Choose who it belongs to
Tick one or more staff members. For an appointment at the customer's address you can narrow the list to people who cover that area.
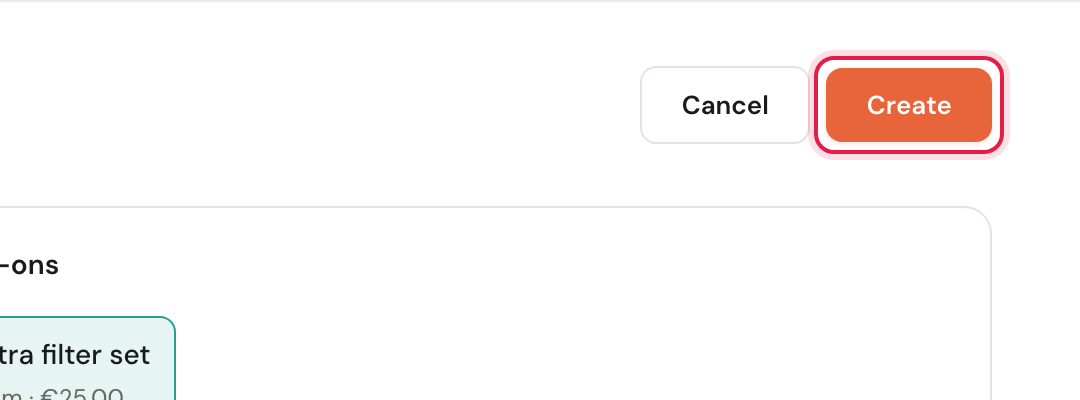
Save the appointment
Click Create at the top right. If the appointment has a customer, Schedulinq then asks whether they should receive a confirmation.
Field by field
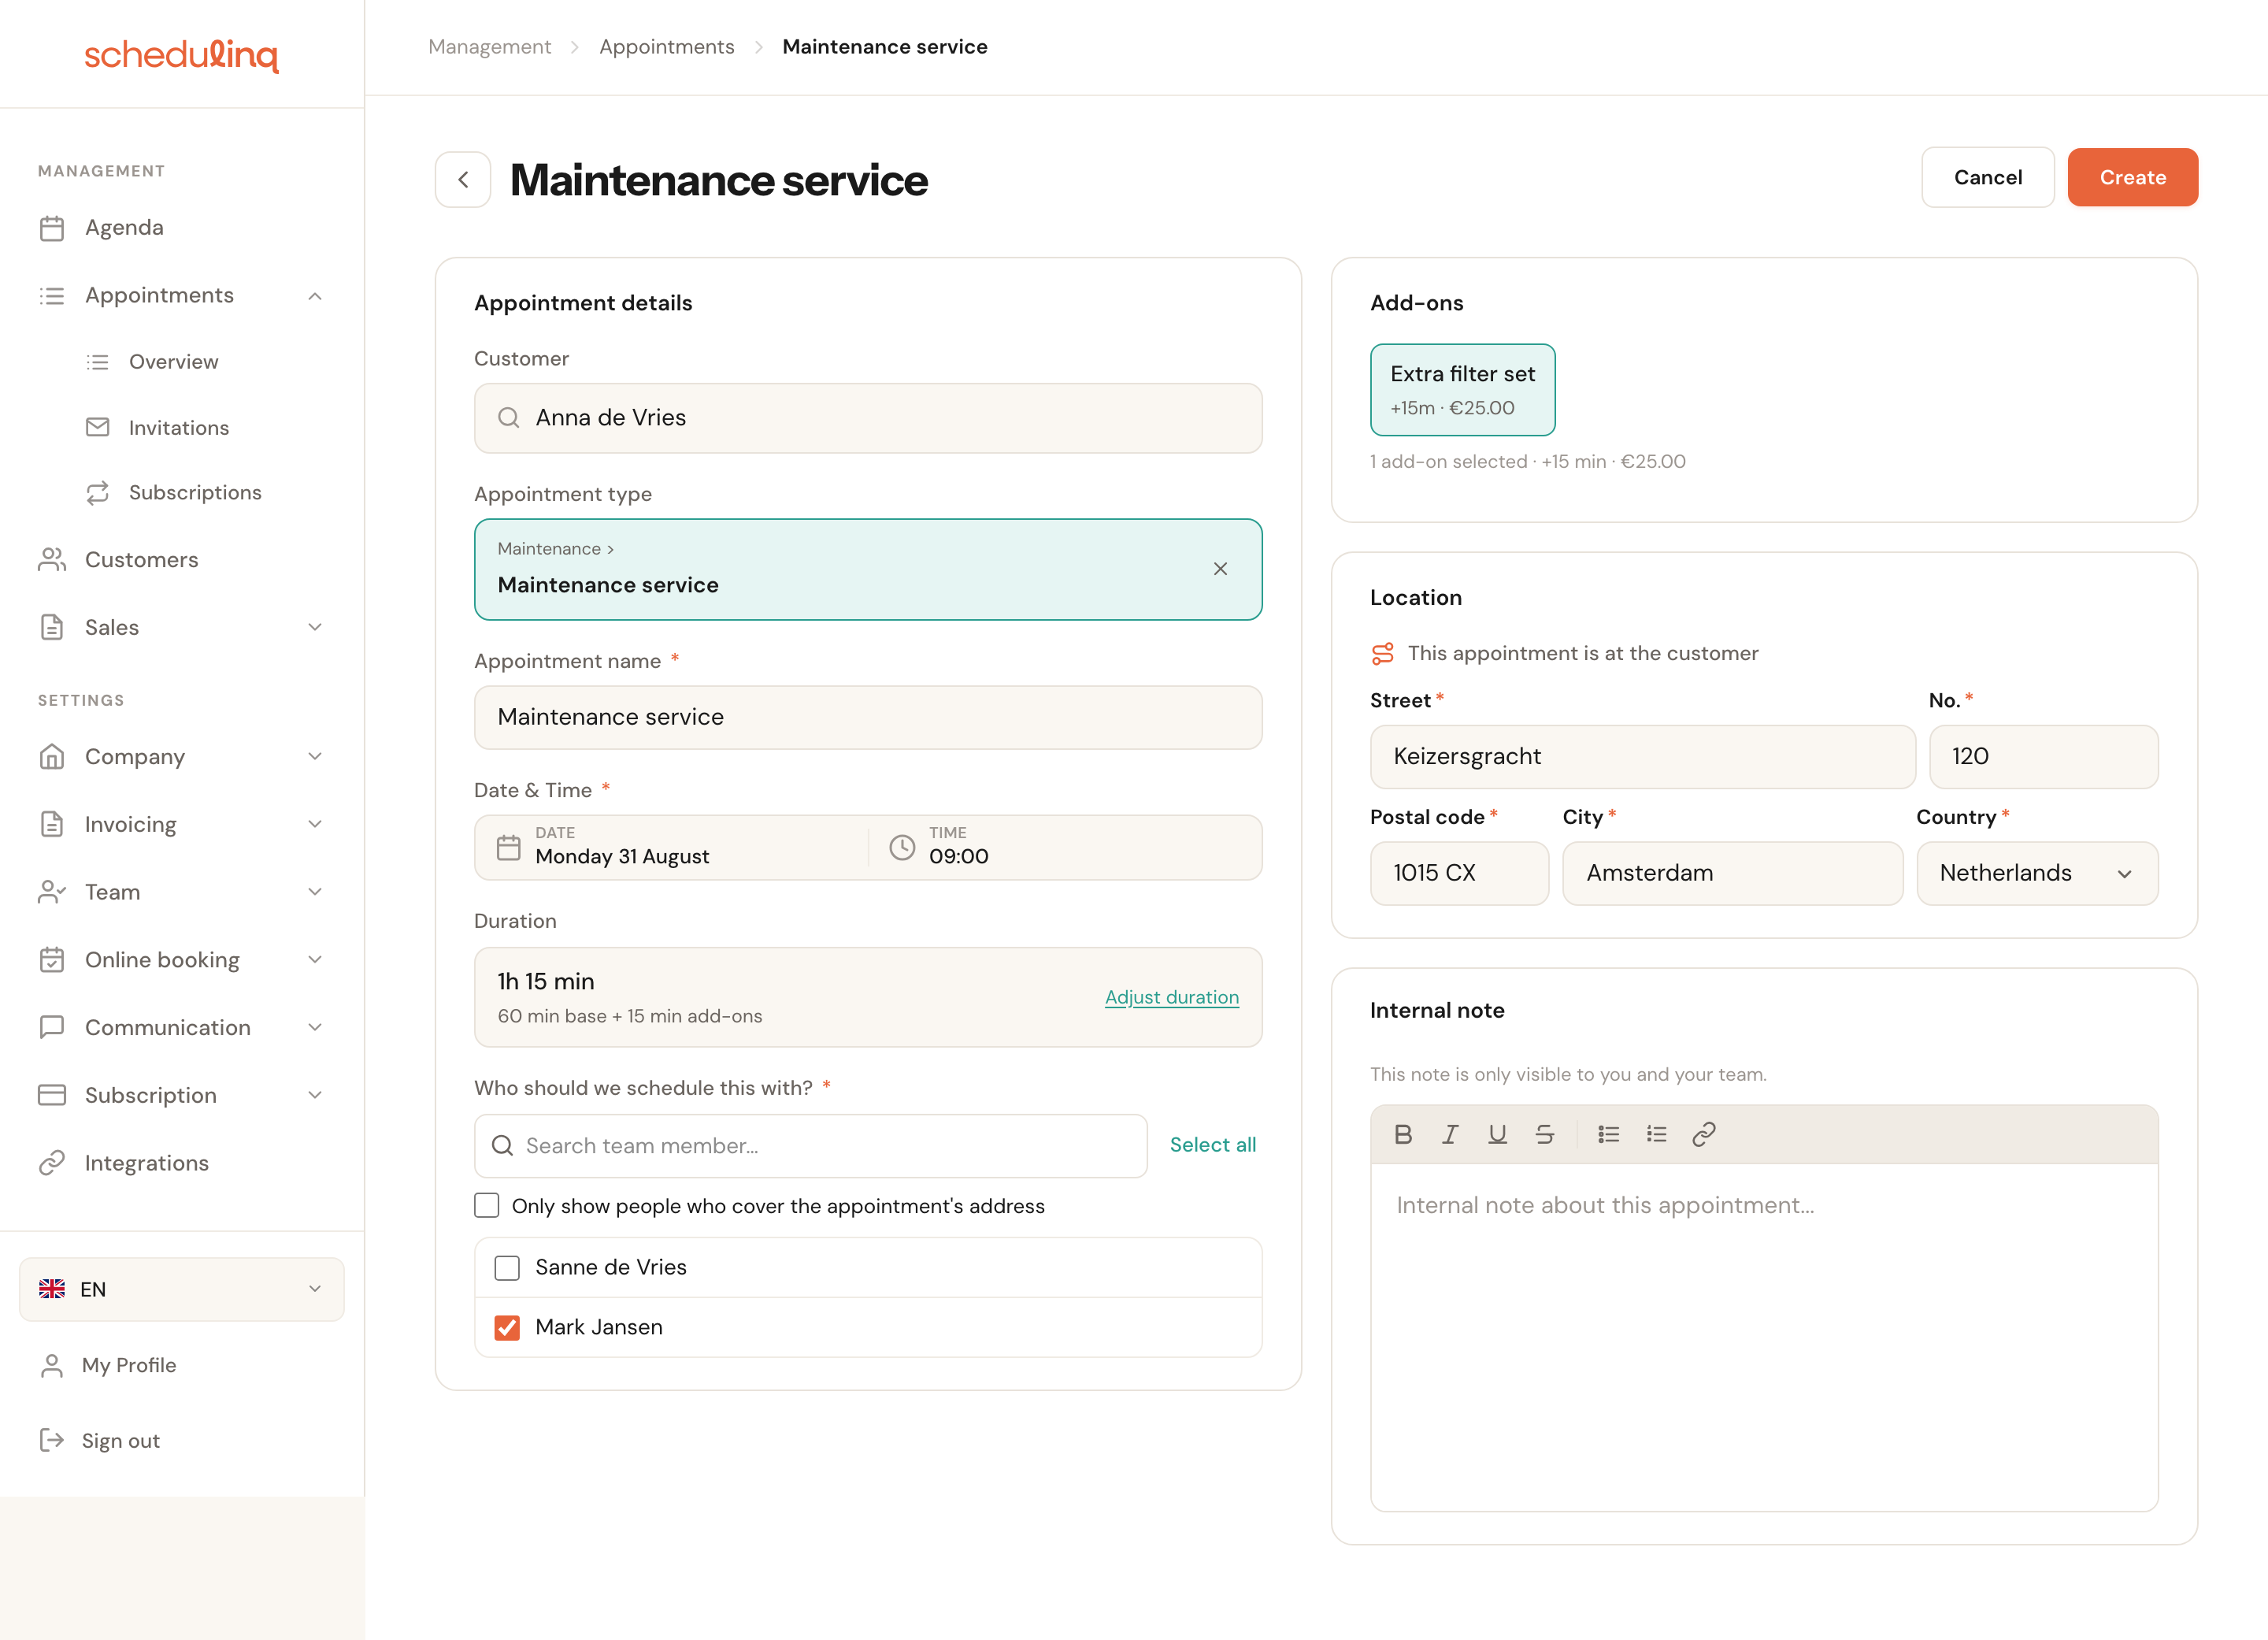
Customer
OptionalSearch by name or email address. Leave it empty and the appointment becomes a block in the calendar with no recipient.
The chosen customer decides who receives the confirmation, which language it is written in, and which address is suggested. An appointment without a customer is therefore not a half-filled appointment but a different kind of item.
Appointment type
Sets duration and priceThe service you are delivering, chosen through the three steps above.
The type supplies the default duration, the price, the available add-ons and the staff allowed to perform it. Choose a different type and all of those change with it.
Appointment name
RequiredFilled in automatically with the name of the appointment type. You can change it.
This is the text shown on the block in the calendar. With ten "Maintenance service" blocks in one day it helps to make it distinctive — the street name, say, or the type of boiler.
Date & time
RequiredA date first, then an hour and a minute. Times run in five-minute steps.
Confirm your choice with the button in the picker — closing the panel with Escape discards the time.
Duration
AutomaticDefaults to the appointment type's duration plus any selected add-ons, with the breakdown underneath ("60 min base + 15 min add-ons"). Adjust duration replaces it with a time you set by hand.
Only adjust the duration when you know this appointment differs. If every appointment of this type needs longer, change the duration on the appointment type instead — otherwise you repeat the correction forever.

Who should this appointment be scheduled with?
RequiredOne or more staff members. The list shows who performs the chosen appointment type.
For an appointment at the customer's address a filter appears that narrows the list to people who cover that area. That filter looks at the service area, not at the calendar — see the warning below.
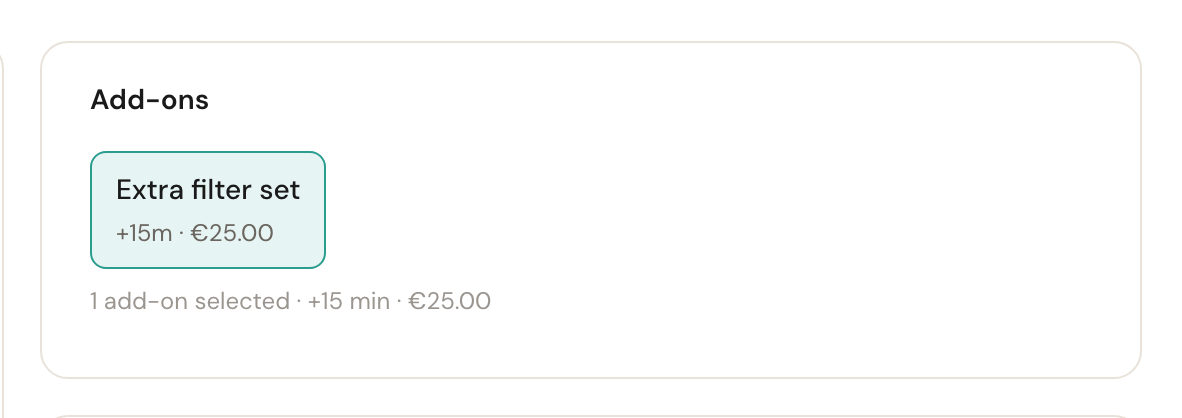
Add-ons
If the type has anyClick an add-on to include it. Its time and amount are added to the appointment and summarised under the list.
Add-ons you switch on here behave exactly as they do when a customer books them, so the duration and the price match what ends up on the invoice.
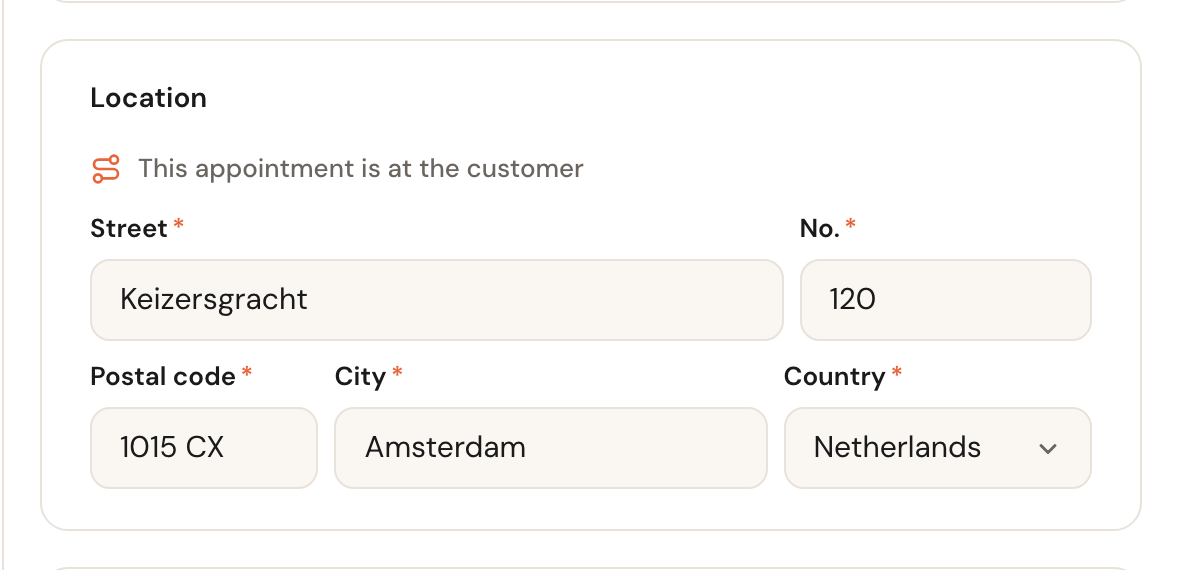
Location
For an appointment at the customer's address this holds the address, carried over from the customer record and editable. For one at your own location it says which.
This address goes into the confirmation and the calendar entry, and drives travel time. If you change it here, that applies to this one appointment only.
Internal note
Internal onlyRoom for whatever your colleague needs to know on site.
This text is not visible to the customer — the screen says as much. Anything the customer should read belongs in the confirmation, not here.
What the customer receives
If the appointment has a customer, Schedulinq asks after saving whether they should get a message. Its content comes from the communication step for a new appointment, so you write it once for your whole company rather than every time.
Say no and the appointment simply sits in the calendar with the customer none the wiser. That is exactly what you want for something you already confirmed by phone.
Frequently asked questions
Can I double-book someone? Yes. Manual scheduling does not check whether the staff member is already busy or outside working hours. Online bookings are checked against the calendar.
Why is my colleague missing from the list? The list only shows staff assigned to this appointment type. If the service-area filter is on, people outside that area drop out too.
The duration looks wrong. Check whether add-ons are selected — they are added to the base duration. If the base itself is wrong, the fault is in the appointment type.