
Create categories
Group your services into folders — for your own overview and for the list your customer picks from.
A category is a folder for organising your appointment types. It does nothing to the service itself: no duration, no price, no availability. It only decides how your catalogue is arranged — both in your own overview and in the list your customer chooses from.
With a handful of services you don't need them. From about ten onwards they save your customer searching, and save you scrolling.
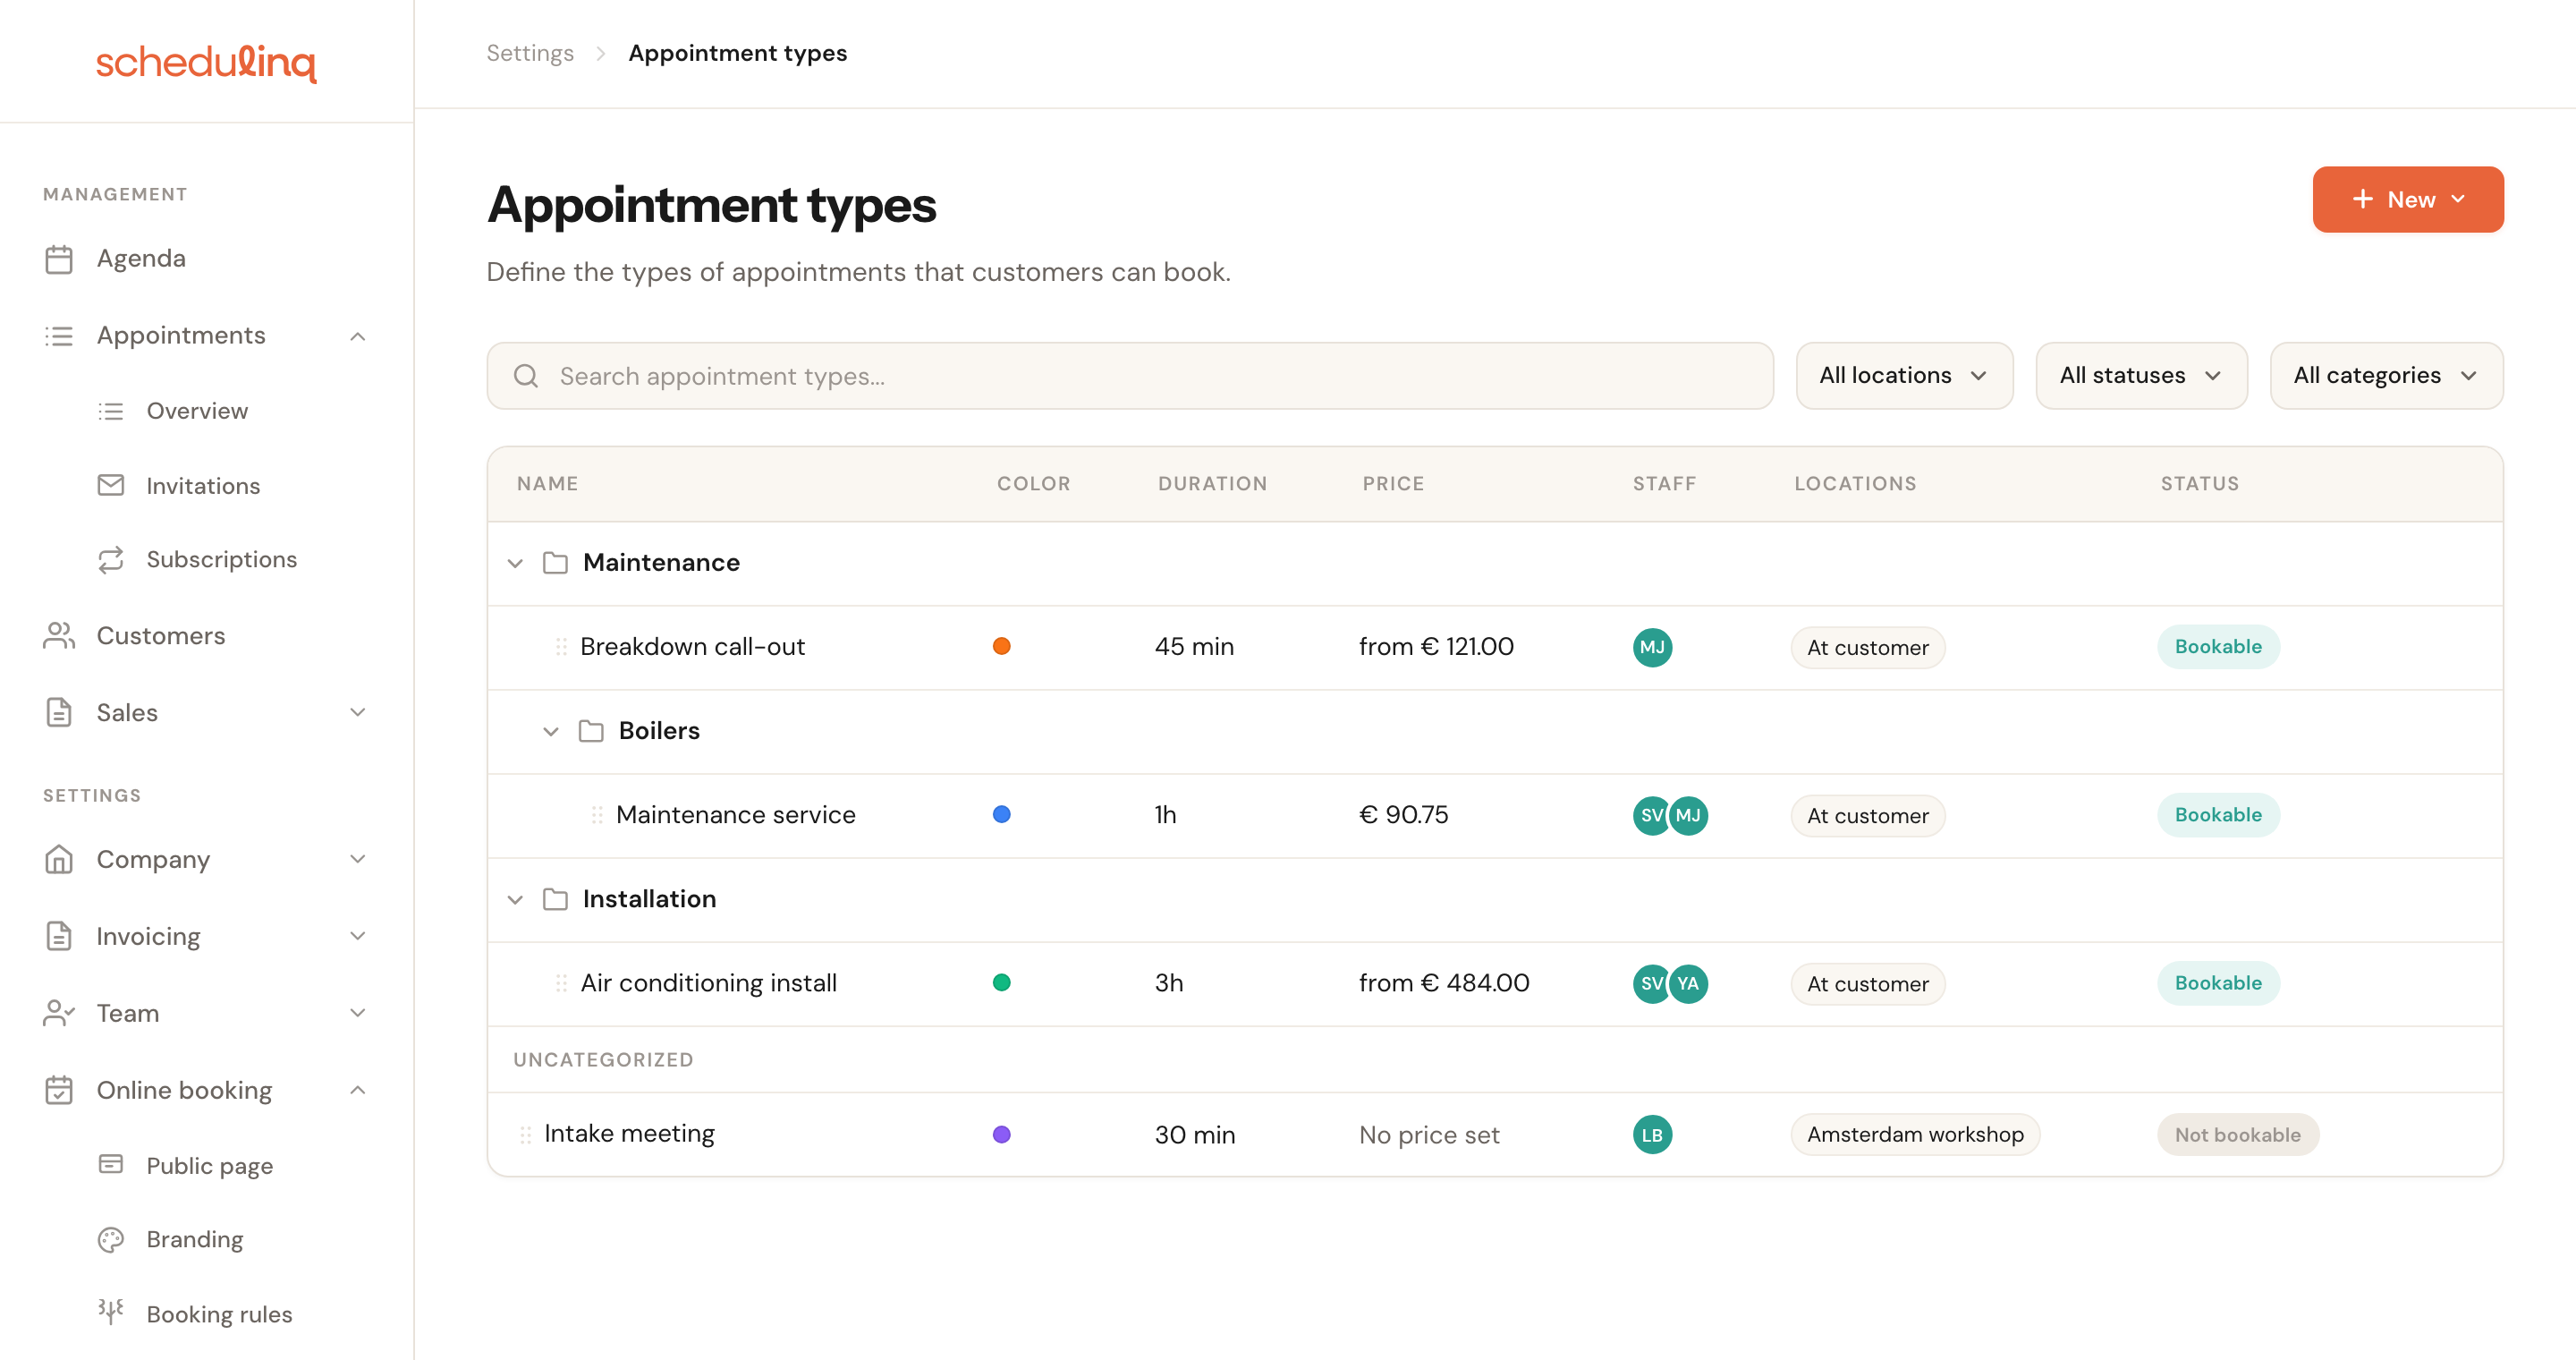
Folders are categories, the rows underneath are appointment types. Services without a category sit at the bottom under Uncategorized — they stay perfectly bookable.
In short
- Go to Settings → Appointment types.
- Click New at the top right and choose Add category.
- Give the category a name in your own language. The Id fills itself in.
- Click Create, then drag your appointment types into the new folder.
Step by step
Create a category
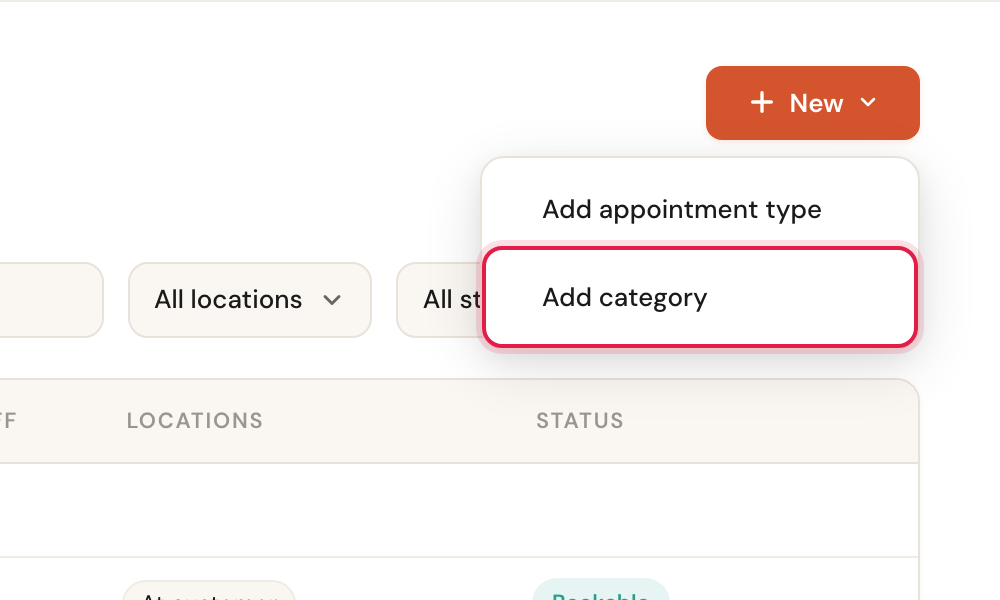
Click New at the top right and choose Add category.
Fill in the name and language
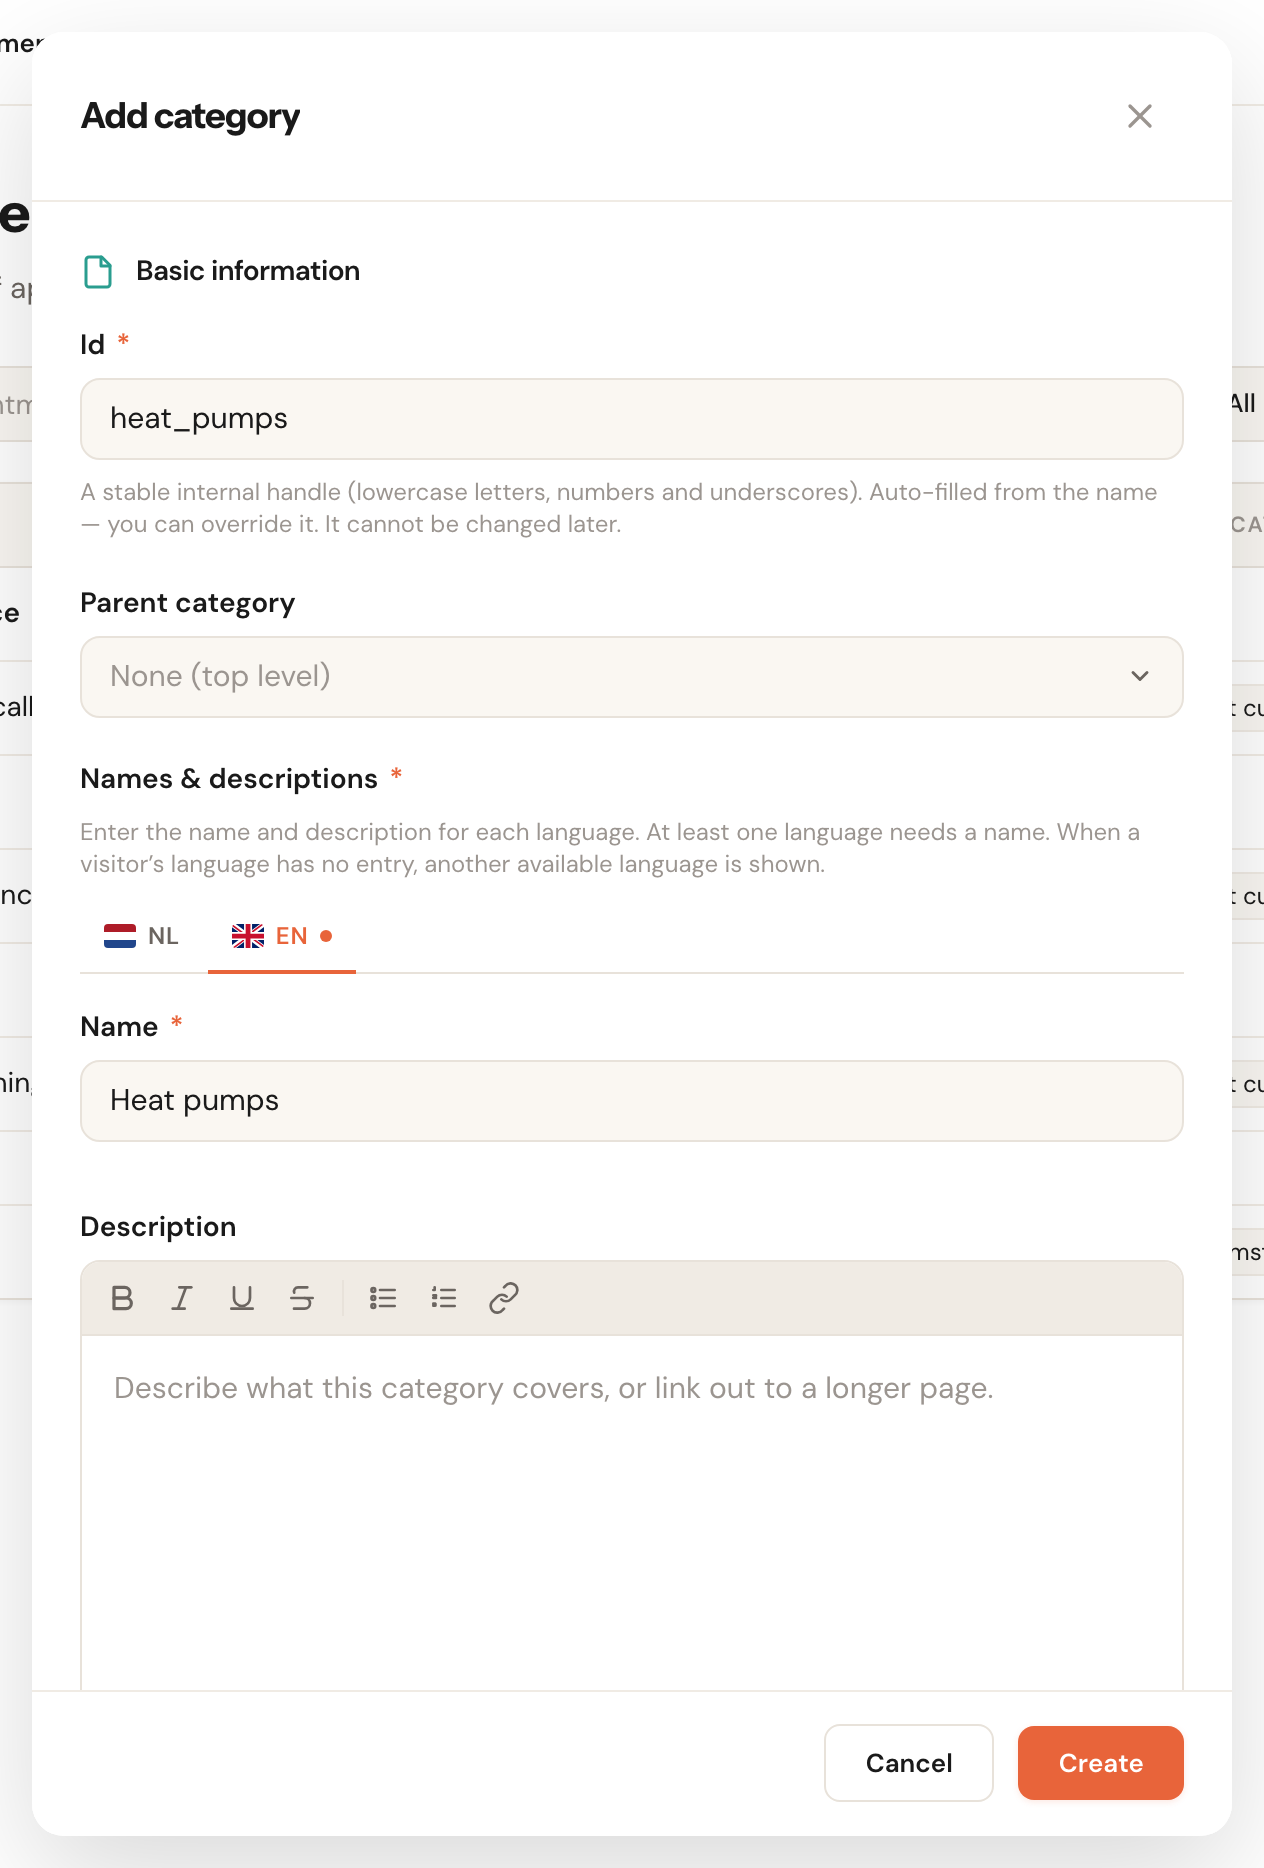
The editor asks for three things: an Id, an optional parent category, and the name per language. Only the name in your company's default language is required.
Put appointment types in it
Drag an appointment type by the handle on the left and drop it under the category header it belongs to. You can also create a service that lands in the right category straight away: hover over the category row and click the calendar icon there.
You can also pick the category from inside the service itself, in the Category block — see Create an appointment type.
The fields in the editor
Id
RequiredCannot be changed laterThe internal name of the category: lowercase letters, digits and underscores. Unlike an appointment type, this field fills itself in from the name you type — you may overwrite it as long as you haven't saved yet.
Your customers never see this field. It stays the same when you rename or translate the category later, so exports and integrations keep recognising it.
Parent category
OptionalLeave it on None (top level) for an ordinary category, or pick an existing category to nest this one underneath it.
This is also how you move an existing category later: open it, choose a different parent and save. Dragging does not work for categories — see below.
Names & descriptions
Name requiredThere is one tab per language your company supports. The name in your company's default language is required; the rest are optional. The description is optional and may contain formatting and links.
This is what the customer reads. If their language is missing, Schedulinq falls back to one you did fill in — the category never disappears from the list, but a translation reads better.
Subcategories
A category may contain categories. Useful when one group gets too coarse: Maintenance with Boilers and Heat pumps underneath it.
The quickest way: hover over the category row and click the folder-with-plus icon. An input appears under the row — type the name and confirm with the tick.

Click into the field yourself before typing — the cursor does not land there on its own.
The buttons on a category row
Hover over a category and four buttons appear on the right.

- Add appointment type — opens a new appointment type with this category already filled in.
- Add subcategory — the quick input described above.
- Edit — opens the editor: name, translations, parent category.
- Delete — see below.
Ordering
You can drag appointment types: grab the handle to the left of the name and drop the service under the category it belongs to. That both moves it and sets its place within the group.
Categories themselves cannot be dragged. Their order is fixed when you create them; after that they sort by that order and then by name. To put a category somewhere else in the tree, move it with the Parent category field in the editor.
Deleting a category
Click the bin icon. If the category holds appointment types, Schedulinq asks what should happen to them first.
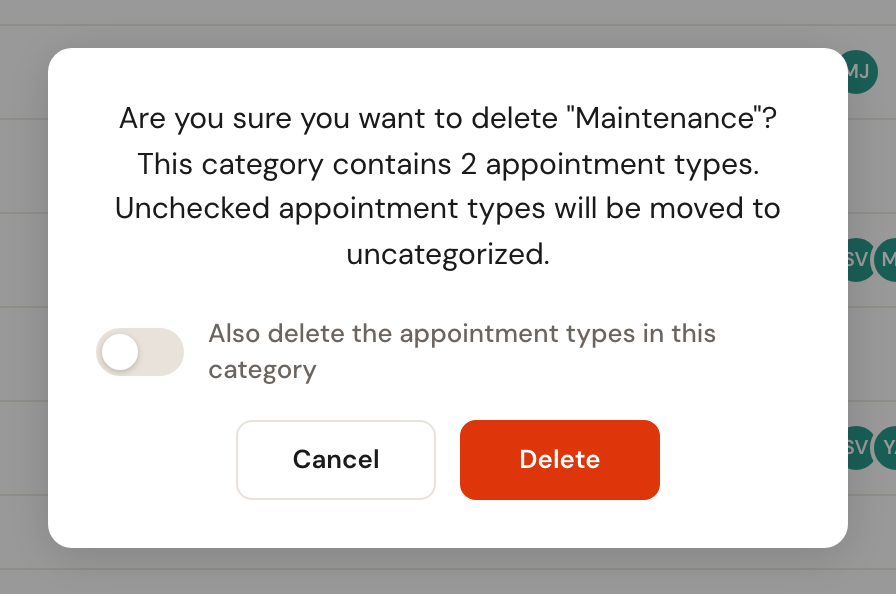
- Switch off (the default): the category disappears, the services survive and move to Uncategorized. They stay bookable.
- Switch on: the services are archived along with it and disappear from your booking page.
Existing appointments stay readable: a deleted category survives behind the scenes so past appointments keep their origin. It only disappears from your catalogue and from the customer's list.
What the customer sees
On your booking page your services are grouped under their category, in the same structure as here. Services without a category simply sit among them — Uncategorized is a heading in your overview, not one for the customer.
Frequently asked questions
Do I have to use categories? No. With a small catalogue, No category is fine.
Can a service be in two categories? No, an appointment type belongs to exactly one category.
I deleted a category — are my services gone? Only if you turned the switch on. If it was off, you'll find them at the bottom of the overview under Uncategorized.
Can I change the Id later? No, it is fixed once created. The name customers see can always be changed.