
Edit a step
The whole step editor — when a message goes out, over which channel, to whom, and what it says.
A step is one message: a confirmation, a reminder, a notification to your team. The step editor decides when that message goes out, over which channel, to whom and what it says — in every language your company supports. This is the screen where you make those choices, field by field.
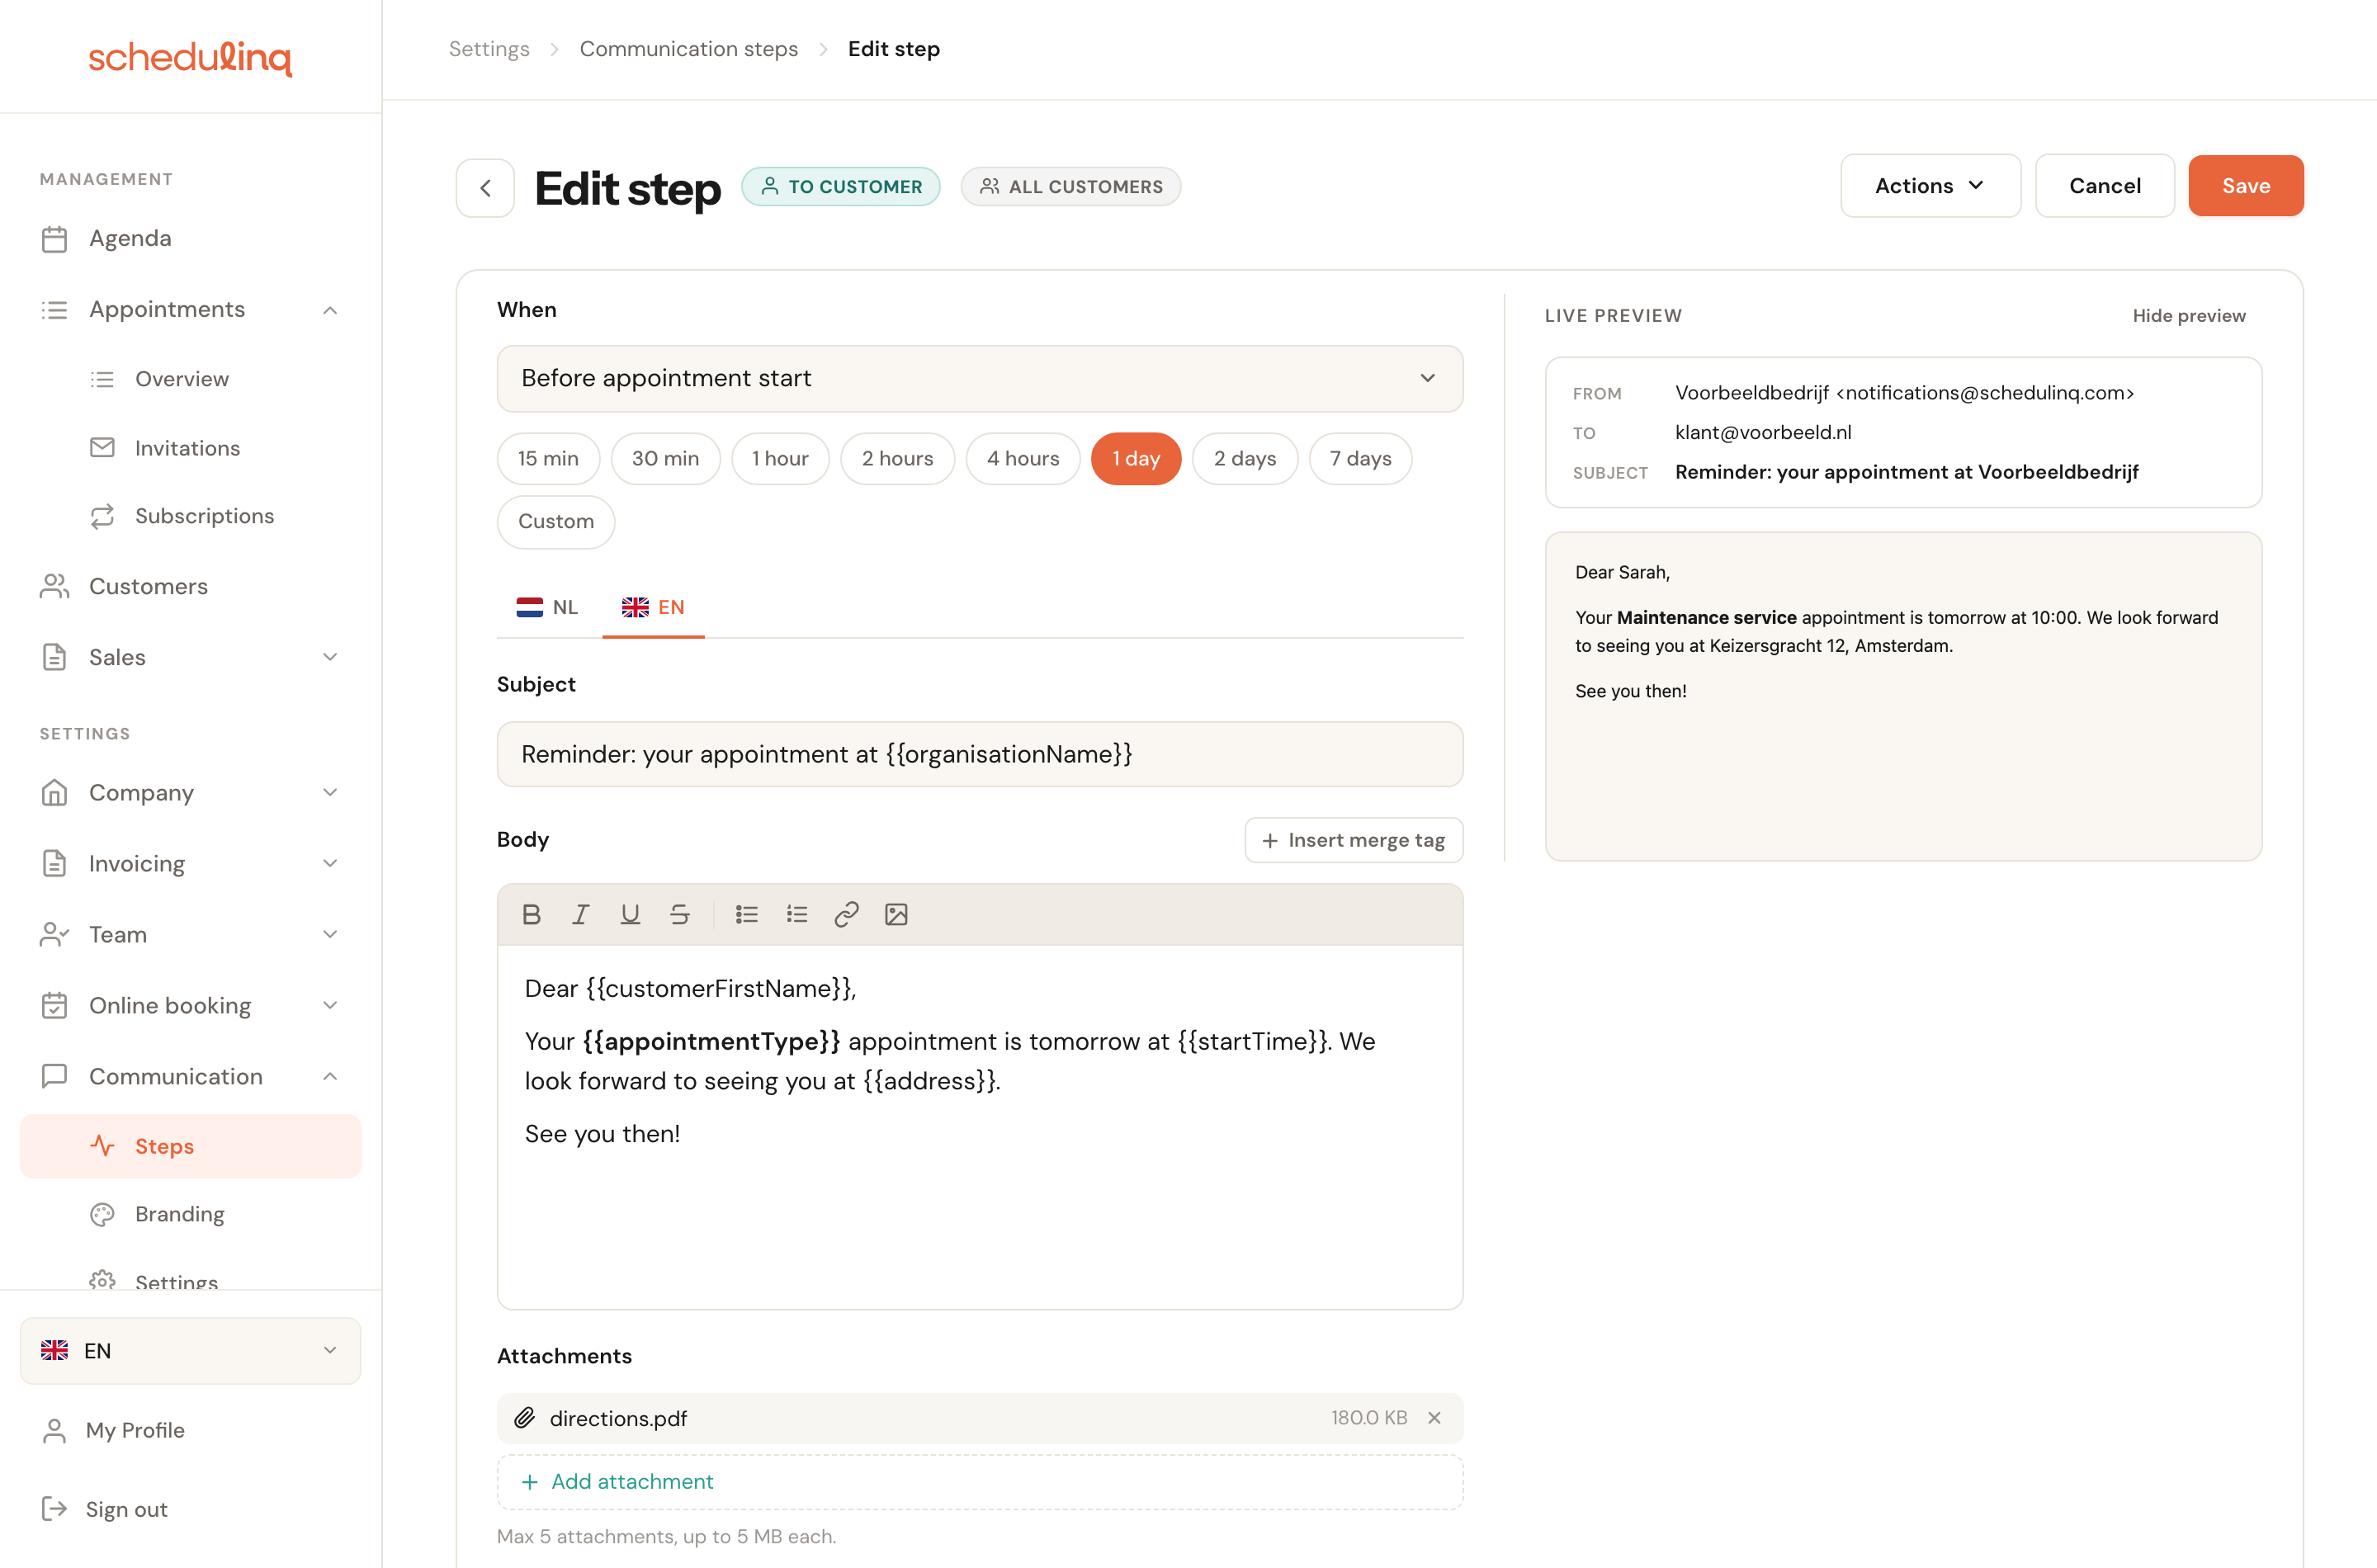
You fill in the step on the left and see what the customer receives on the right.
Opening the editor
Go to Communication → Steps
You see your whole message schedule. Click the step you want to change.
The editor opens at its own address
The list stays underneath and the editor gets its own web address, so you can share or bookmark the page, and your browser's back button returns you to the list.
Make your changes and save
Cancel and Save sit at the top right. Archiving and deleting live under Actions.
When
When
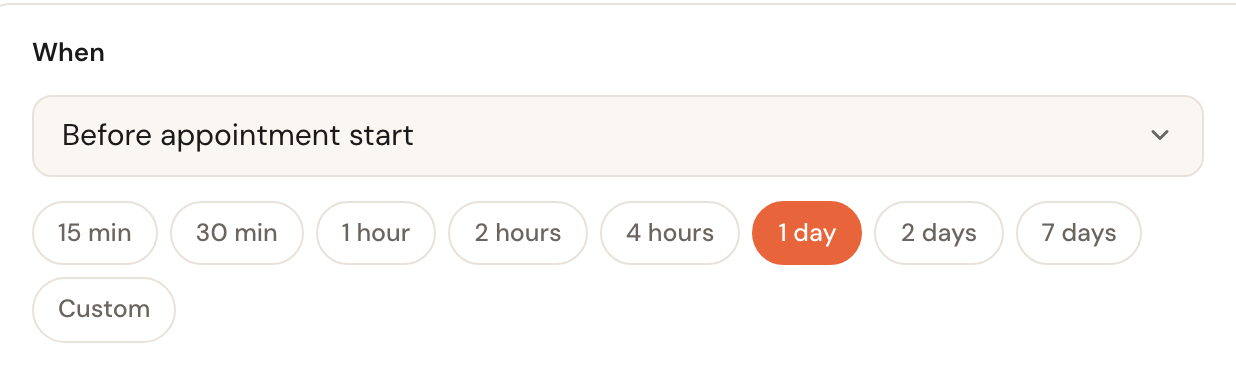
RequiredThe event this message hangs off. Which options you get depends on the kind of schedule: for appointments, for instance, Immediately when the appointment is created, Before appointment start, After appointment end, On cancellation, On reschedule and On change.
"Before" and "after" are separate entries in the list rather than a direction you set somewhere else. You pick the moment you actually mean, without having to get a plus or minus sign right afterwards.
How long before or after
Only for a timed momentPick a moment that sits around the event and the buttons from 15 min to 7 days appear. If none of them fits, click Custom and type a number with minutes, hours or days.
For an immediate moment — Immediately when the appointment is created — these buttons are absent and the editor simply says the step runs straight away. That is deliberate rather than a limitation: there is nothing to delay about a confirmation.
Channel and recipient

Channel
Email, SMS or WhatsAppHow the message is sent. Email is always available. SMS is not available during the trial and costs money per message. WhatsApp can only be chosen once you have connected your WhatsApp Business number.
SMS and WhatsApp are shorter and more direct; email has room for formatting and attachments. Only email can carry files — the other two channels do not even show that block.
Recipient
Customer, organisation or teamWho receives the message. Customer is the ordinary choice. Organisation sends to your own mailbox, usually for notices like "invitation unanswered". Assigned team sends to the staff performing the appointment — one message per person, in their own language.
The recipient also decides who "you" is in your text. Writing for your team means "your appointment" is the customer's appointment, not the reader's — which is why the editor adds a short note under the title as soon as you pick anything other than Customer.
Languages

Language tabs
One tab per language your company supports. You write a separate subject and body per language, and switching tabs keeps what you had already typed.
A language you leave empty is not saved. That is usually exactly what you want — but it also means you throw an existing translation away by emptying it and saving.
Subject and body
Subject
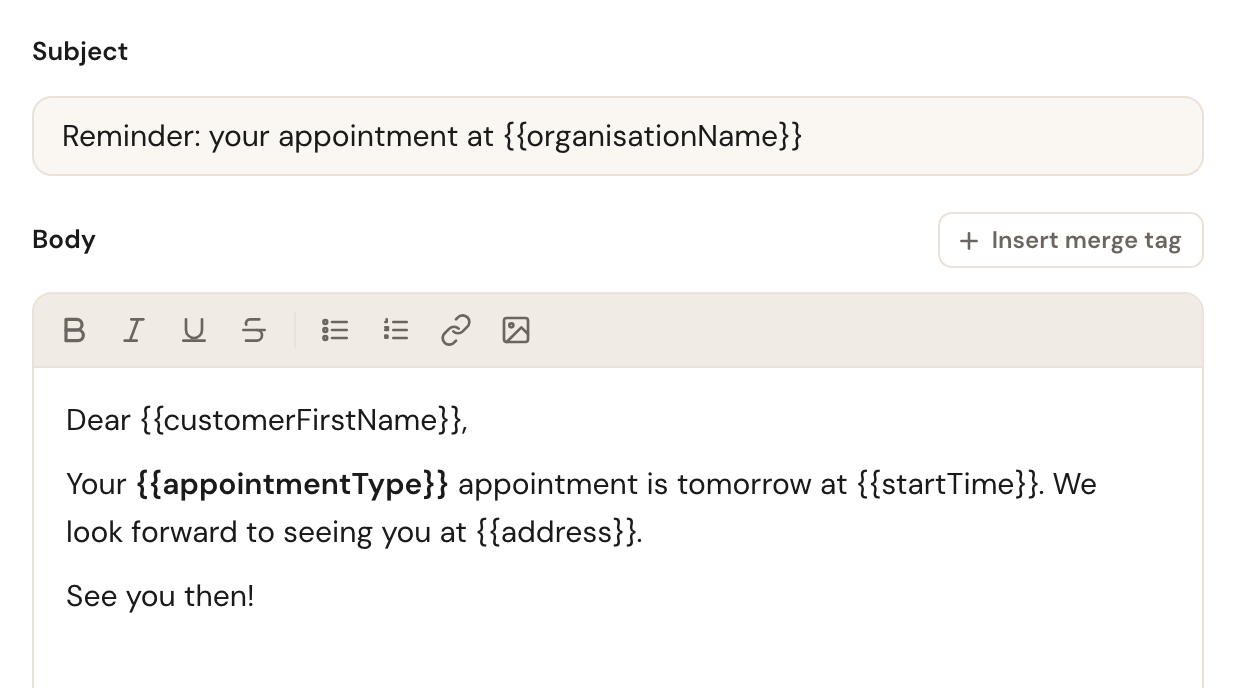
Email onlyThe subject line of the email. Up to 500 characters. SMS and WhatsApp have no subject, so the field is not shown for them.
Body
Required in at least one languageThe content. For email this is a rich text editor with bold, italics, lists, links and images. For SMS and WhatsApp it is a plain text box.
Save stays disabled while no language has a body at all. The subject does not count towards that — so an email step can be saved without a subject line.
Variables
A variable is a piece of text between double braces that is replaced with real data
when the message is sent. {{customerFirstName}} becomes Sarah.
Click Insert merge tag and pick one; it lands where your cursor was — in the subject or in the body, depending on where you were last. Typing one yourself works just as well.
What you can use
For appointments and invitations:
| Variable | What it becomes |
|---|---|
{{customerName}} | The customer's full name |
{{customerFirstName}} | The customer's first name |
{{customerEmail}} | The customer's email address |
{{customerPhone}} | The customer's phone number |
{{recipientName}} | Name of whoever receives the message |
{{recipientFirstName}} | First name of whoever receives the message |
{{organisationName}} | Your company name |
{{appointmentType}} | The booked service |
{{actionLink}} | Button or link to the action (book, change) |
{{appointmentDetails}} | Card with all appointment details — email only |
Appointments only:
| Variable | What it becomes |
|---|---|
{{appointmentDate}} | Date of the appointment |
{{startTime}} | Start time |
{{endTime}} | End time |
{{durationMinutes}} | Duration in minutes |
{{address}} | Address of the appointment |
{{workerName}} | Name of the staff member |
{{workerEmail}} | Email address of the staff member |
{{notes}} | Notes on the appointment |
{{appointmentChanges}} | A "what changed" list — email only |
{{reviewLink}} | Link to your review page |
Invitations only:
| Variable | What it becomes |
|---|---|
{{expiryDate}} | When the invitation expires |
Invoices:
| Variable | What it becomes |
|---|---|
{{invoiceNumber}} | Invoice number |
{{invoiceDate}} | Invoice date |
{{dueDate}} | Due date |
{{amountDue}} | Outstanding amount |
Attachments
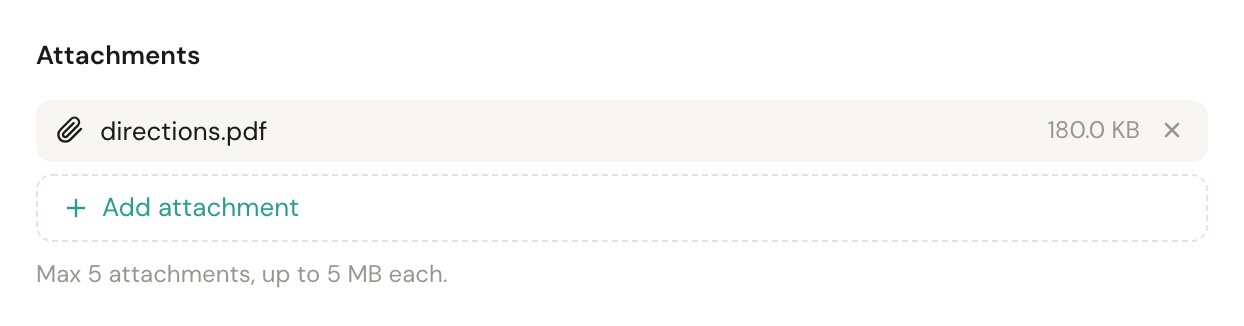
Attachments
Email onlyMax 5 × 5 MBFiles attached to every email this step sends. PDF, JPG, PNG, DOCX and XLSX are allowed.
Useful for things that never change — directions, terms and conditions, a preparation form. Do not put anything here that differs per customer: everyone who gets this step gets the same file.
Attach calendar invite
Appointment moments onlyAdds an .ics file so the customer can put the appointment in their own calendar.
The switch only appears for moments where that makes sense: creating, rescheduling,
changing and cancelling an appointment.
Who the step applies to
Two questions that stand apart from each other: which kind of customer reads this, and which services it belongs to.
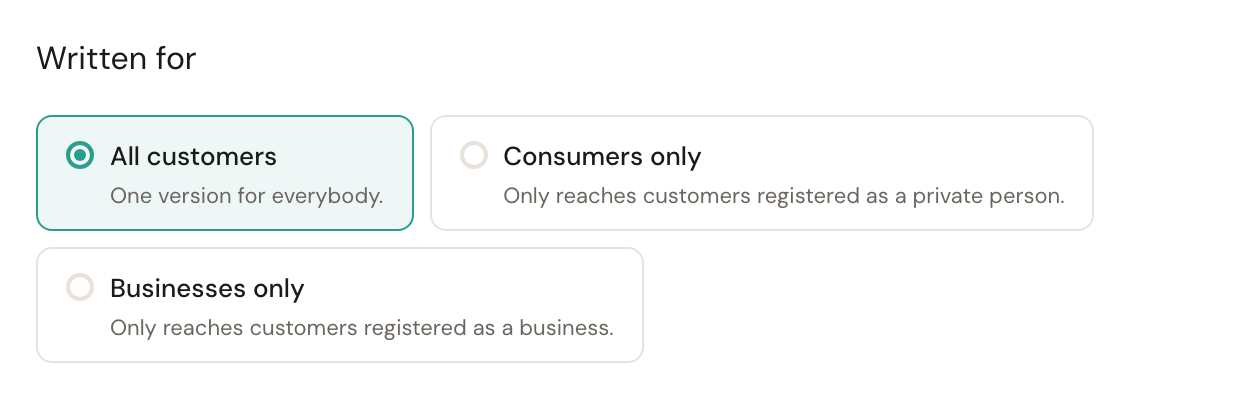
Written for
Only when the recipient is CustomerAll customers sends one version to everybody. Consumers only and Businesses only restrict the step to customers registered as such.
Businesses and consumers often want addressing differently. Pick one of the two and Schedulinq warns you that the other group currently gets nothing — which is allowed, but it should be a choice rather than a surprise. Add a second step for the other group.
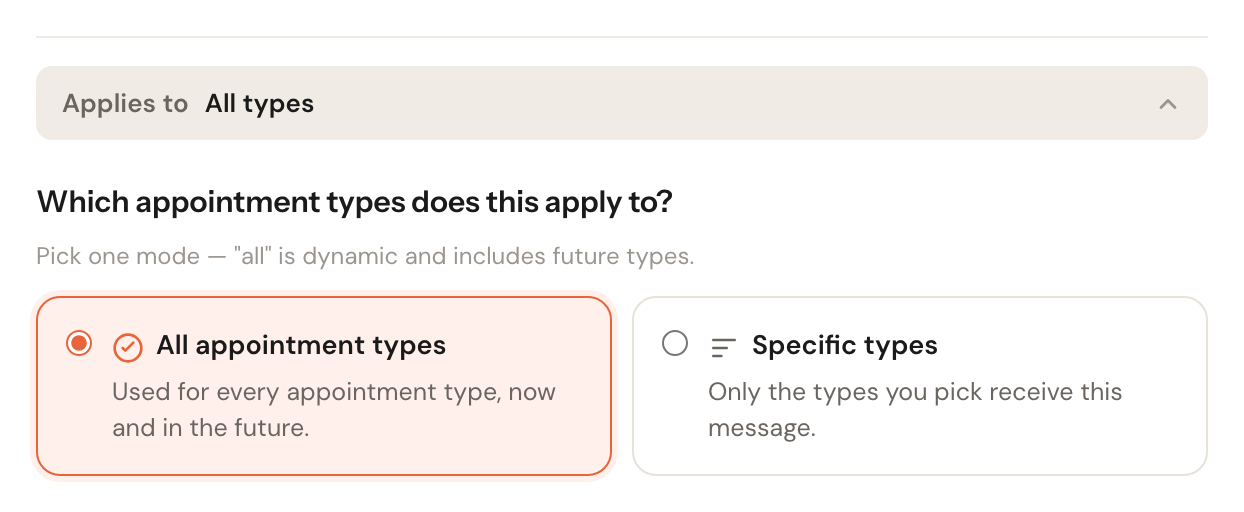
Applies to
Default: all typesClick the Applies to row at the bottom to expand it. All appointment types is dynamic and includes services you create later. Specific types restricts the step to the ones you tick.
A step for specific types sitting at exactly the same moment as a step for all types replaces that general step for those services. The editor says so as soon as the situation arises, so you do not accidentally send two messages where you meant one.
The live preview
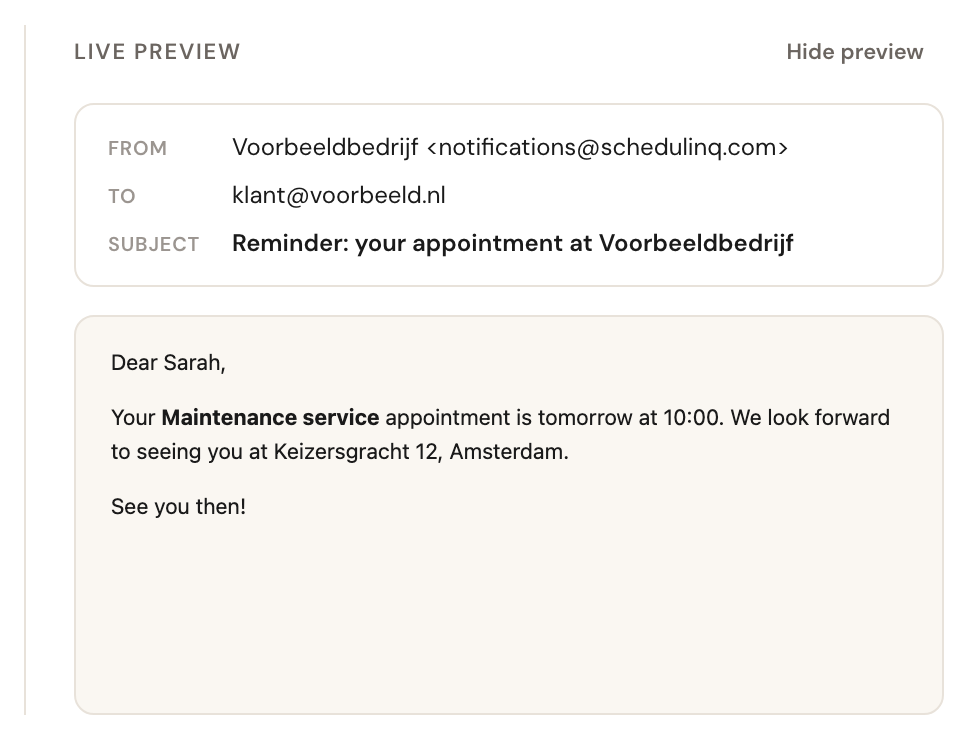
Variables are already replaced with sample data here.
To the right of the form sits a preview that keeps up as you type. It uses the same rendering as a real send — including your branding, logo and buttons — so what you see here is what the customer receives. Hide preview folds it away when you want more room.
Saving
Click Save. For a WhatsApp step your text goes to Meta for approval at that moment; until approval comes back, the step falls back to SMS or email.
If you no longer want a step, choose Actions → Archive rather than deleting. For messages Schedulinq needs — a booking confirmation, a cancellation — that choice is absent: you can change the step but not remove it.
Frequently asked questions
Why can I no longer change the channel? Channel and recipient are fixed at creation. Create a new step with the channel you want and archive the old one.
I emptied a language and now it is gone. Empty languages are not kept on save. Type the text again and save.
My WhatsApp message was rejected. Meta approves each template separately. The reason appears under the text box. It is usually a variable at the very start or end, two variables next to each other, or too little fixed text.
Who exactly gets this message? That is the interplay of Recipient, Written for and Applies to. How the three work together is covered in How communication works.