
Ready to go live
Seven checks before you share your booking page — especially the settings that fail silently, without ever showing an error.
You have finished setting things up. The question is whether it actually works. Schedulinq gives no warning when your booking page stays empty — a service with nobody assigned, a schedule nobody fills, or a three-day notice period all look exactly like a healthy setup from the admin screens. The customer just sees "no available times".
So walk these seven checks. They are ordered by how often they go wrong.
1. Is every appointment type "Bookable"?
Go to Settings → Appointment types and look only at the Status column. That column is the fastest answer to "am I live?": per service, it sums up whether a customer can see it at all.
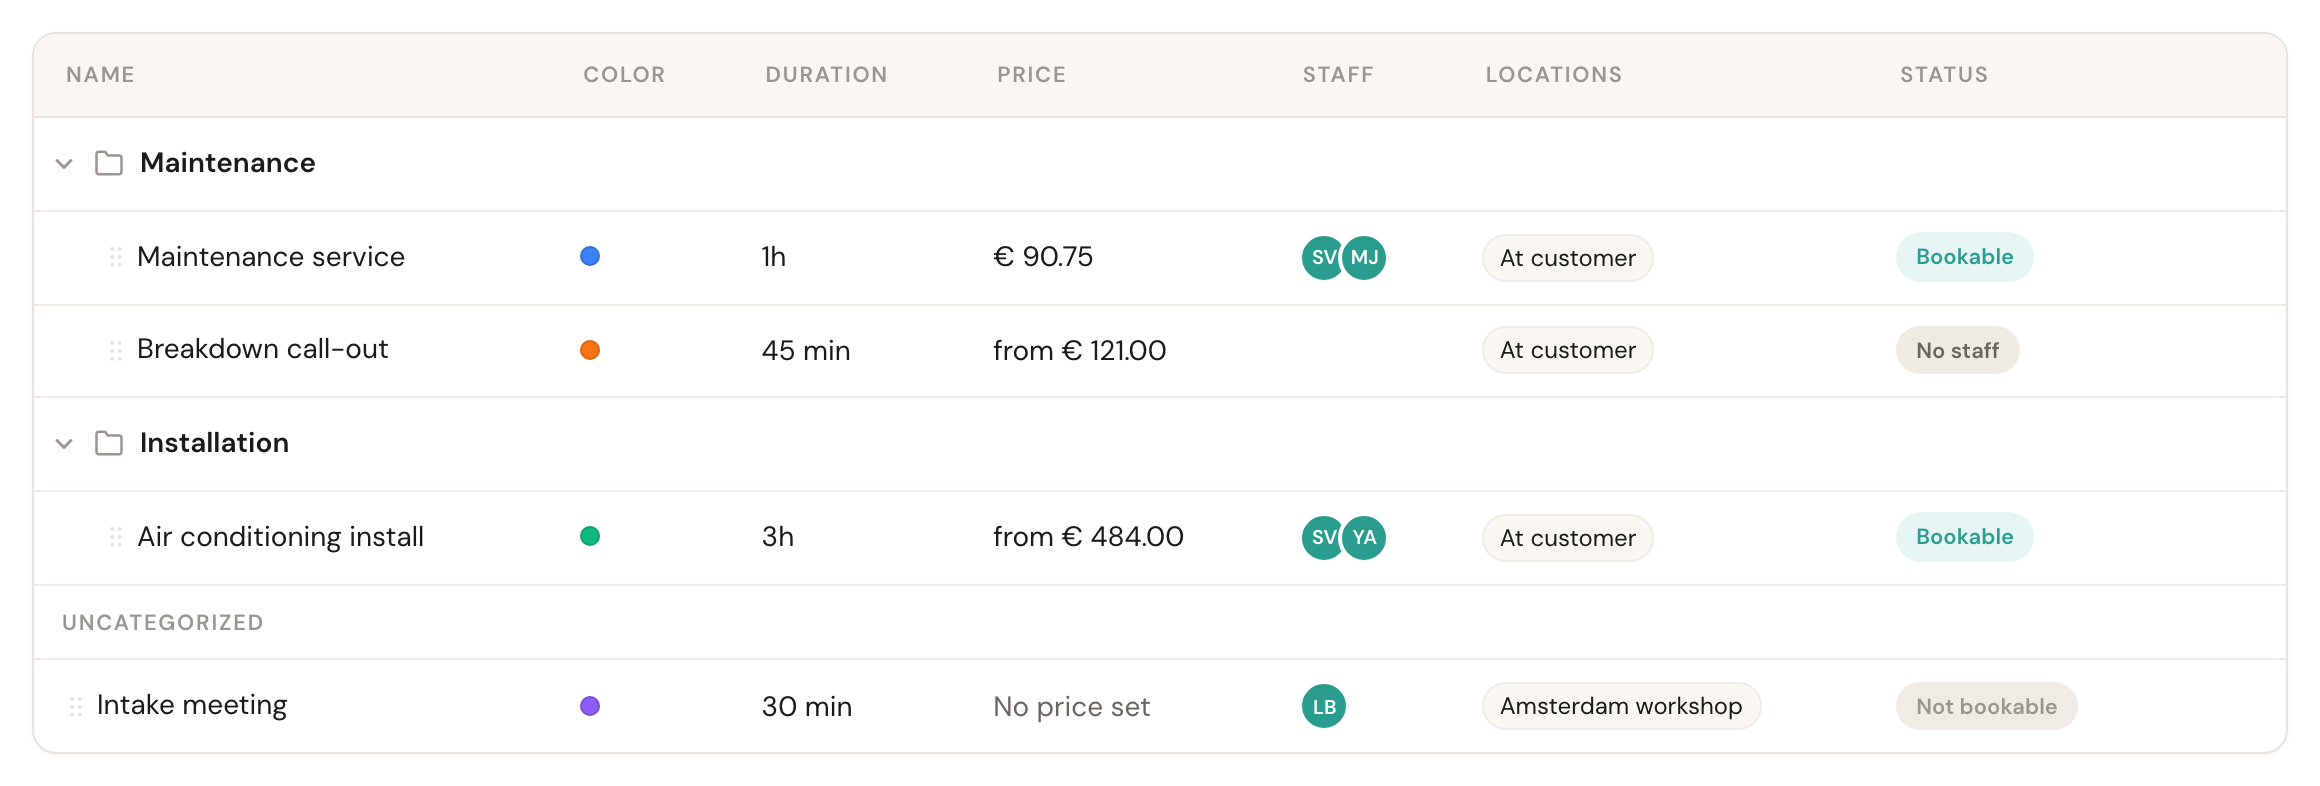
Three statuses, three different causes — and only one of them means the service can be booked.
- Bookable — good. Customers can choose this service.
- No staff — Online booking is on, but nobody is assigned. Schedulinq only looks for free slots in assigned staff members' calendars, so with nobody assigned there are never any times.
- Not bookable — Online booking is set to No. That is fine for services you only schedule yourself, but not for the ones you sell.
There is a third reason a service stays invisible that you cannot see here: no duration set. Such a service deliberately never appears on your booking page. Open the service to check — Create an appointment type explains every field.
2. Is anybody working on the days you offer?
Go to Team → Schedule. Under Who is working you see, per day, which colleagues work and between which hours.
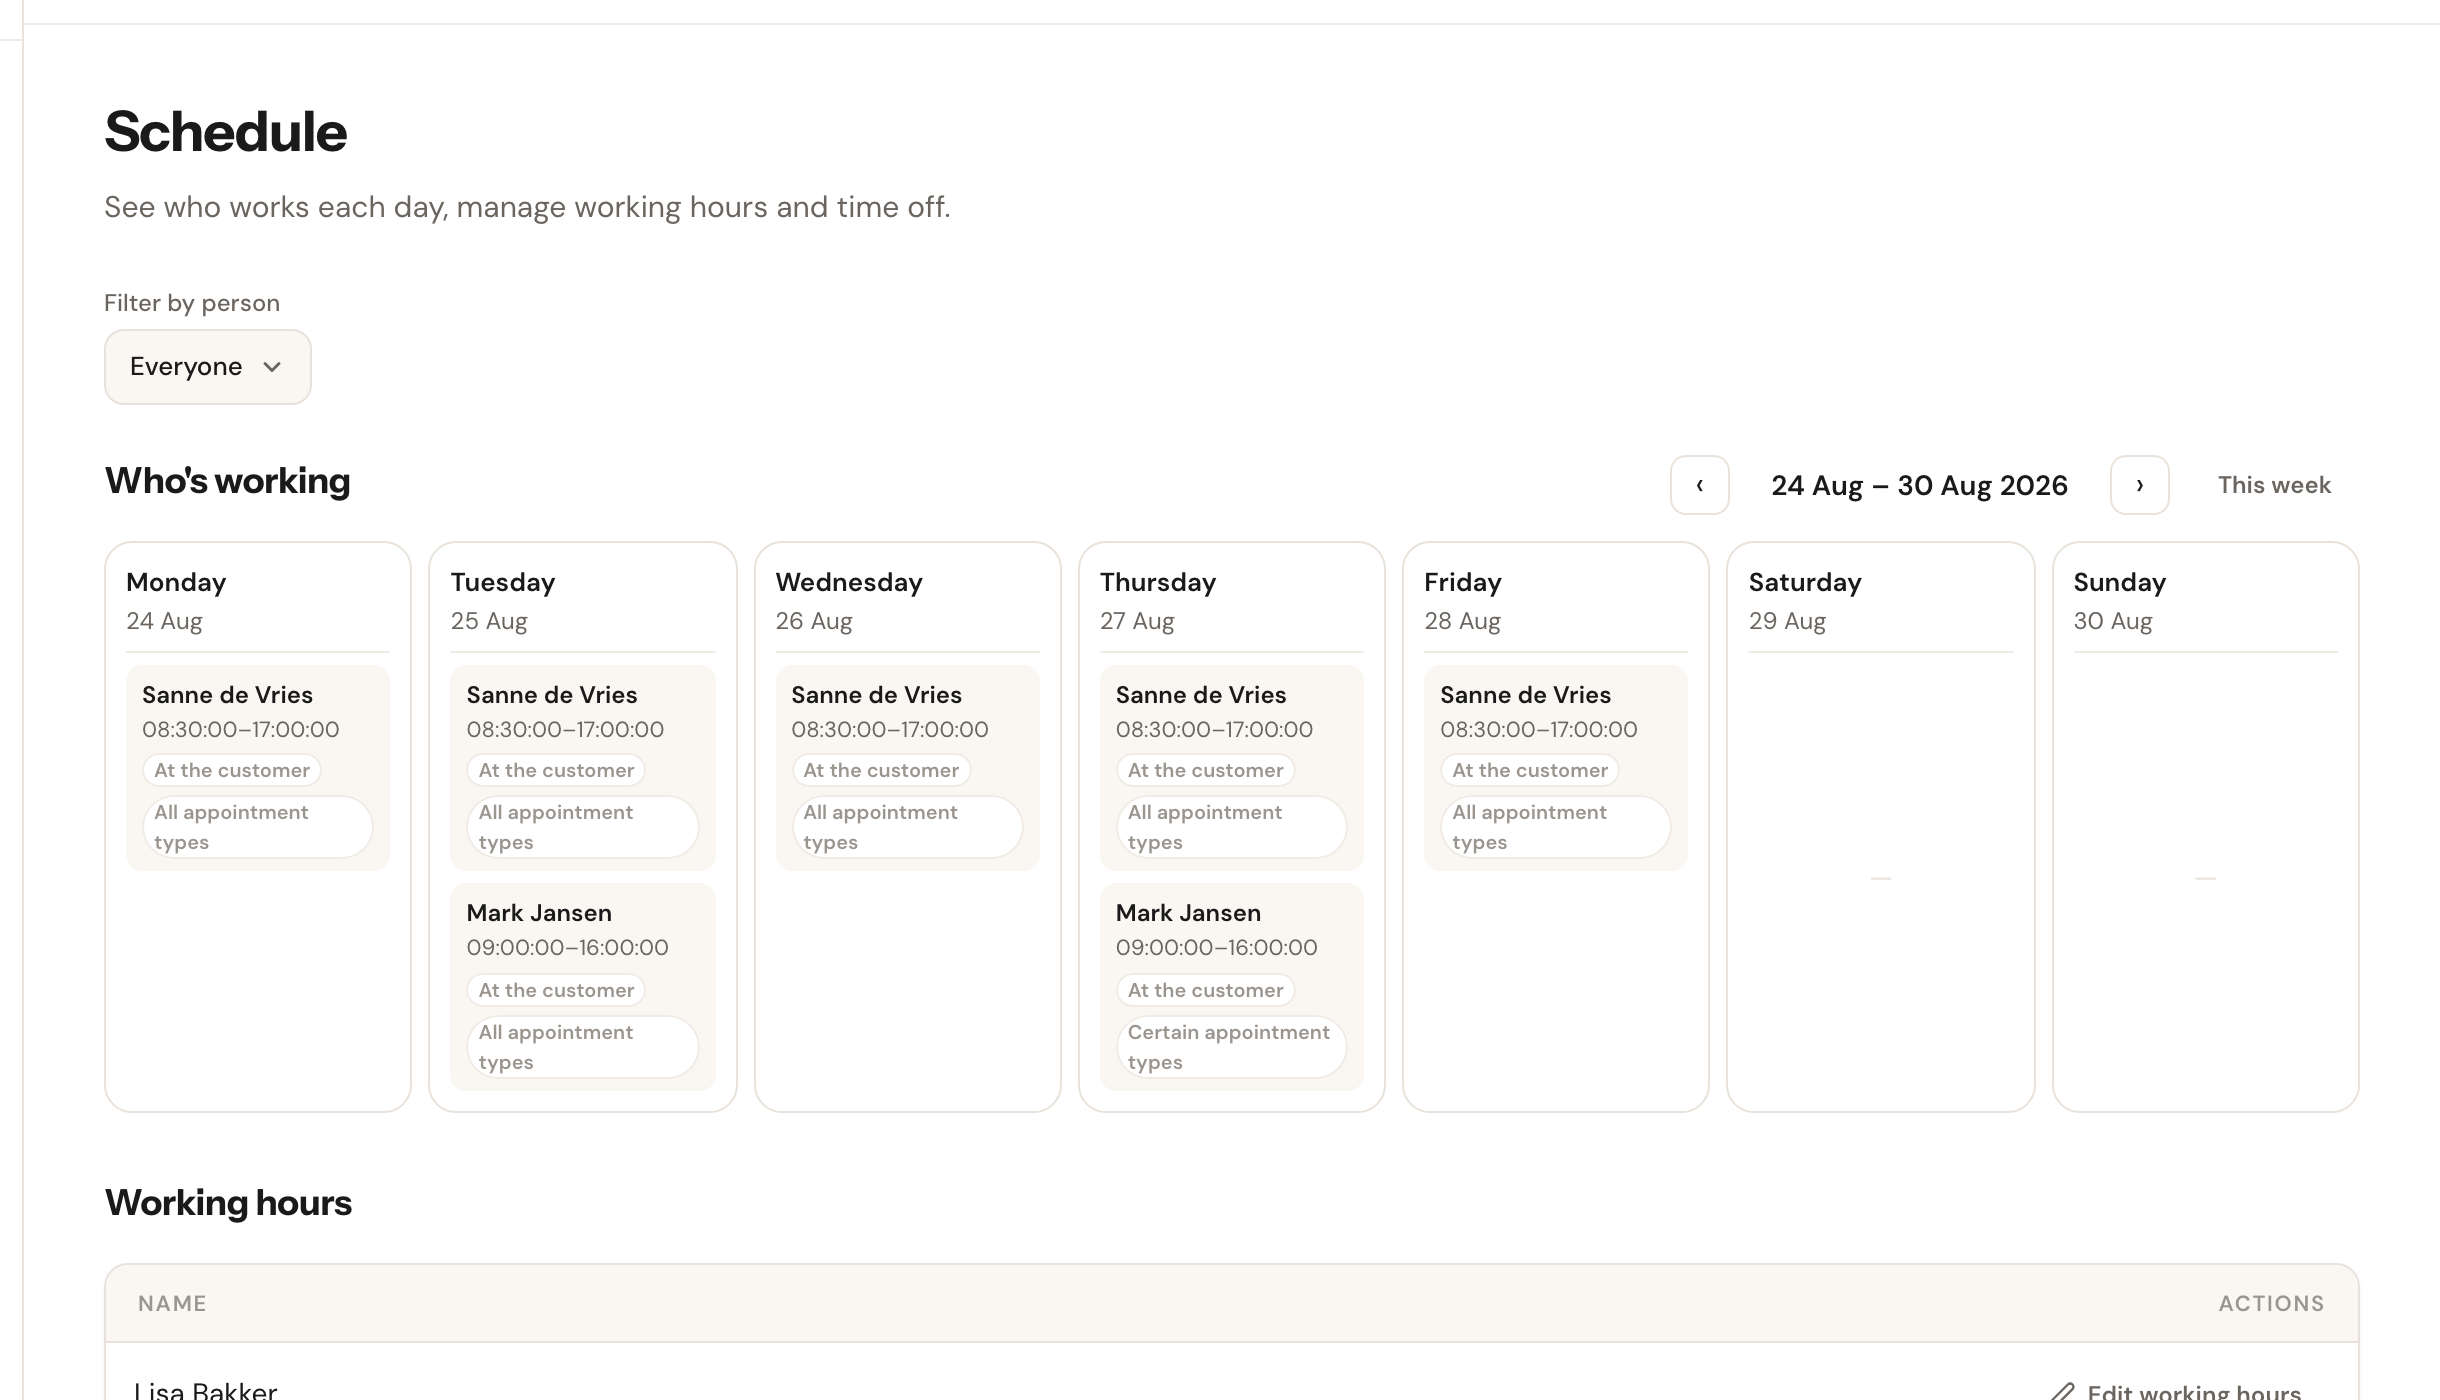
Watch the label under each block: All appointment types or Certain appointment types.
An empty day means no bookable times on that day, however well your services are configured. Two things to check:
- Does everyone have working hours? A colleague without a schedule never produces available times.
- Is a block limited to certain appointment types? If it reads Certain appointment types instead of All appointment types, that block only counts towards the services it covers. Hover the label to see which.
A new colleague only appears in available times once three things are true: the invitation has been accepted, they are assigned to an appointment type, and they have working hours in the schedule. There is no separate switch that makes someone "bookable" — it is that chain.
3. Are your booking rules blocking your own calendar?
Go to Online booking → Booking rules. Two fields here can quietly empty your booking page.
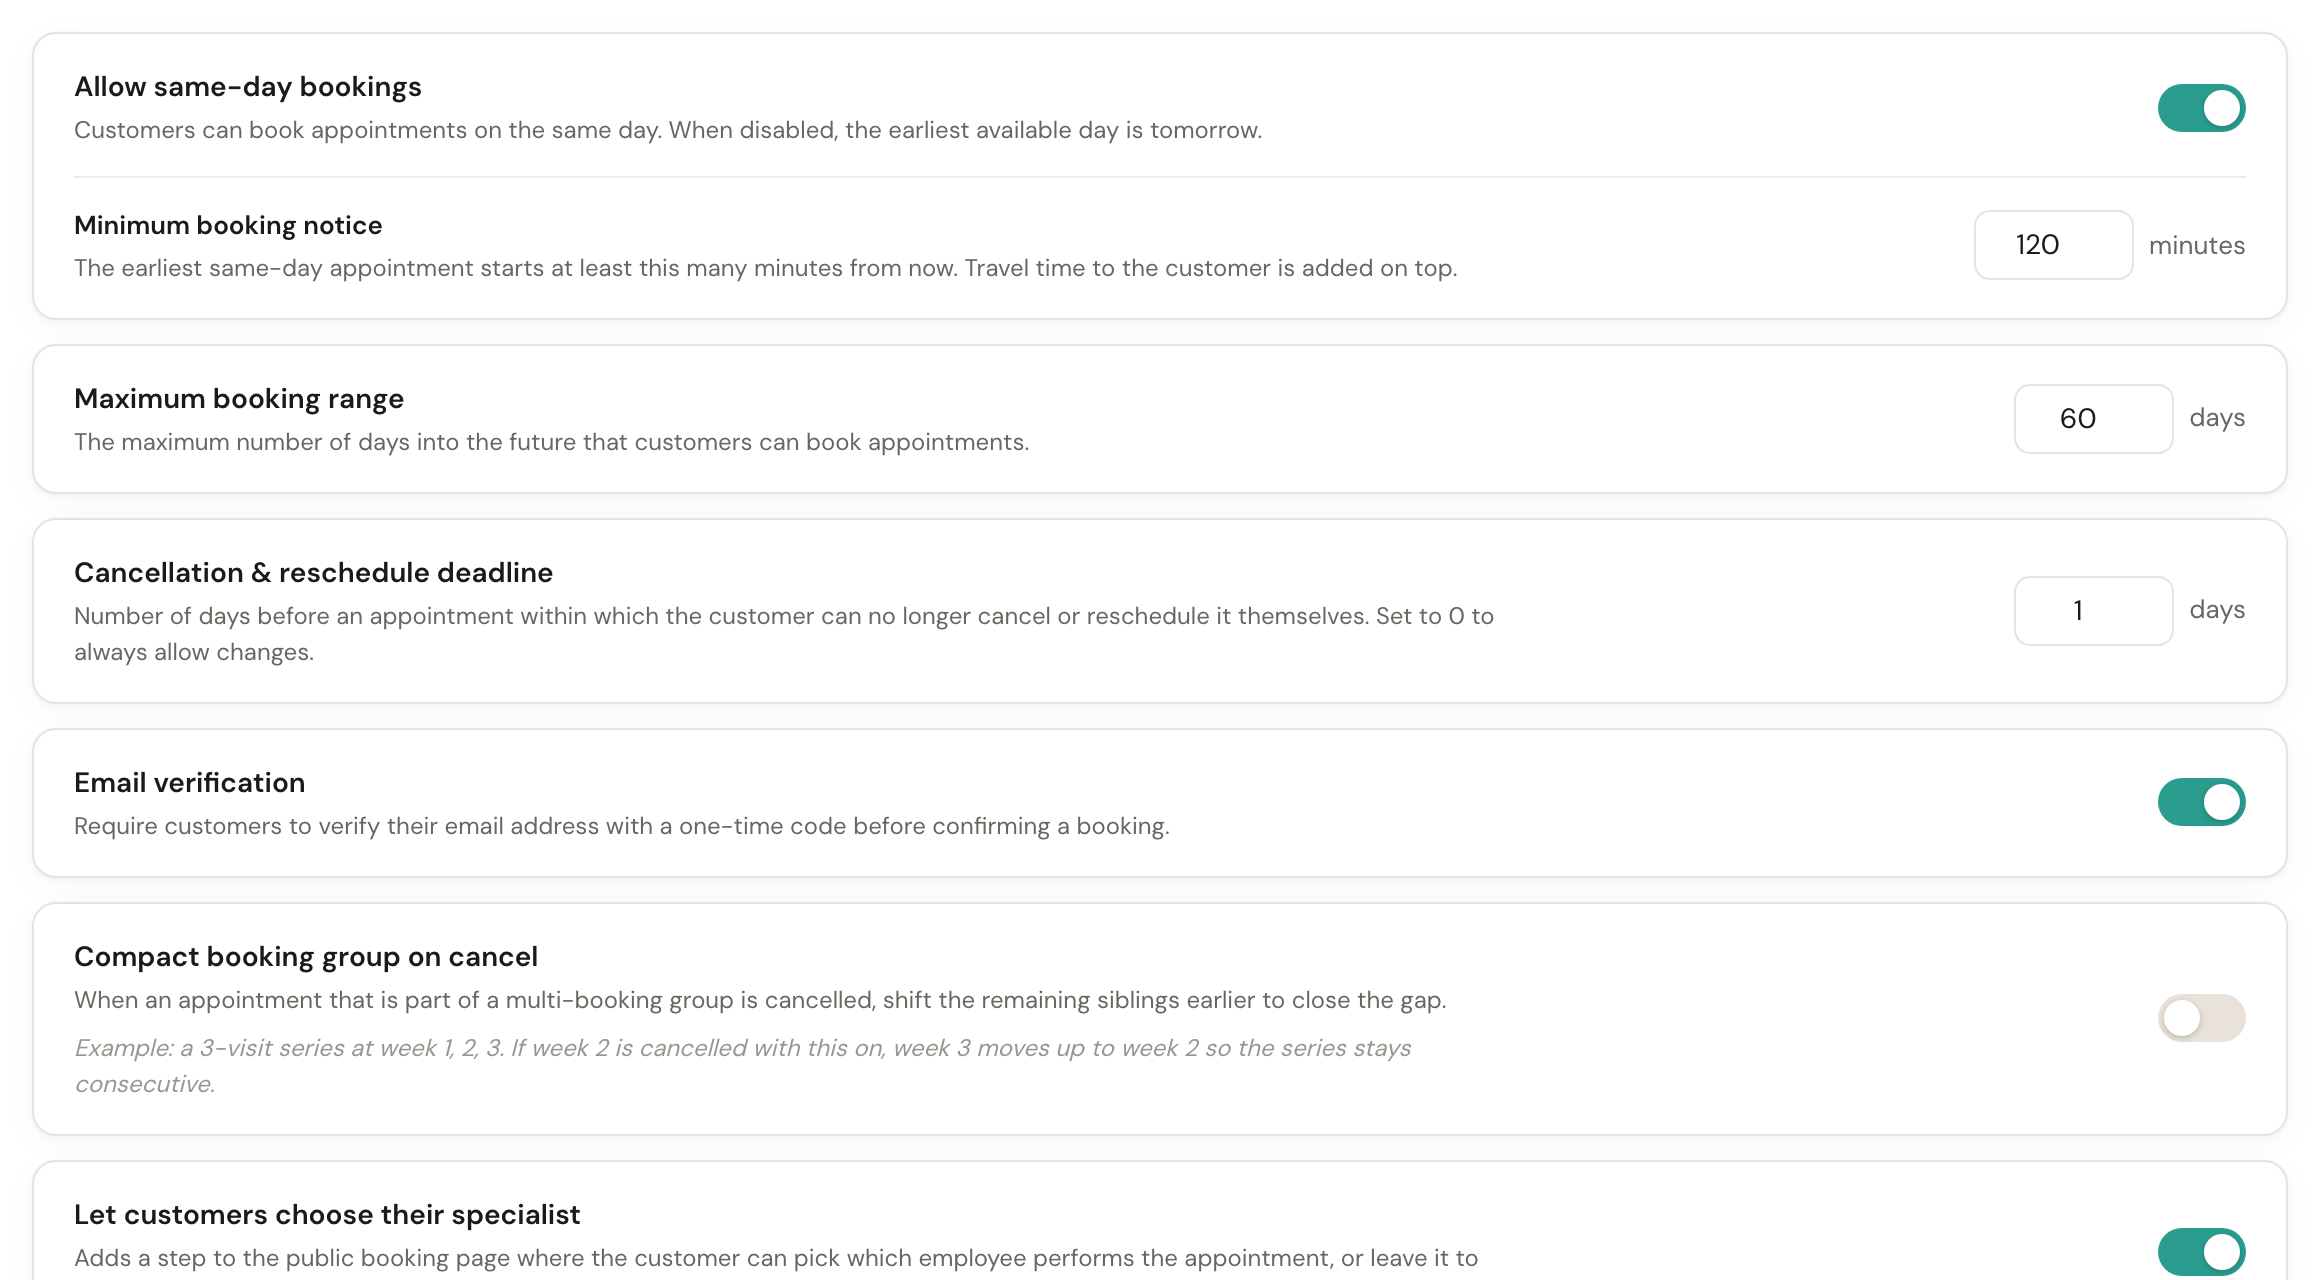
- Minimum notice — the next appointment can only be booked this many minutes from now. Set it to a few days' worth of minutes and your entire coming week disappears. Travel time to the customer is added on top of this.
- Maximum booking window — how far ahead customers may book. Set too tight, and a customer planning for next month sees nothing.
- Allow same-day bookings — with this off, tomorrow is the earliest day. That is a choice rather than a fault, but it does explain why today is never available.
4. Do customers get a confirmation?
Go to Communication → Steps. If a yellow banner sits at the top, some appointment types receive no confirmation, cancellation or reschedule notice at all.
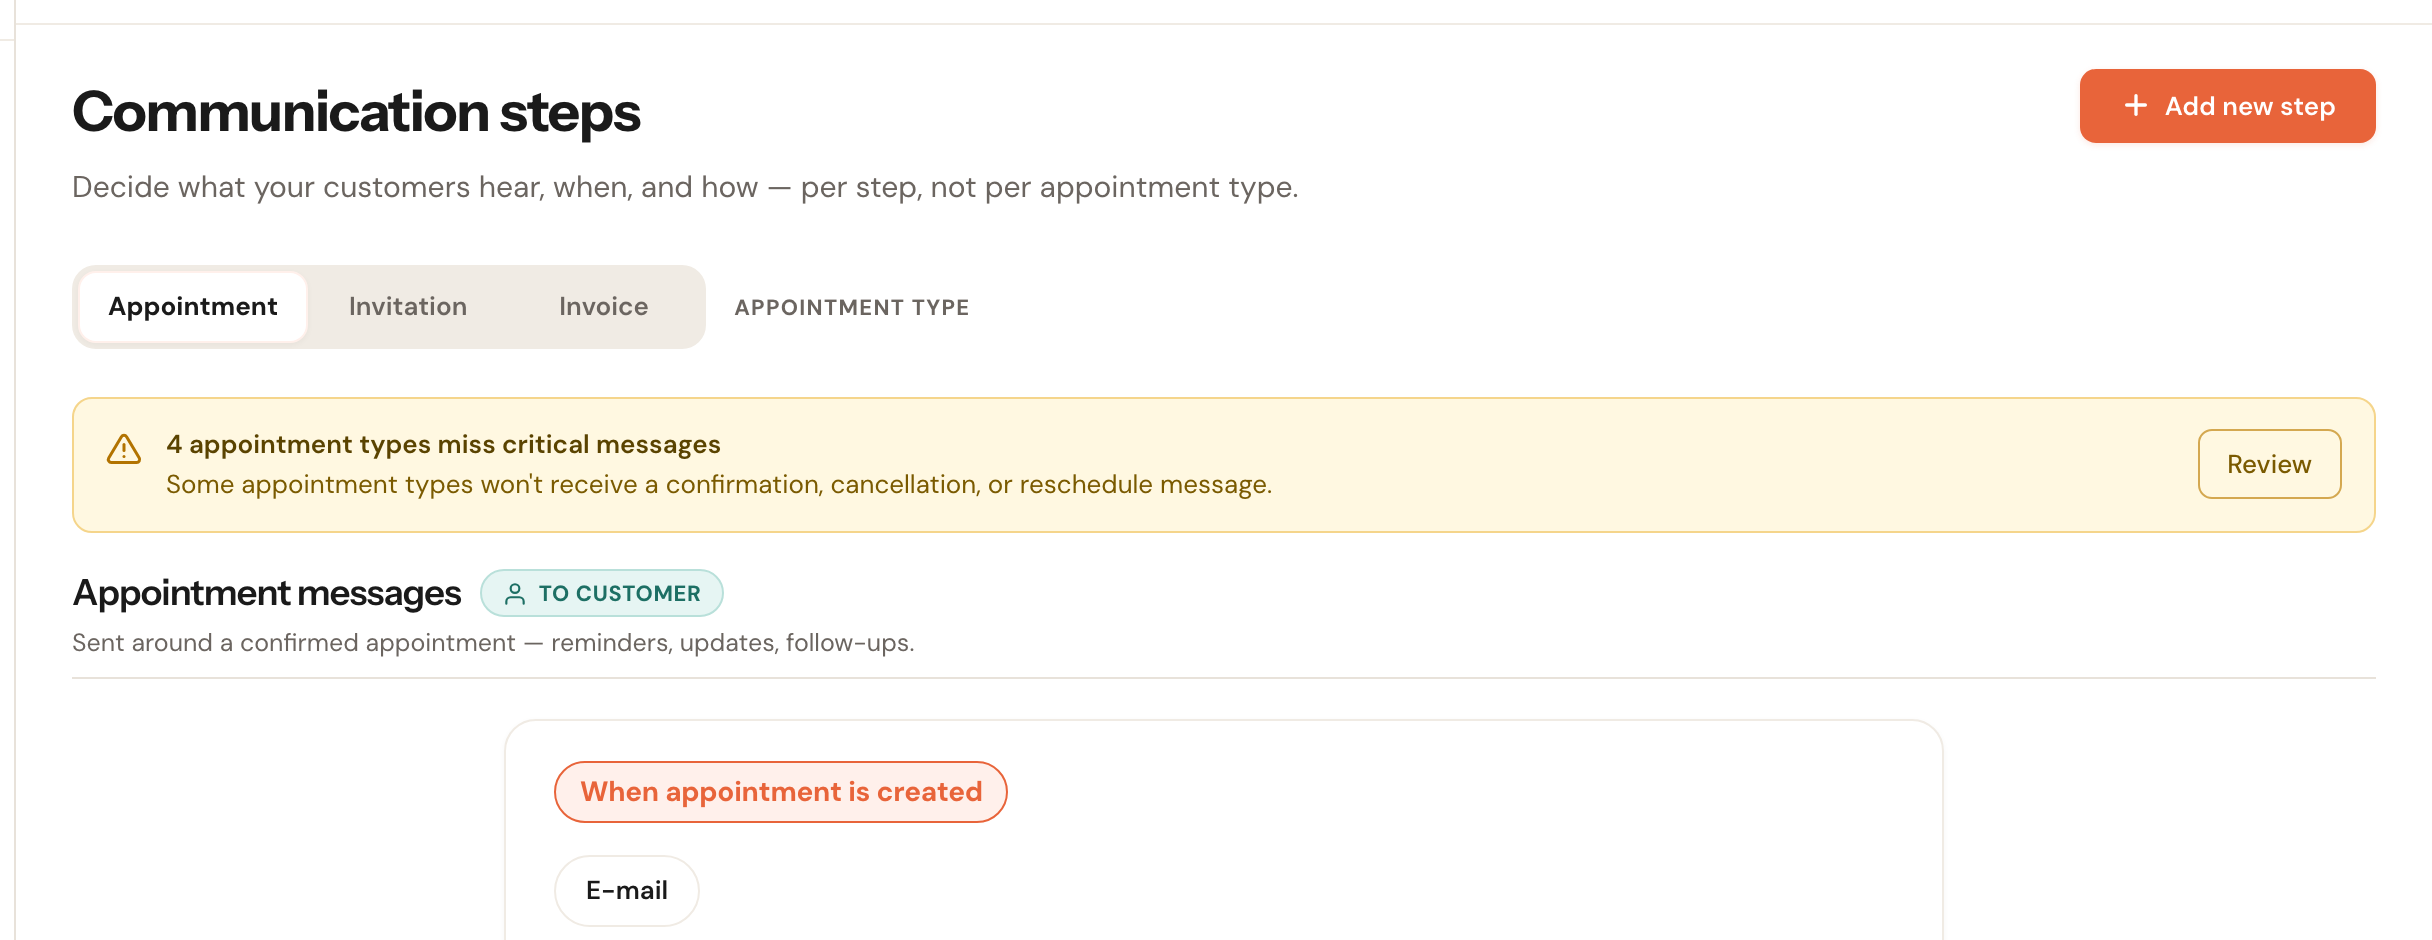
Click View for the list: which message is missing, per appointment type.
This is the only place in Schedulinq where such a gap reports itself to you. A customer who books and hears nothing picks up the phone — which is exactly what turning on online booking was meant to prevent.
5. Is your booking page right?
Go to Company → Details. At the top sits your Booking URL: the link customers use.

The buttons beside it copy the link, open it, or change it. Then check under Online booking → Public page whether the texts and layout are right, and under Online booking → Branding whether your colours and logo are in place.
6. Only if you invoice through Schedulinq
Go to Invoicing → Invoice settings and check your numbering, payment term and default texts, and under Invoicing → Invoice template how the PDF looks.
If you do not invoice through Schedulinq, skip this one.
7. Book an appointment yourself
The last check is the only one that tests everything at once. Open your own booking URL — through the button next to the link on Company → Details, or through View booking page on Online booking → Public page — and walk through a booking the way a customer would.
Watch for:
- Are all the services you expect actually listed?
- Do you get times, and are they realistic ones?
- Is the confirmation email right — sender, wording, your branding?
Afterwards, remember to cancel or delete the test appointment in your calendar.