
Set working hours
Record when, where and for what each colleague is bookable — with blocks, periods, and the trap of restricted services.
Working hours are where availability comes from. An appointment type decides what a customer can book; the schedule decides when and with whom. Without working hours there are no times on offer, however well your appointment types are set up.
Who already has working hours?
Go to Settings → Team → Schedule. At the top is Who's working: the week at a glance, showing per day who works, from when to when, and where.
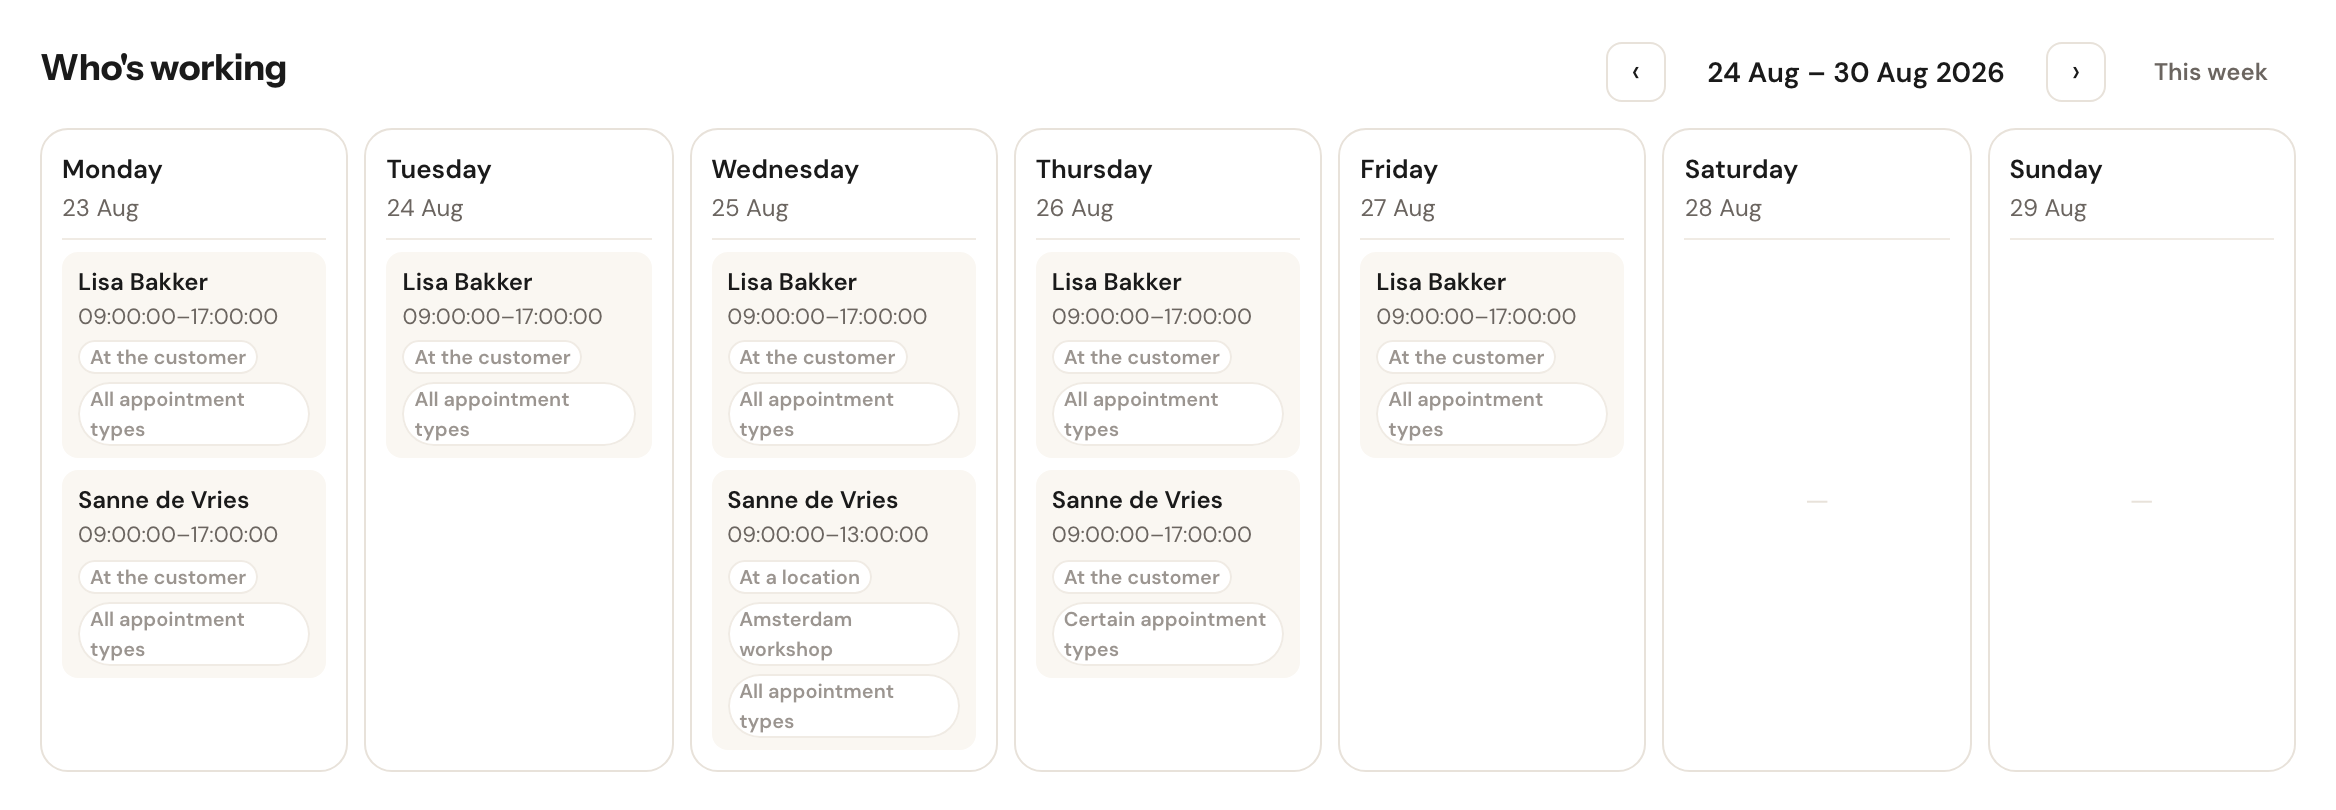
This is a reading screen. Changes are made per person, in the table below it.
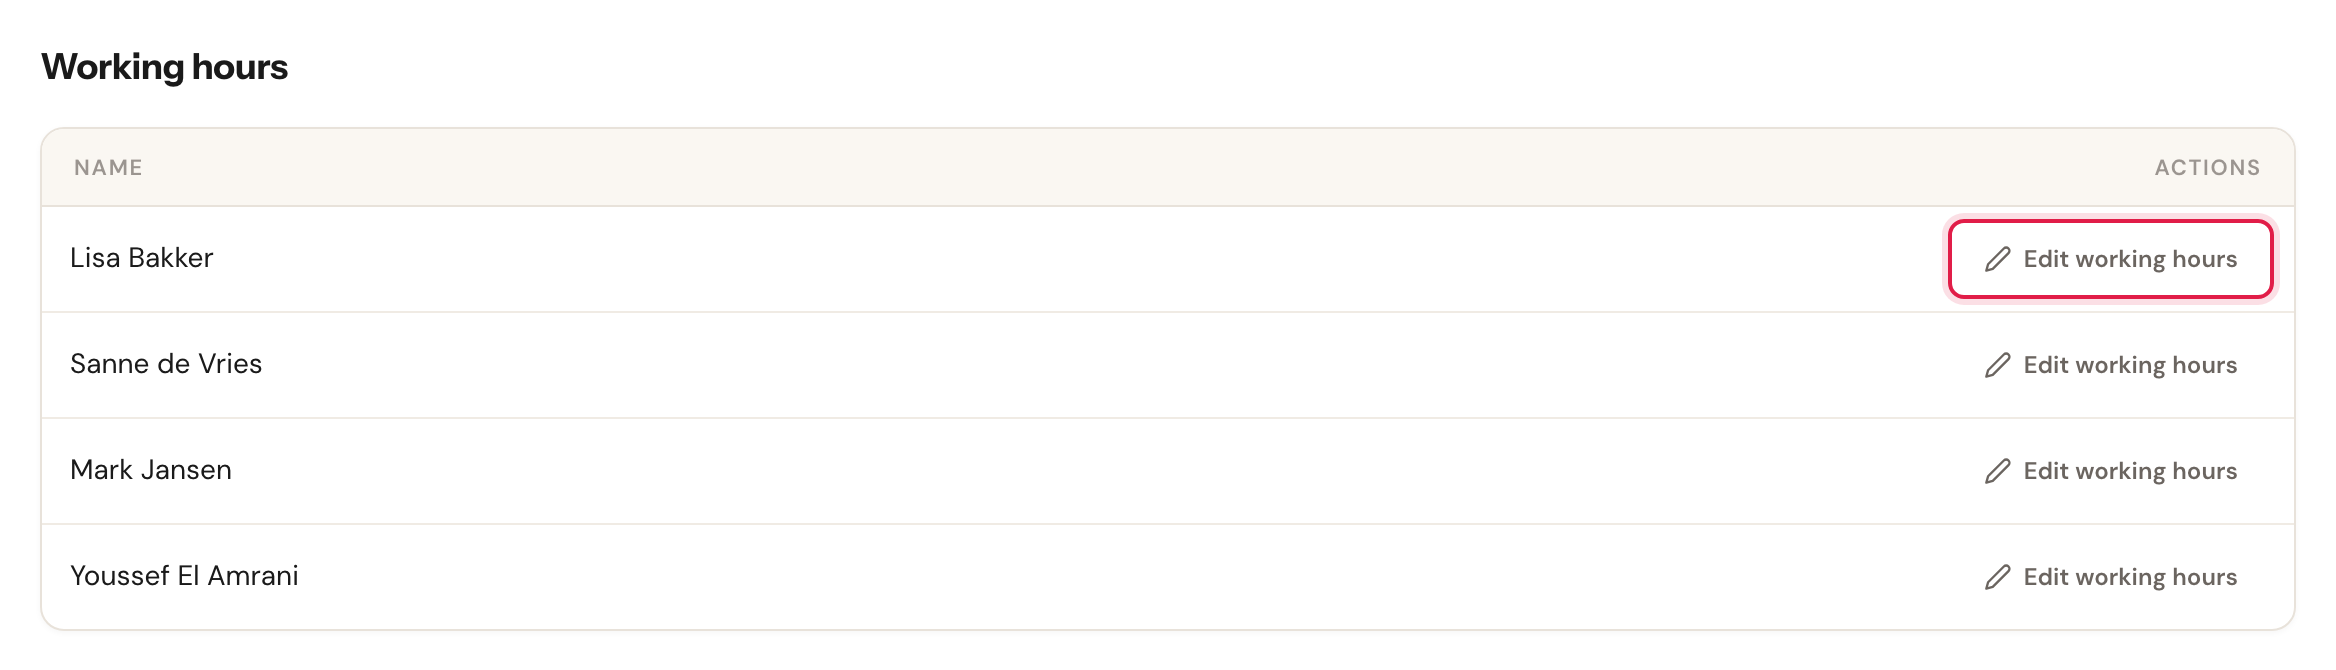
Below the roster is the list of team members. Click Edit working hours next to someone's name to open their week.
One colleague's week
The page opens read-only, showing only the days that person works. Closed days are left out — a row saying Closed tells you nothing when there is no toggle to act on.
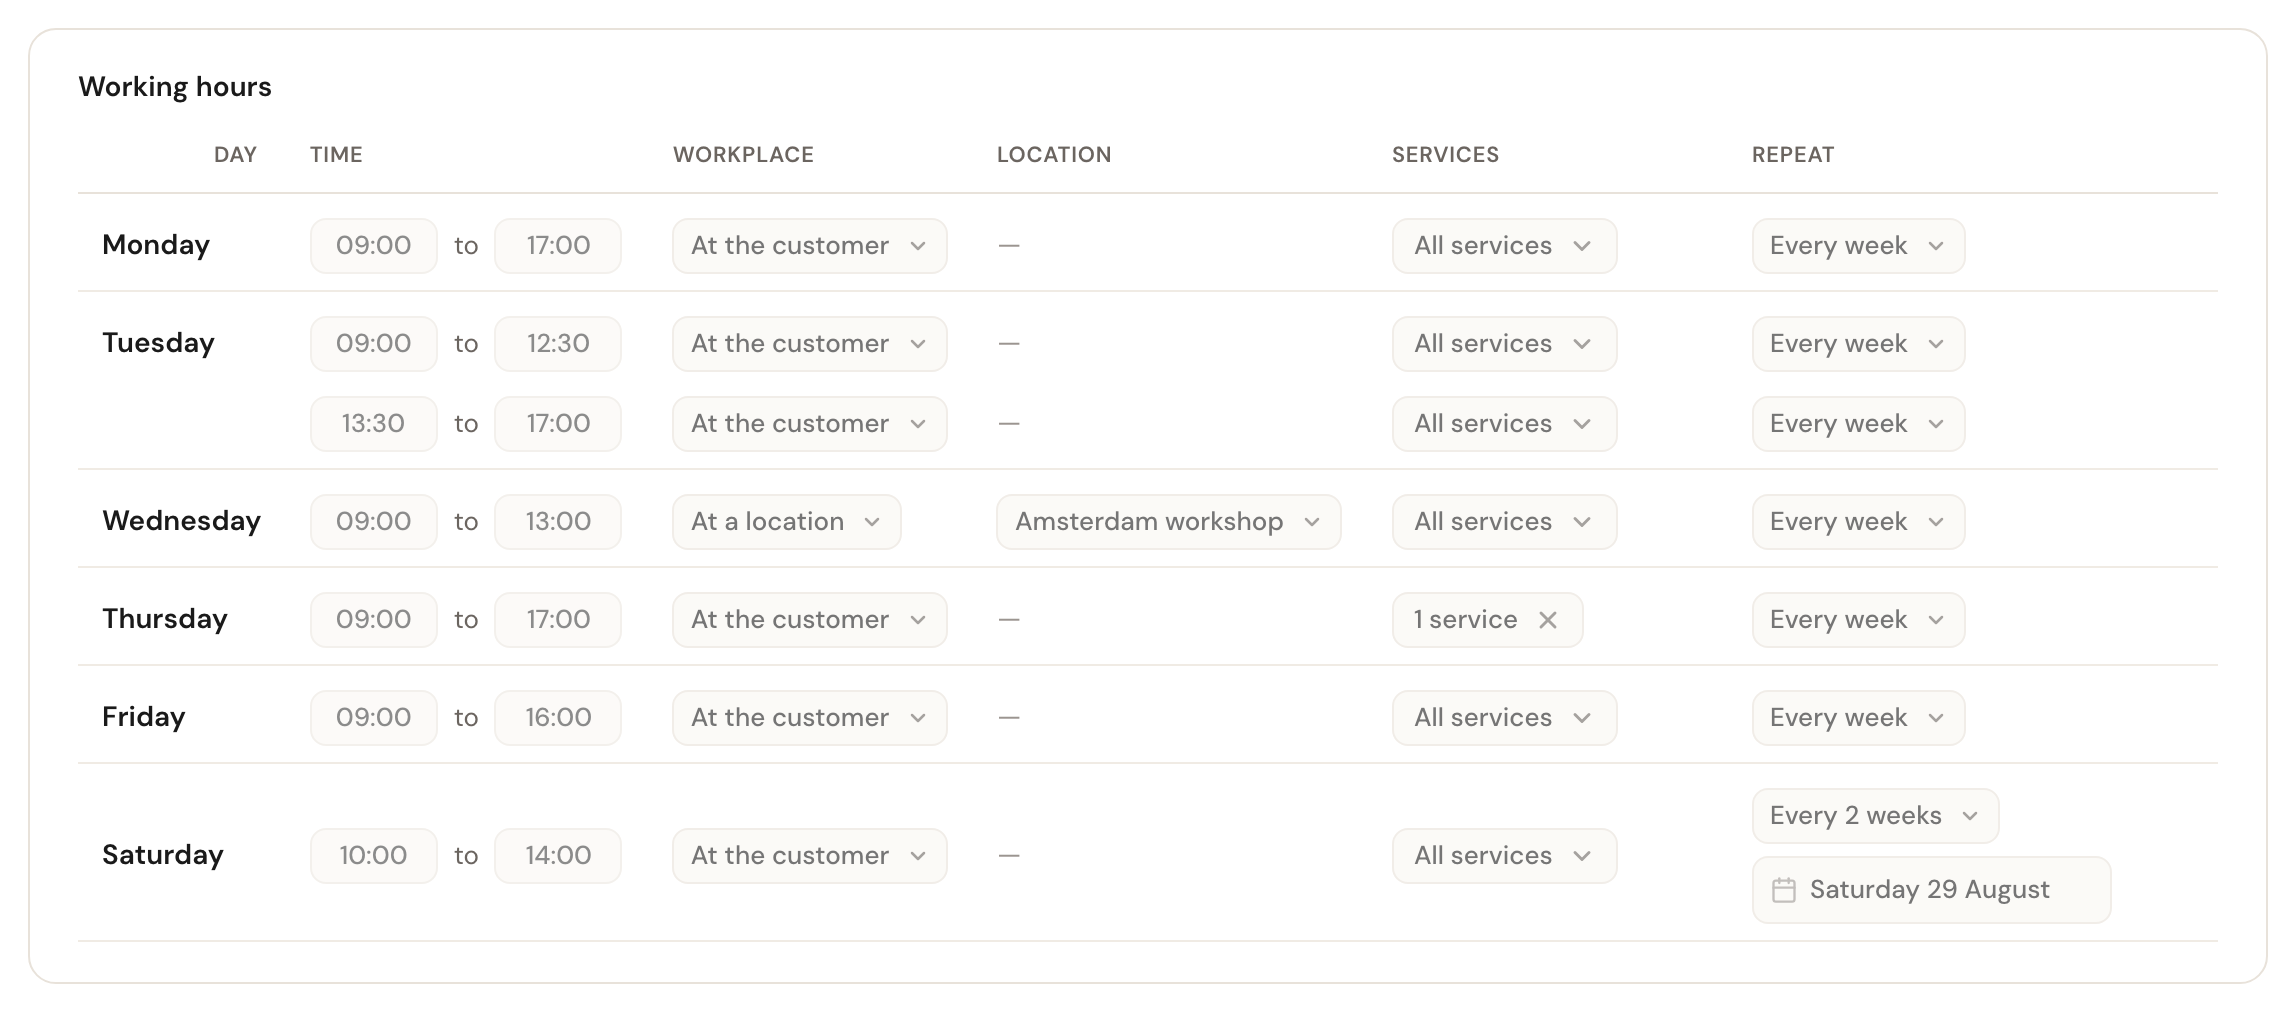
Click Edit at the top right to change it; the closed days then appear too, so you can switch them on.
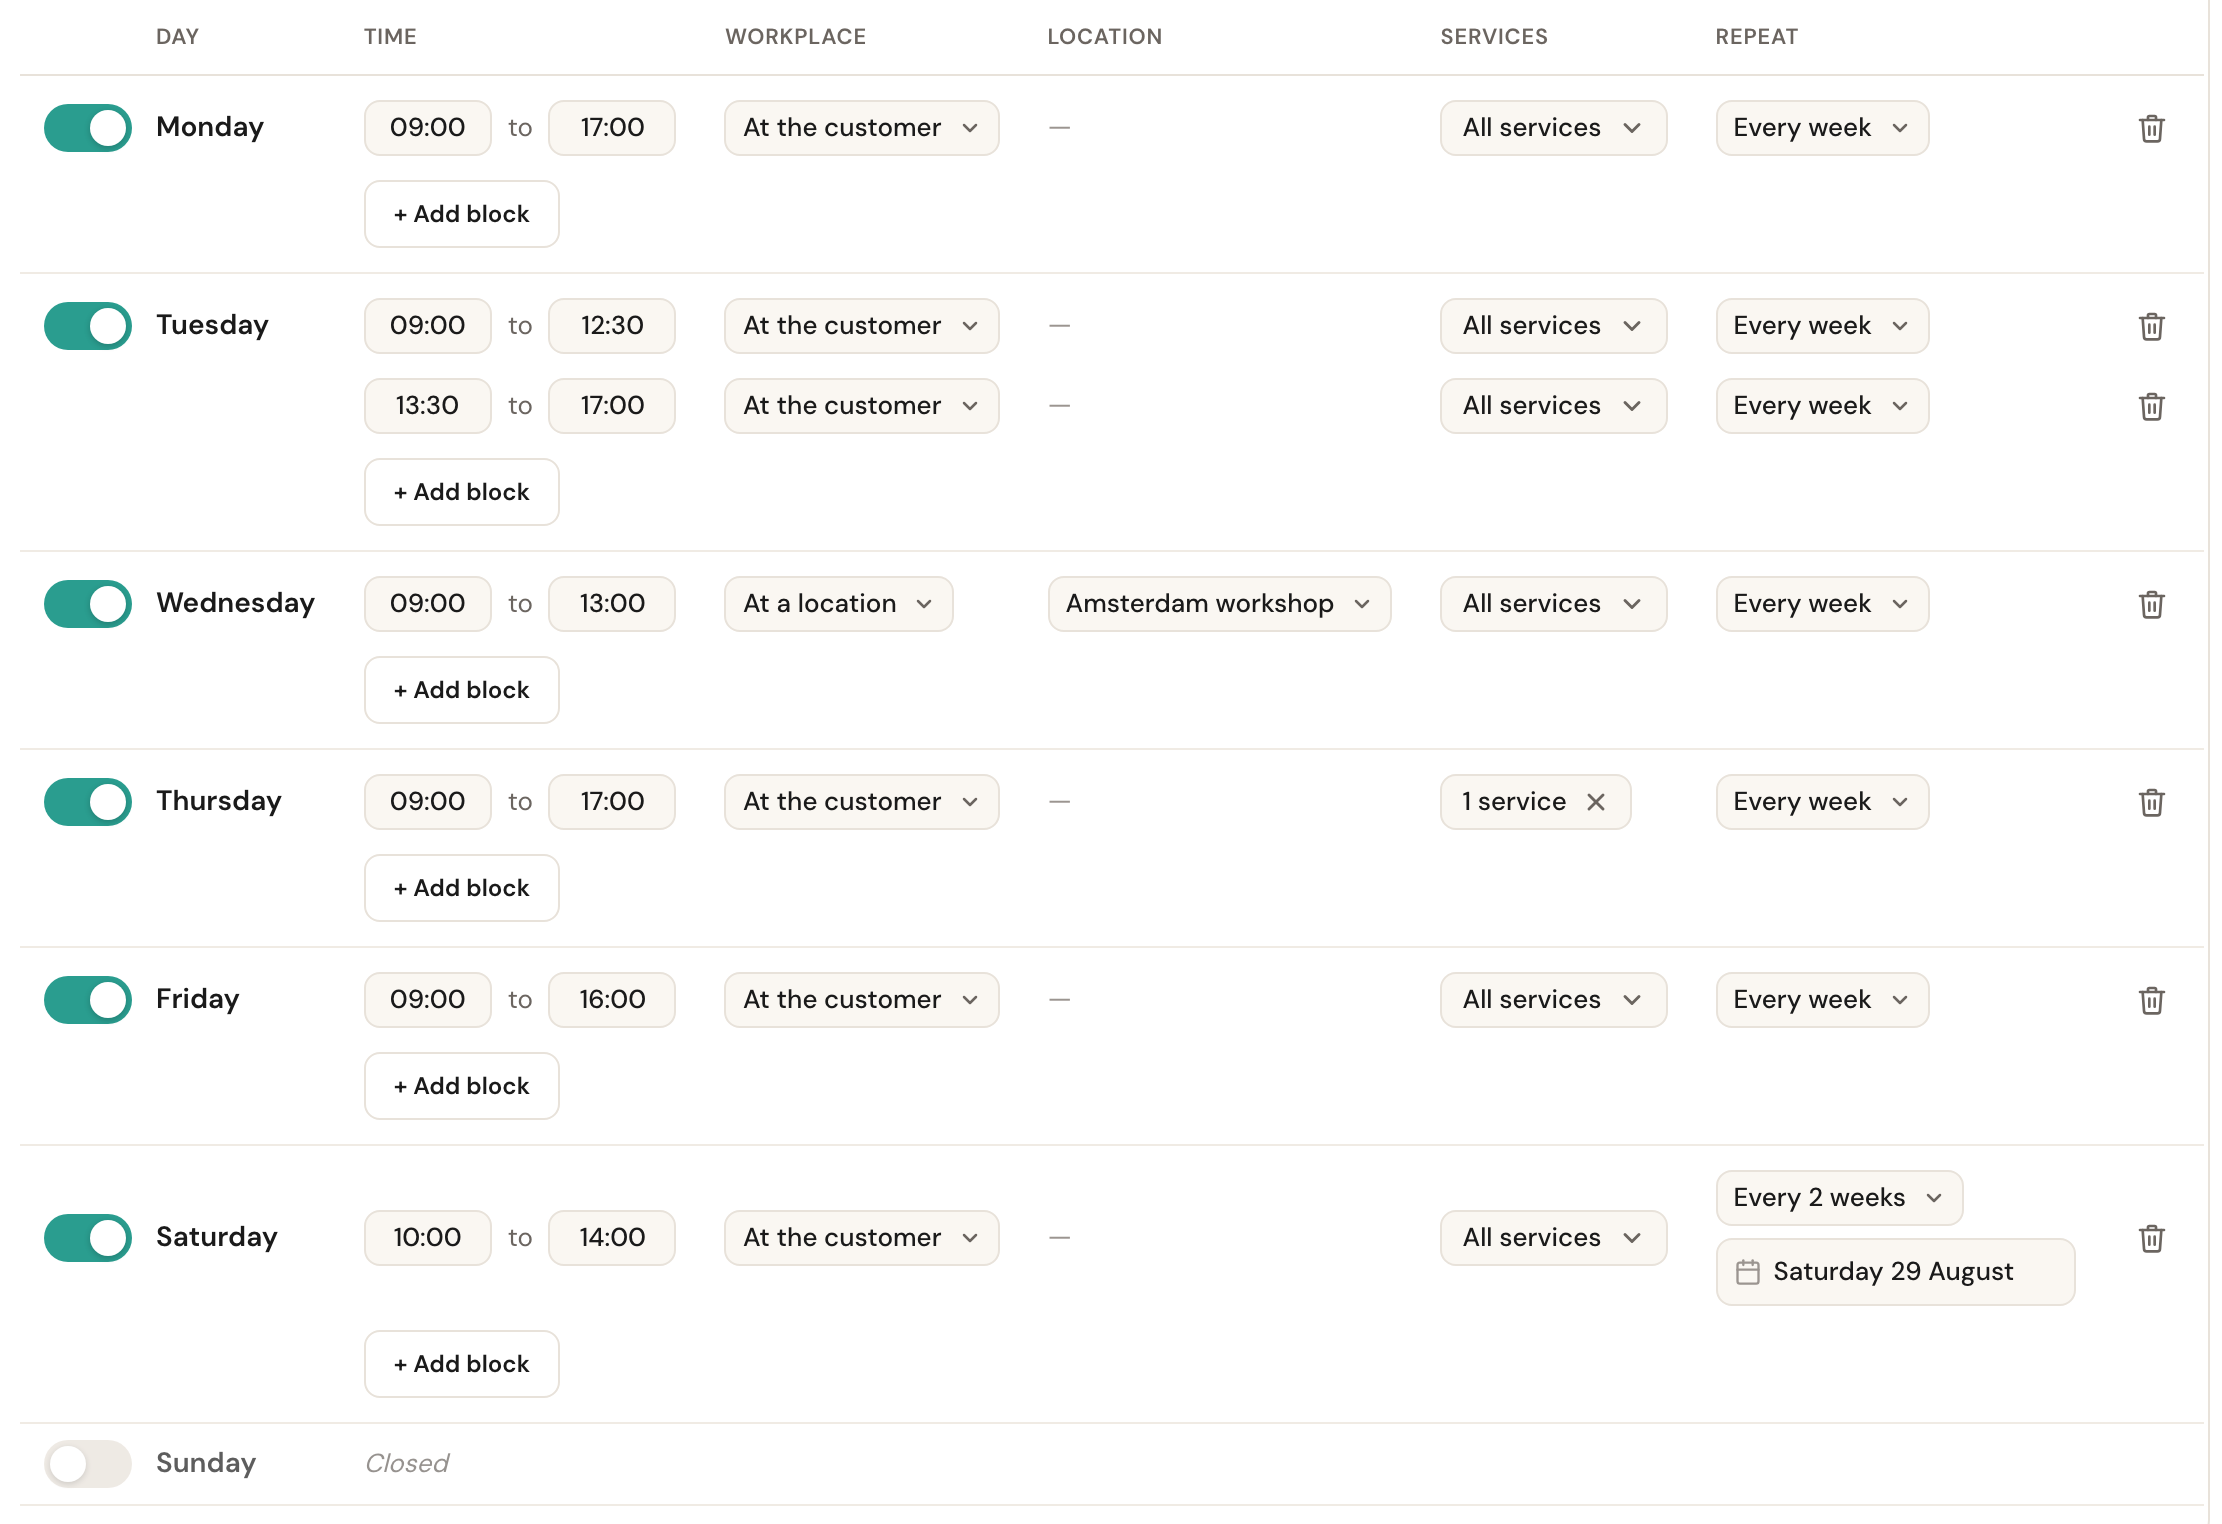
Each row is a block: one continuous stretch of working time. A day may hold several blocks, and that is exactly how you make a break — one block up to the break, one after it. The gap between them is simply not bookable.
Switch a day on or off
The toggle to the left of the day name. Off means Closed: no blocks, so nothing bookable that day. Switch a day on and you immediately get one block from 09:00 to 17:00 to adjust.
Set the times
Start and end time per block. Want a lunch break? Add a second block on the same day with + Add block and leave a gap between them.
Choose the workplace
Per block, not per person — someone can work at a location in the morning and visit customers in the afternoon.

Save
Save at the top right. The page returns to read-only with the saved week on screen. Cancel fetches the saved version back and discards your changes.
The columns
Workplace
Default: At the customerWhere this block is worked: At the customer, At a location, or Both.
This decides which appointments fit in the block. An appointment type that only takes place at a location cannot be booked into a block set to At the customer — not even when the times line up.
Location
Required for at a locationAppears as soon as the workplace is At a location or Both. Pick which branch this block is worked at.
Without a location you cannot save. If you have no locations yet, the location-based workplaces cannot be chosen at all — with the hint add a location first. Create one under Company → Locations.
Services
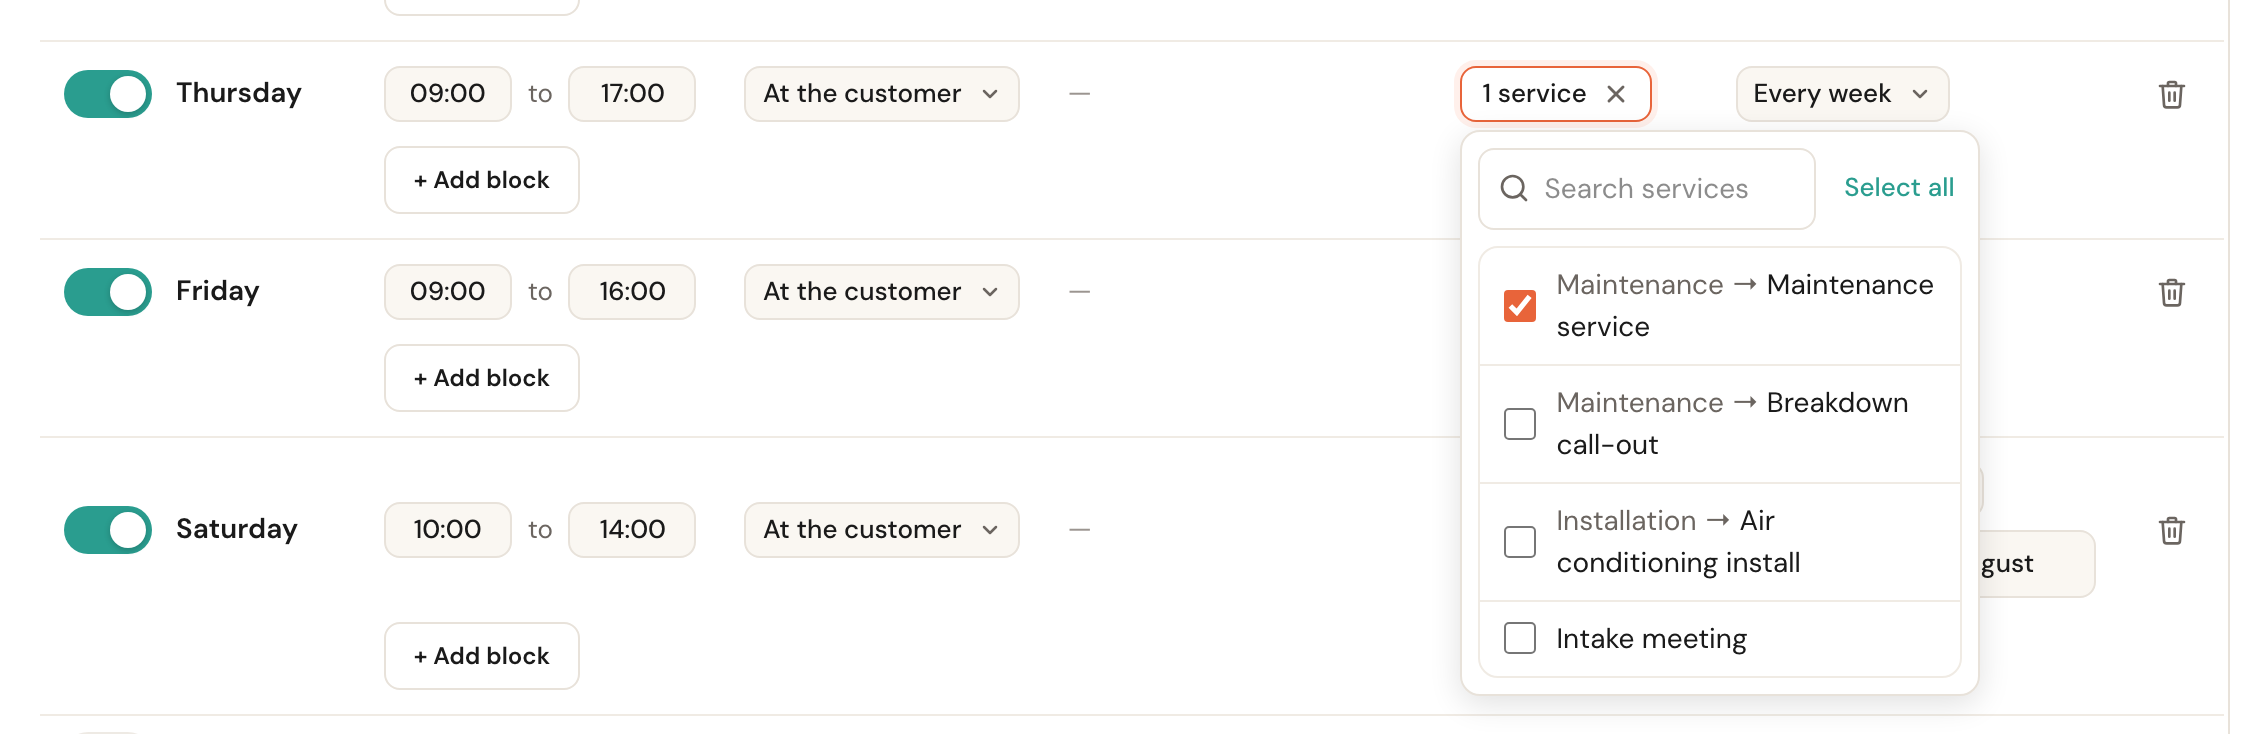
Default: All servicesBy default a block is available for everything this colleague may perform. You can restrict it to certain appointment types.
Useful when someone only does particular work at fixed moments — intakes on Thursday mornings, say. As long as you pick nothing it reads All services and you never have to think about it.
Repeat
Default: Every weekA block can also come back every other week: every 2, 3 or 4 weeks. Pick more than one week and a date appears next to it.
That date is the reference point: the block applies on that day, and every N weeks after it. Without it Schedulinq would not know which Saturday you mean.

The trap: restricted services
This is the most common cause of "my customer sees no times even though everything looks right".
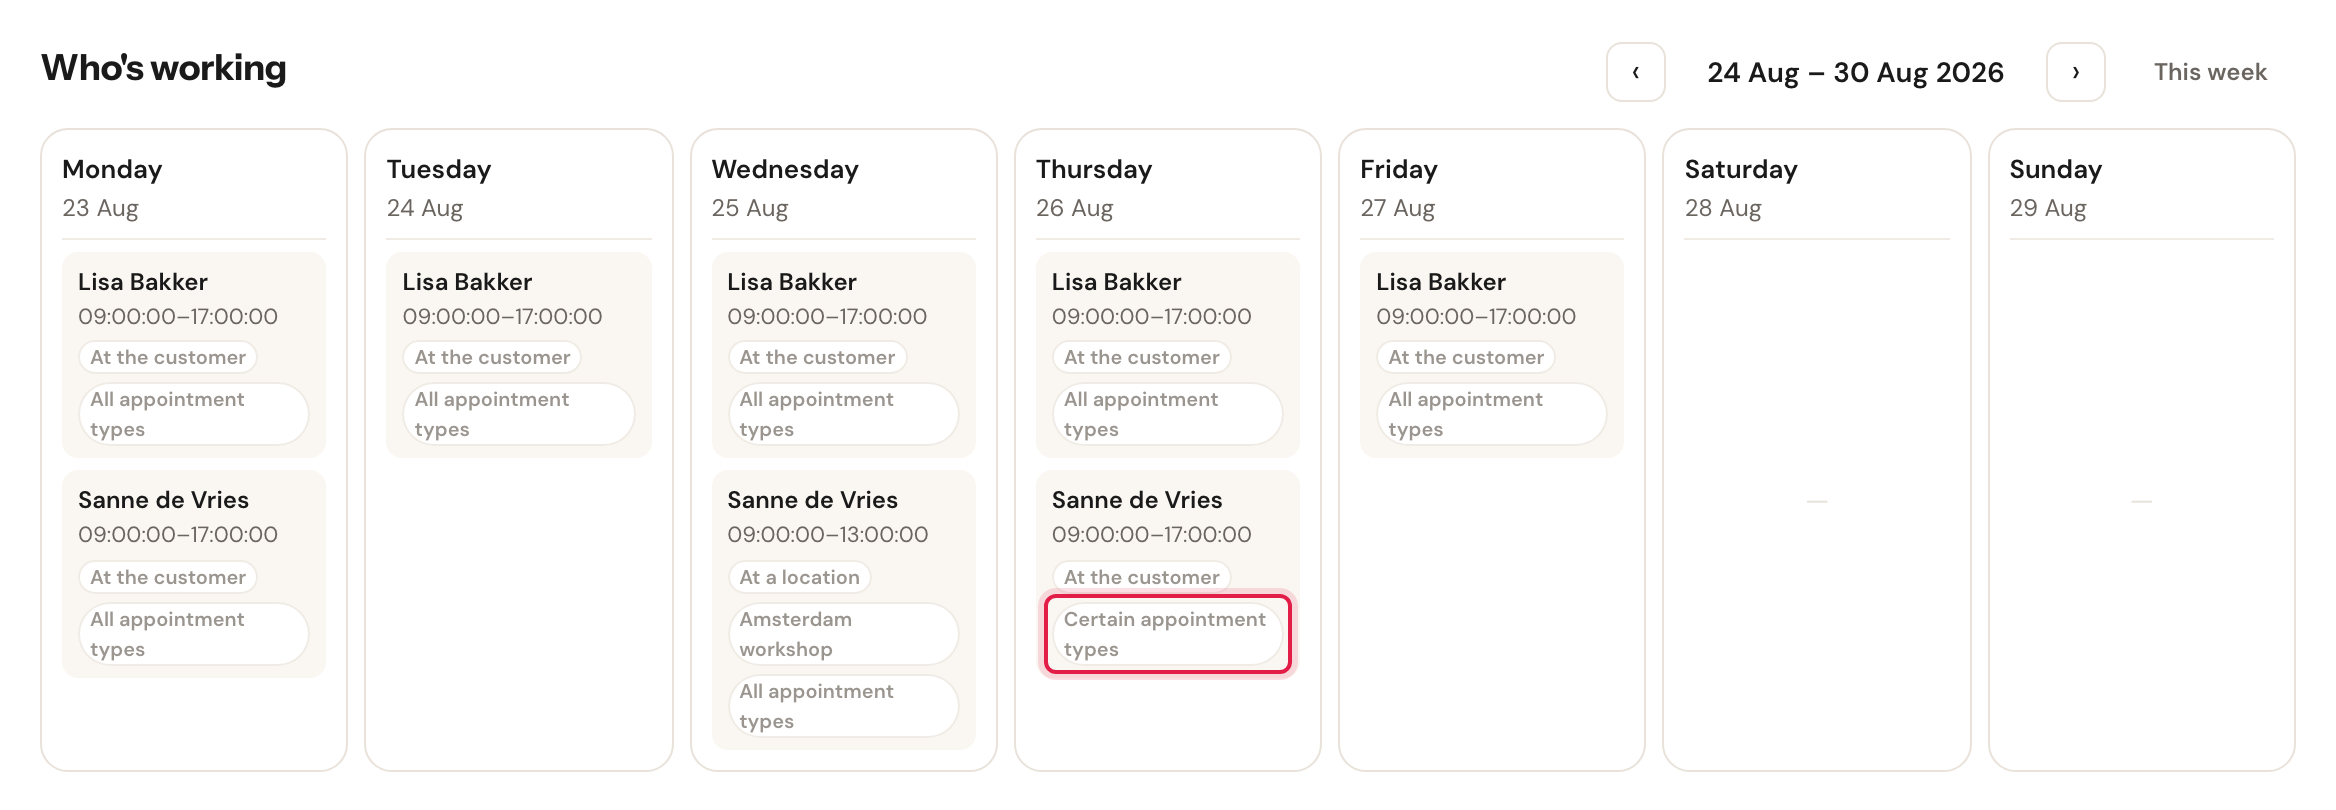
A block restricted to certain appointment types provides availability for those types only. If someone's entire week is restricted to Maintenance service, that same person is invisible for every other appointment type — with a full working week on screen.
You spot it in the Services column: anything other than All services — 1 service, for instance — means that block is restricted. Click it to see which.
In the week roster at the top, such a block is labelled Certain appointment types instead of All appointment types. Hover it to see the names.
If no times appear at all, walk the whole chain in Duration and availability or in the go-live checklist.
Working hours that change later
When someone's schedule changes from a given date — a new contract, one day less from September — you do not have to wait for that day. Periods let you record now what applies later.

Click New period
Visible in edit mode, to the right of the period bar.
Pick the start date
The current working hours run until that date; from that date the new ones apply.

Adjust the new period
The new period starts as a copy of the old one, so you only change what is actually different. Switch between periods with the buttons in the bar; you always edit the period that is selected.
Time off and extra availability
Working hours describe the normal week. Exceptions — a holiday, a public holiday, or an extra Saturday — are recorded under Exceptions, at the bottom of the same schedule page. Those override the week without you having to change it.
Frequently asked questions
A colleague is listed on the appointment type but produces no times. Check in this order: do they have working hours on the days you expect, is the block set to the right workplace, and is the block restricted to certain appointment types?
Can I change my own working hours? Yes. You are in the same list; the page is then called My working hours.
What happens to appointments already booked if I shorten working hours? They stay. Working hours only decide which new times a customer is offered.
Can I switch every day off? Yes, that is allowed — for a long absence, for example. You then get a message that no working days are set in this period.