
Using the calendar
Reading and working the calendar — views, colours, opening or dragging an appointment, and viewing a colleague's calendar.
The calendar is the screen you will spend most of your time on. It shows what is scheduled, when you work and where there is room left. This guide is about reading and operating the calendar; booking a new appointment is covered in Schedule an appointment.
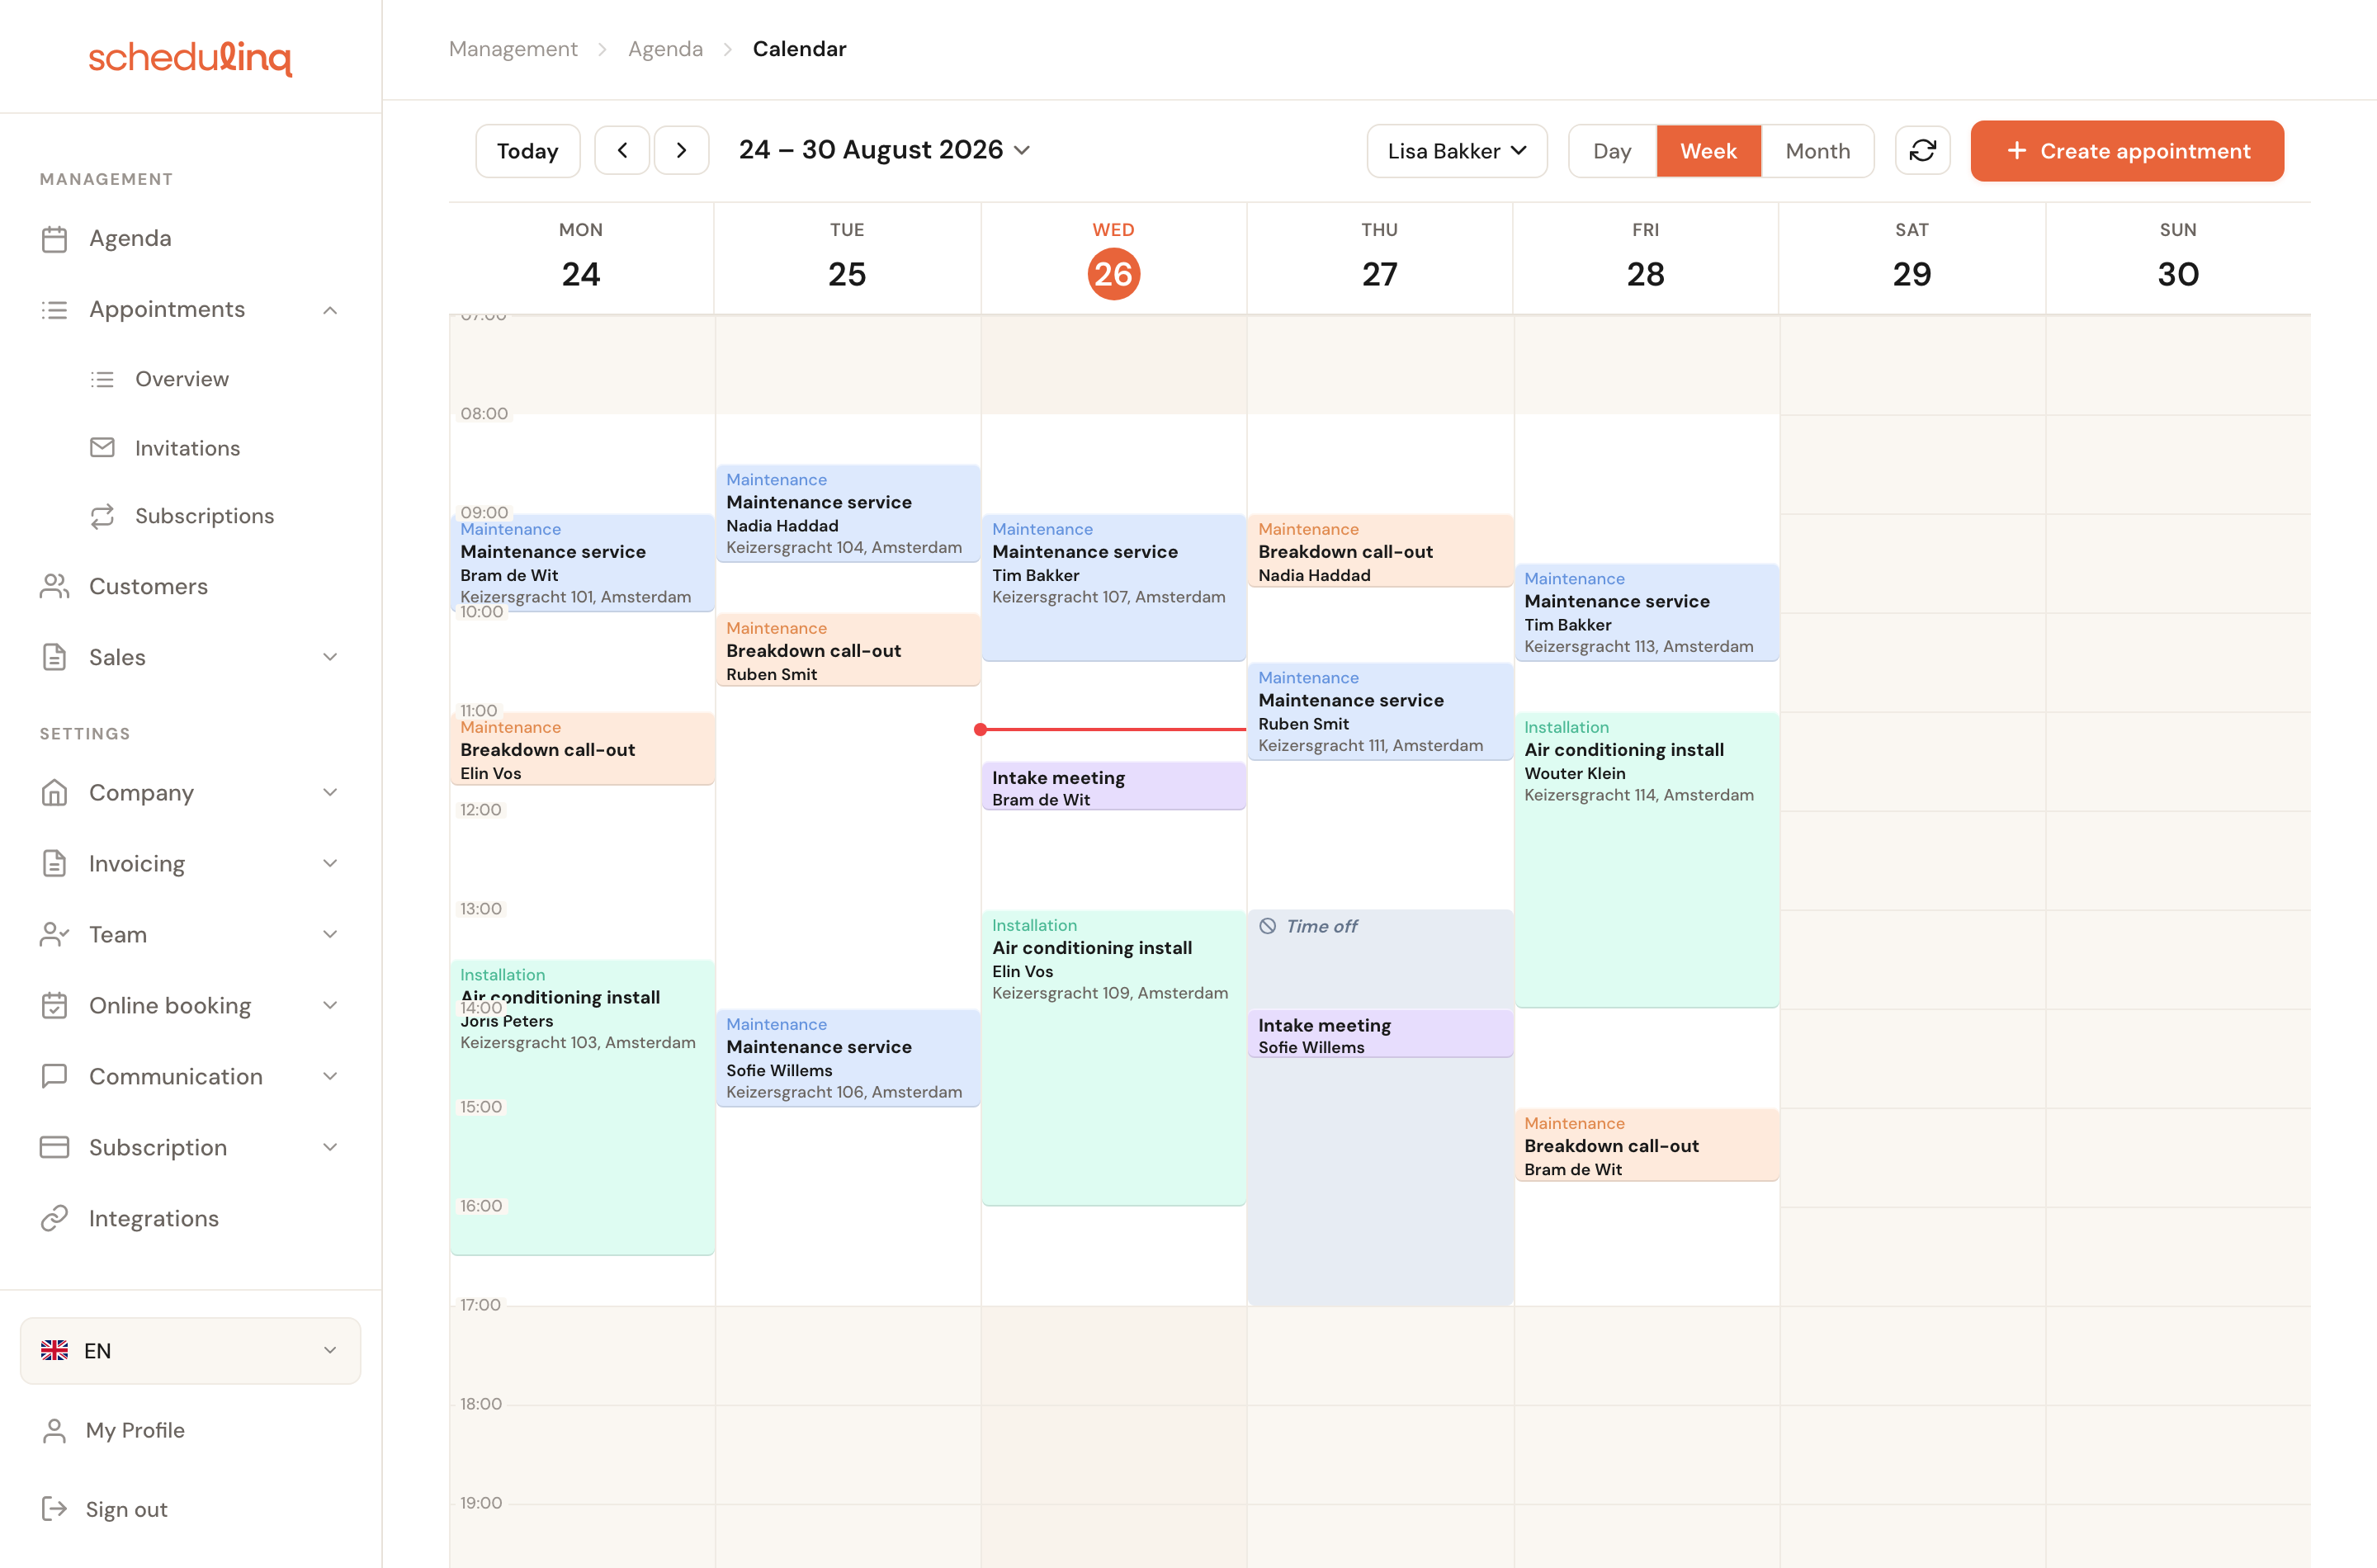
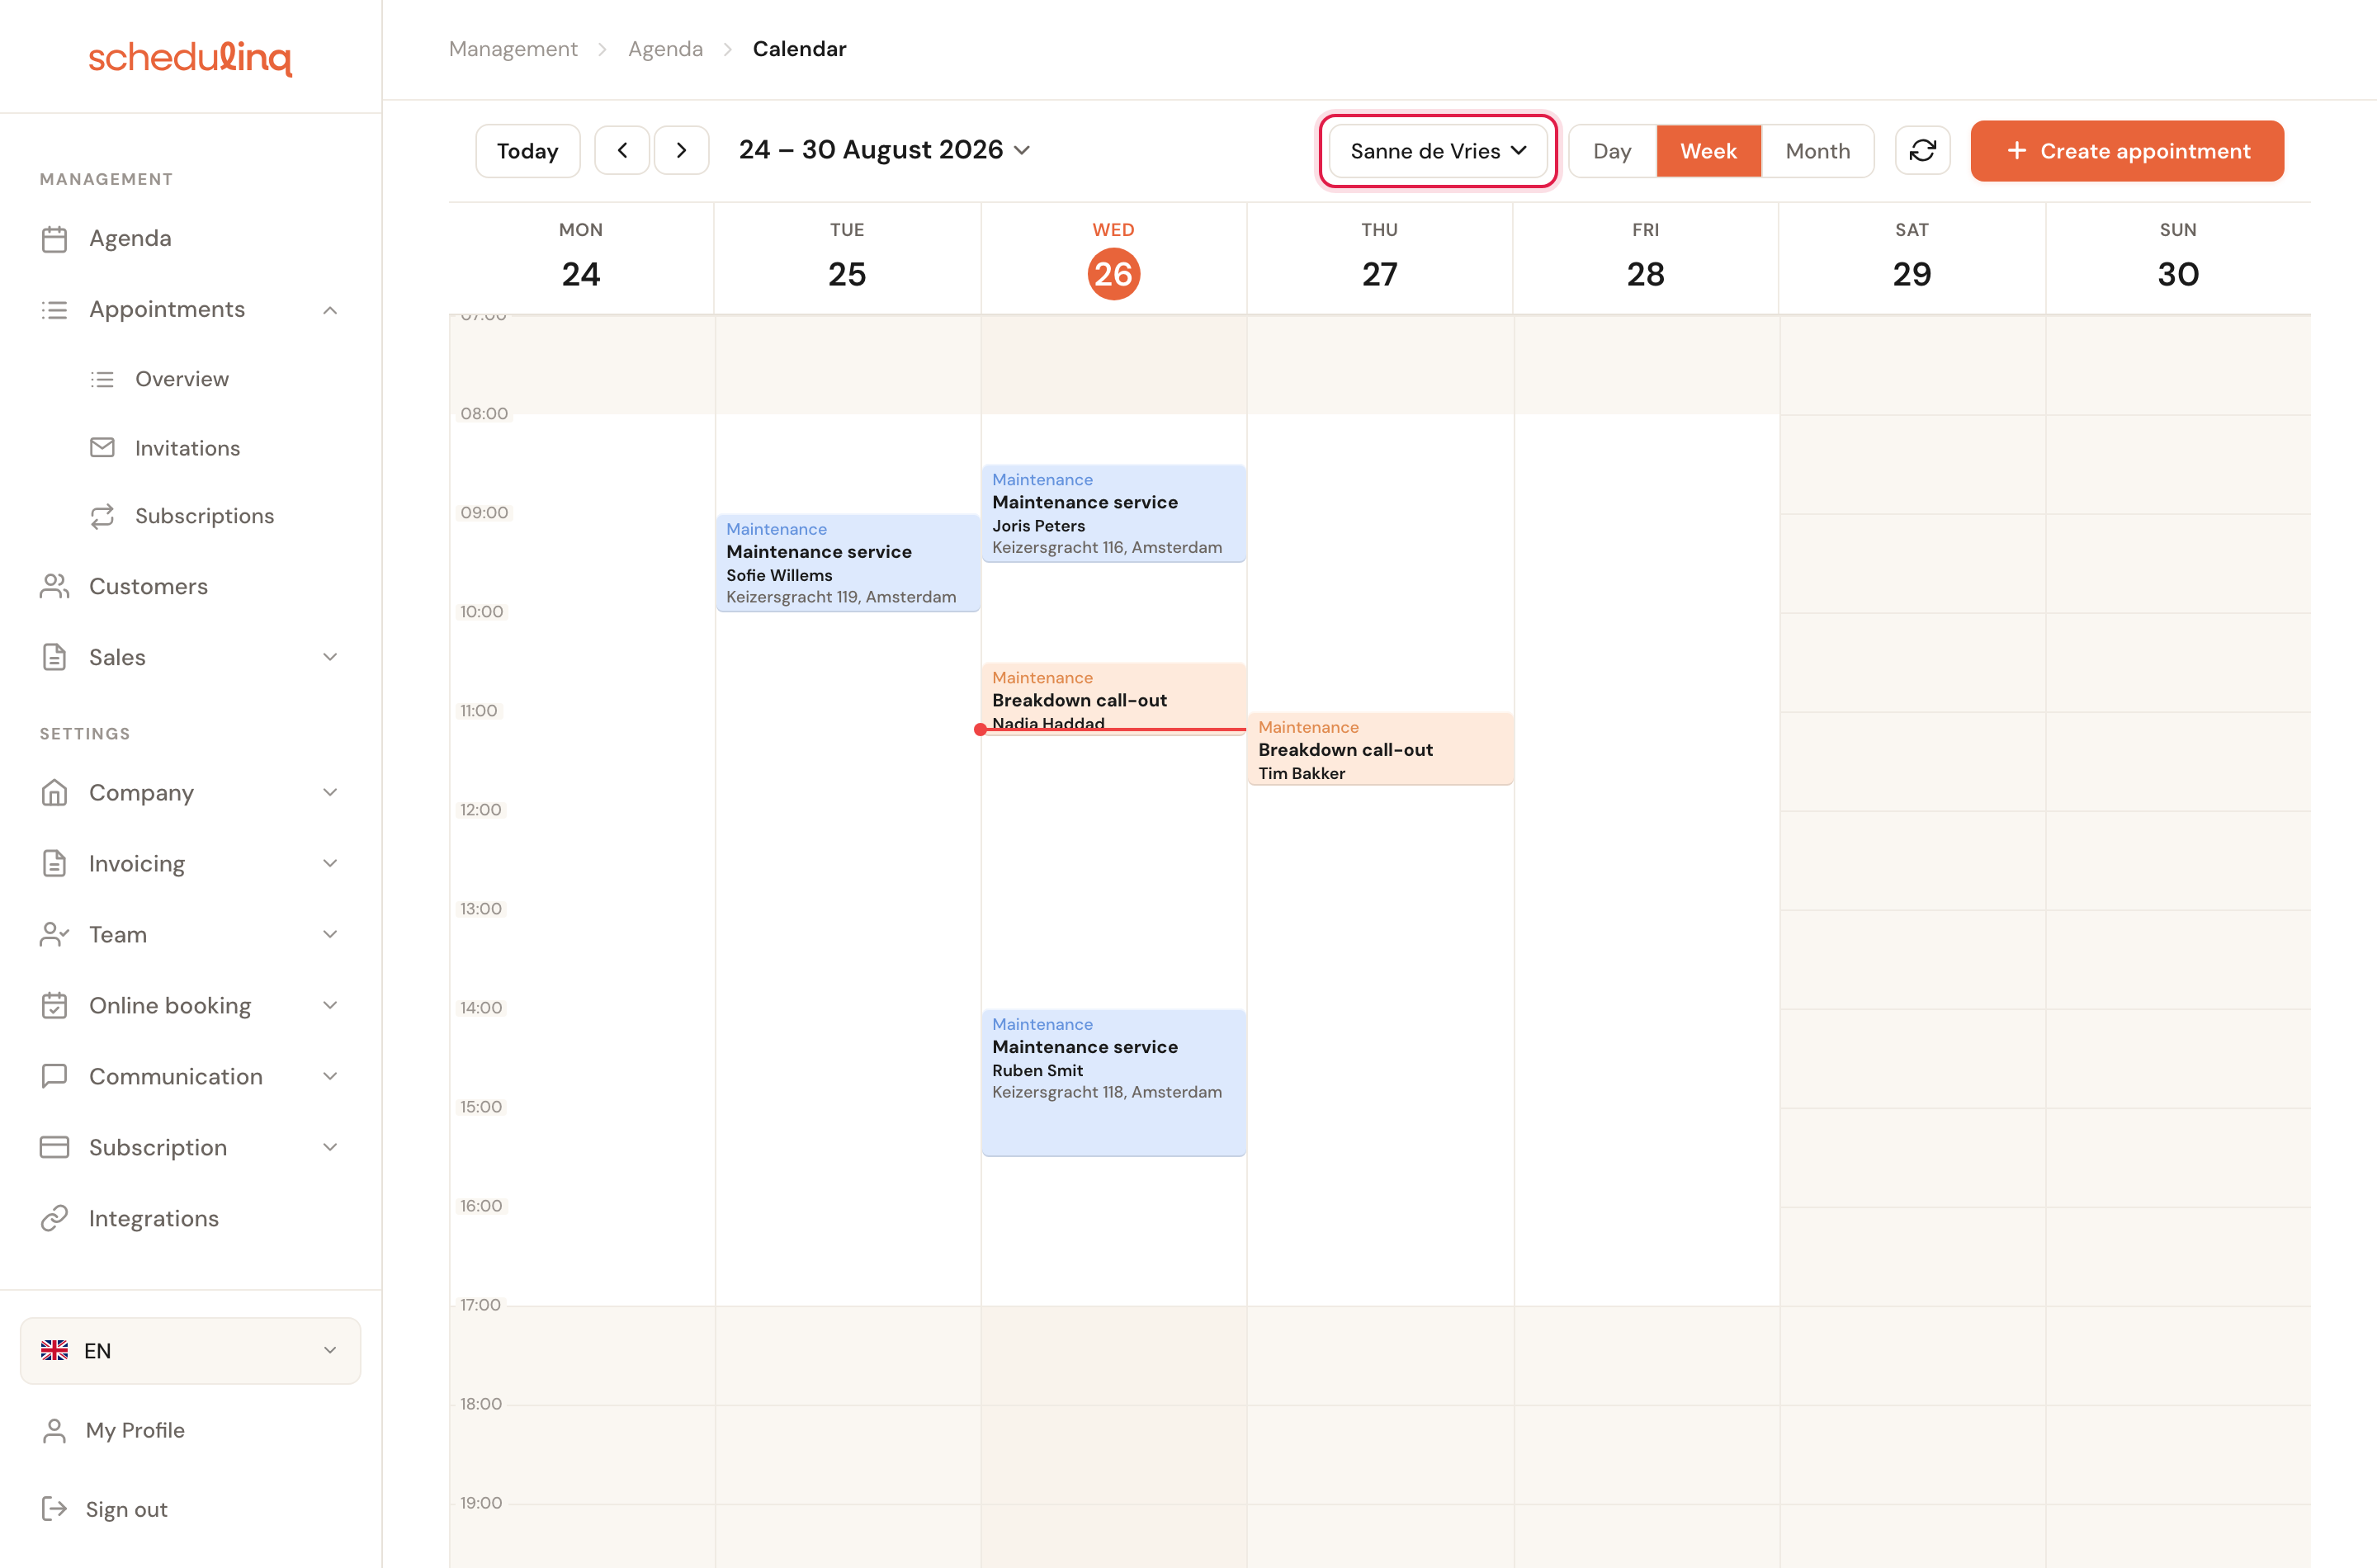
The week view: today is marked in orange, the red line is the current time, and the pale bands show when you work.
The toolbar

- Today jumps back to the current day, whichever view you are in.
- The arrows move one day, week or month forward or back, depending on your view. Click the date beside them to open a mini calendar and jump straight to another date.
- The team member whose calendar you are looking at.
- Day, Week or Month.
Two more buttons sit on the right: the circular arrows fetch events from your connected calendar (Google or Outlook), and Create appointment opens the form for a new appointment.
The three views
Week is the default on a computer and strikes the best balance: you see your whole working week without zooming.
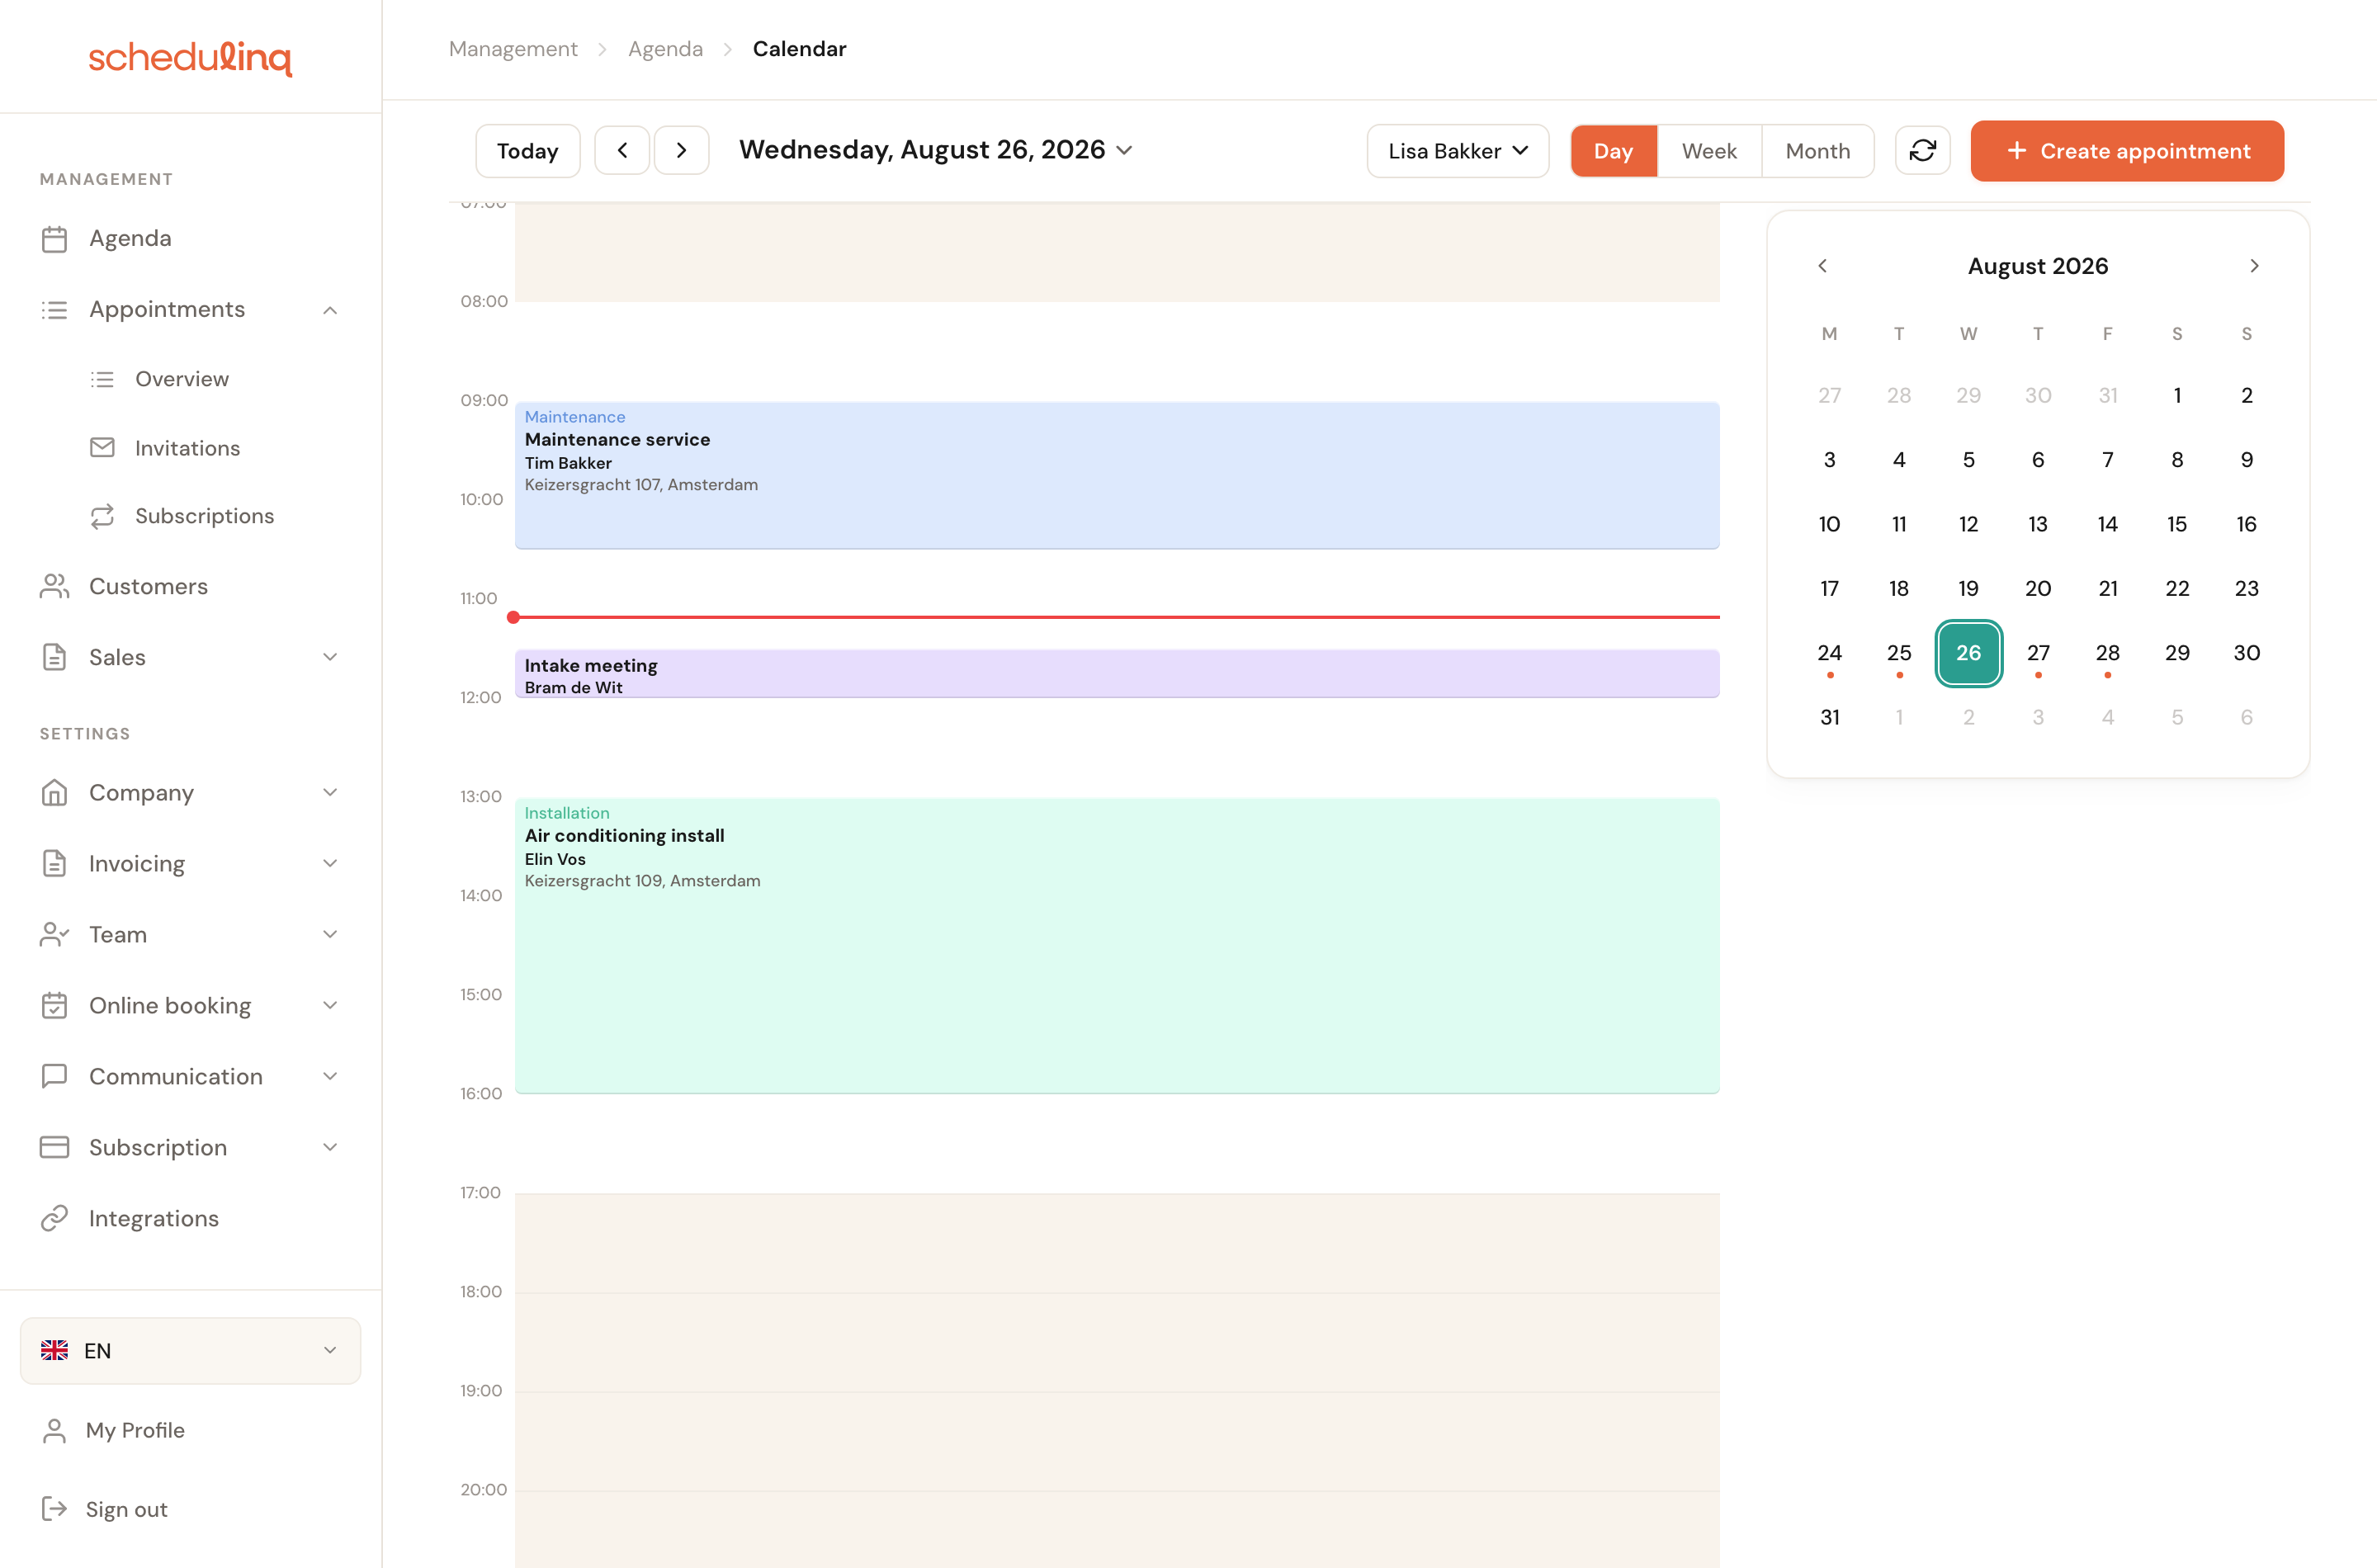
Day shows one day across the full width, with a mini calendar beside it. Useful when a day is packed and the blocks in week view get too narrow. The dots under the dates in that mini calendar show which days have something scheduled.
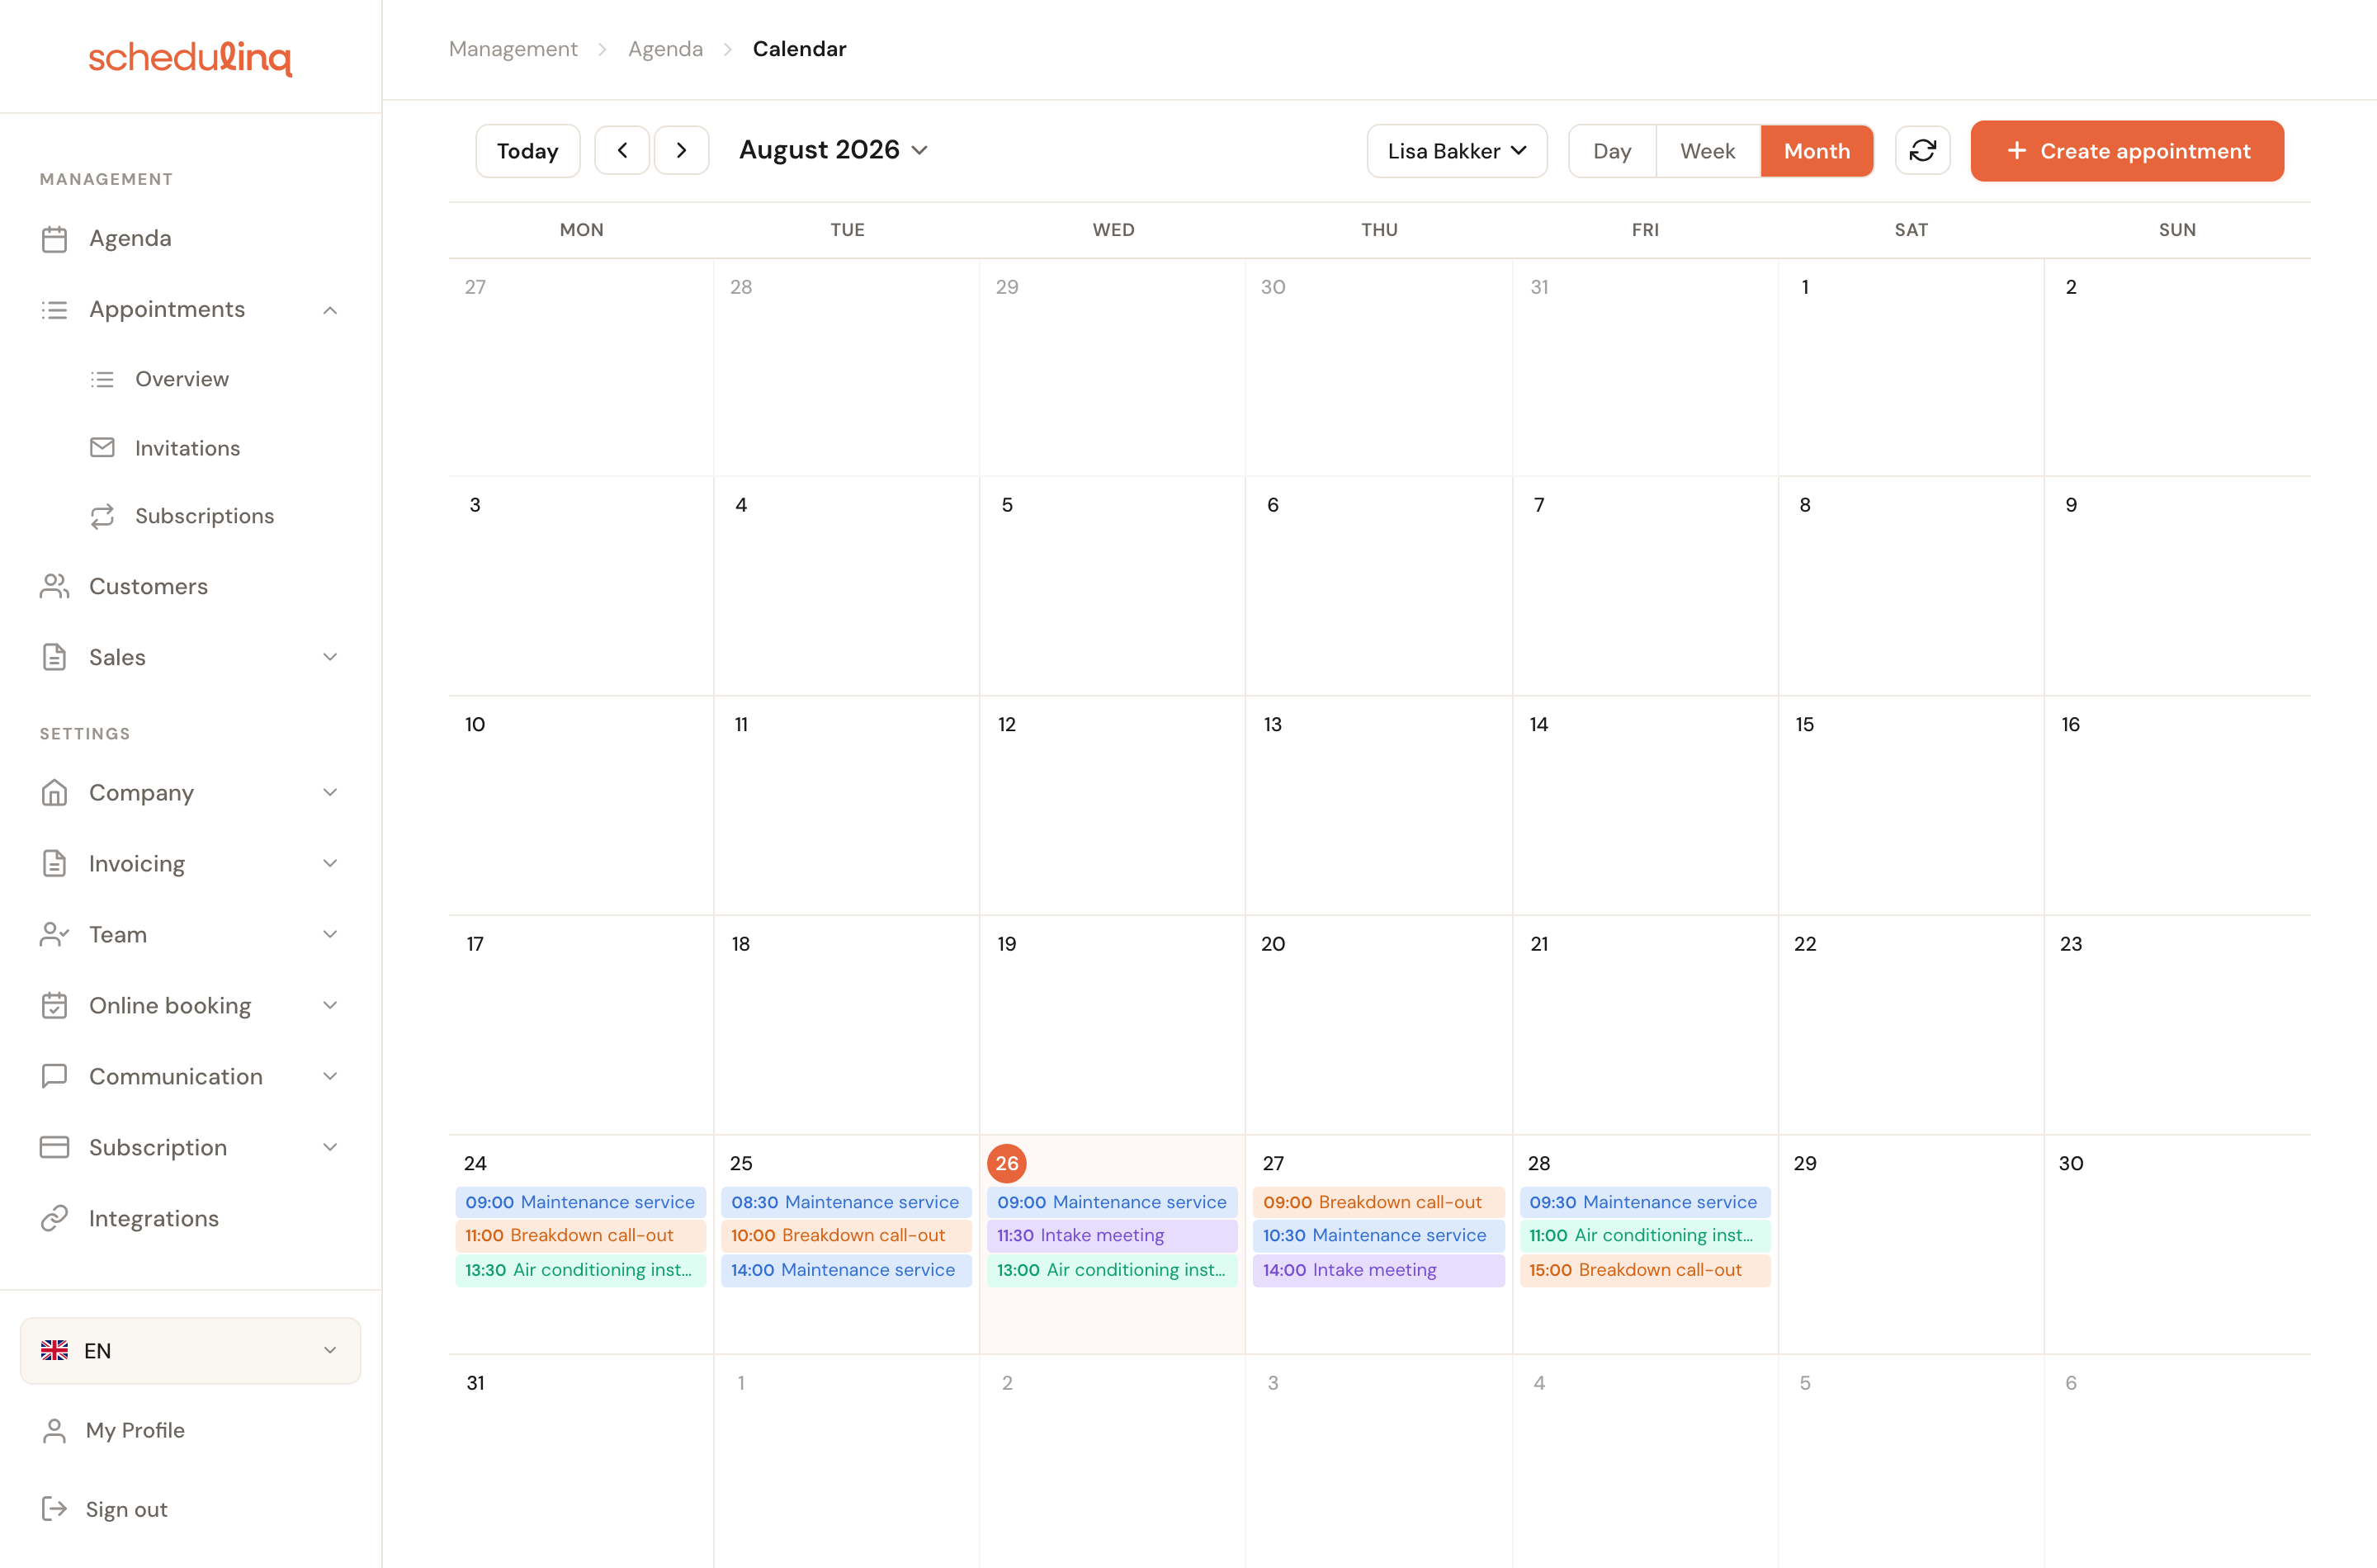
Month gives you overview rather than detail: one line per appointment per day, with start time and name. When a day holds more appointments than fit, a "+2 more" appears at the bottom of that day.
Reading an appointment
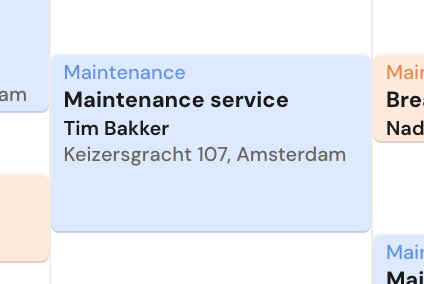
A block shows, from top to bottom: the category, the appointment type, the customer and the address. The longer the appointment, the taller the block and the more fits inside — on a short block only the name survives.
The colour comes from the appointment type. It is the colour you set on the appointment type itself, see Create an appointment type. If you did not pick one, the type is assigned a fixed colour automatically, so the same type always keeps the same colour.
A small icon with a number such as 2/3 means this appointment is part of a single booking containing several appointments.
Besides the appointments themselves, the calendar shows two things you do not put there yourself: the pale bands behind the columns are your working hours from the roster, and a grey block marked Off is time off. You set both under Team → Schedule.
Opening, moving and creating
- Click an appointment to open it. That is where you change everything: time, customer, type and notes.
- Drag an appointment to another moment to reschedule it. As soon as you drop it, Schedulinq asks whether the customer should be told about the new time — you have to deliberately choose send or don't send.
- Click an empty time slot to start a new appointment at that moment. The date and time are filled in for you.
A colleague's calendar
If you are an administrator, or have the right to see all appointments, a name appears in the toolbar. Click it and pick a colleague to view their calendar.
Sharing a calendar view
The calendar puts your view, date and chosen colleague in the web address:
/agenda?view=week&date=2026-08-26&user=…
That means you can save or forward a link to a specific week — whoever opens it sees exactly the same week in the same view. Do note that the link always contains a specific team member: forward it to a colleague and they will see your calendar, not their own.