
The appointments overview
Search, filter and manage every appointment in one list — and delete several at once.
The calendar answers "what does my day look like". This screen answers a different question: "where was that one appointment again?". You'll find it under Appointments → Overview.
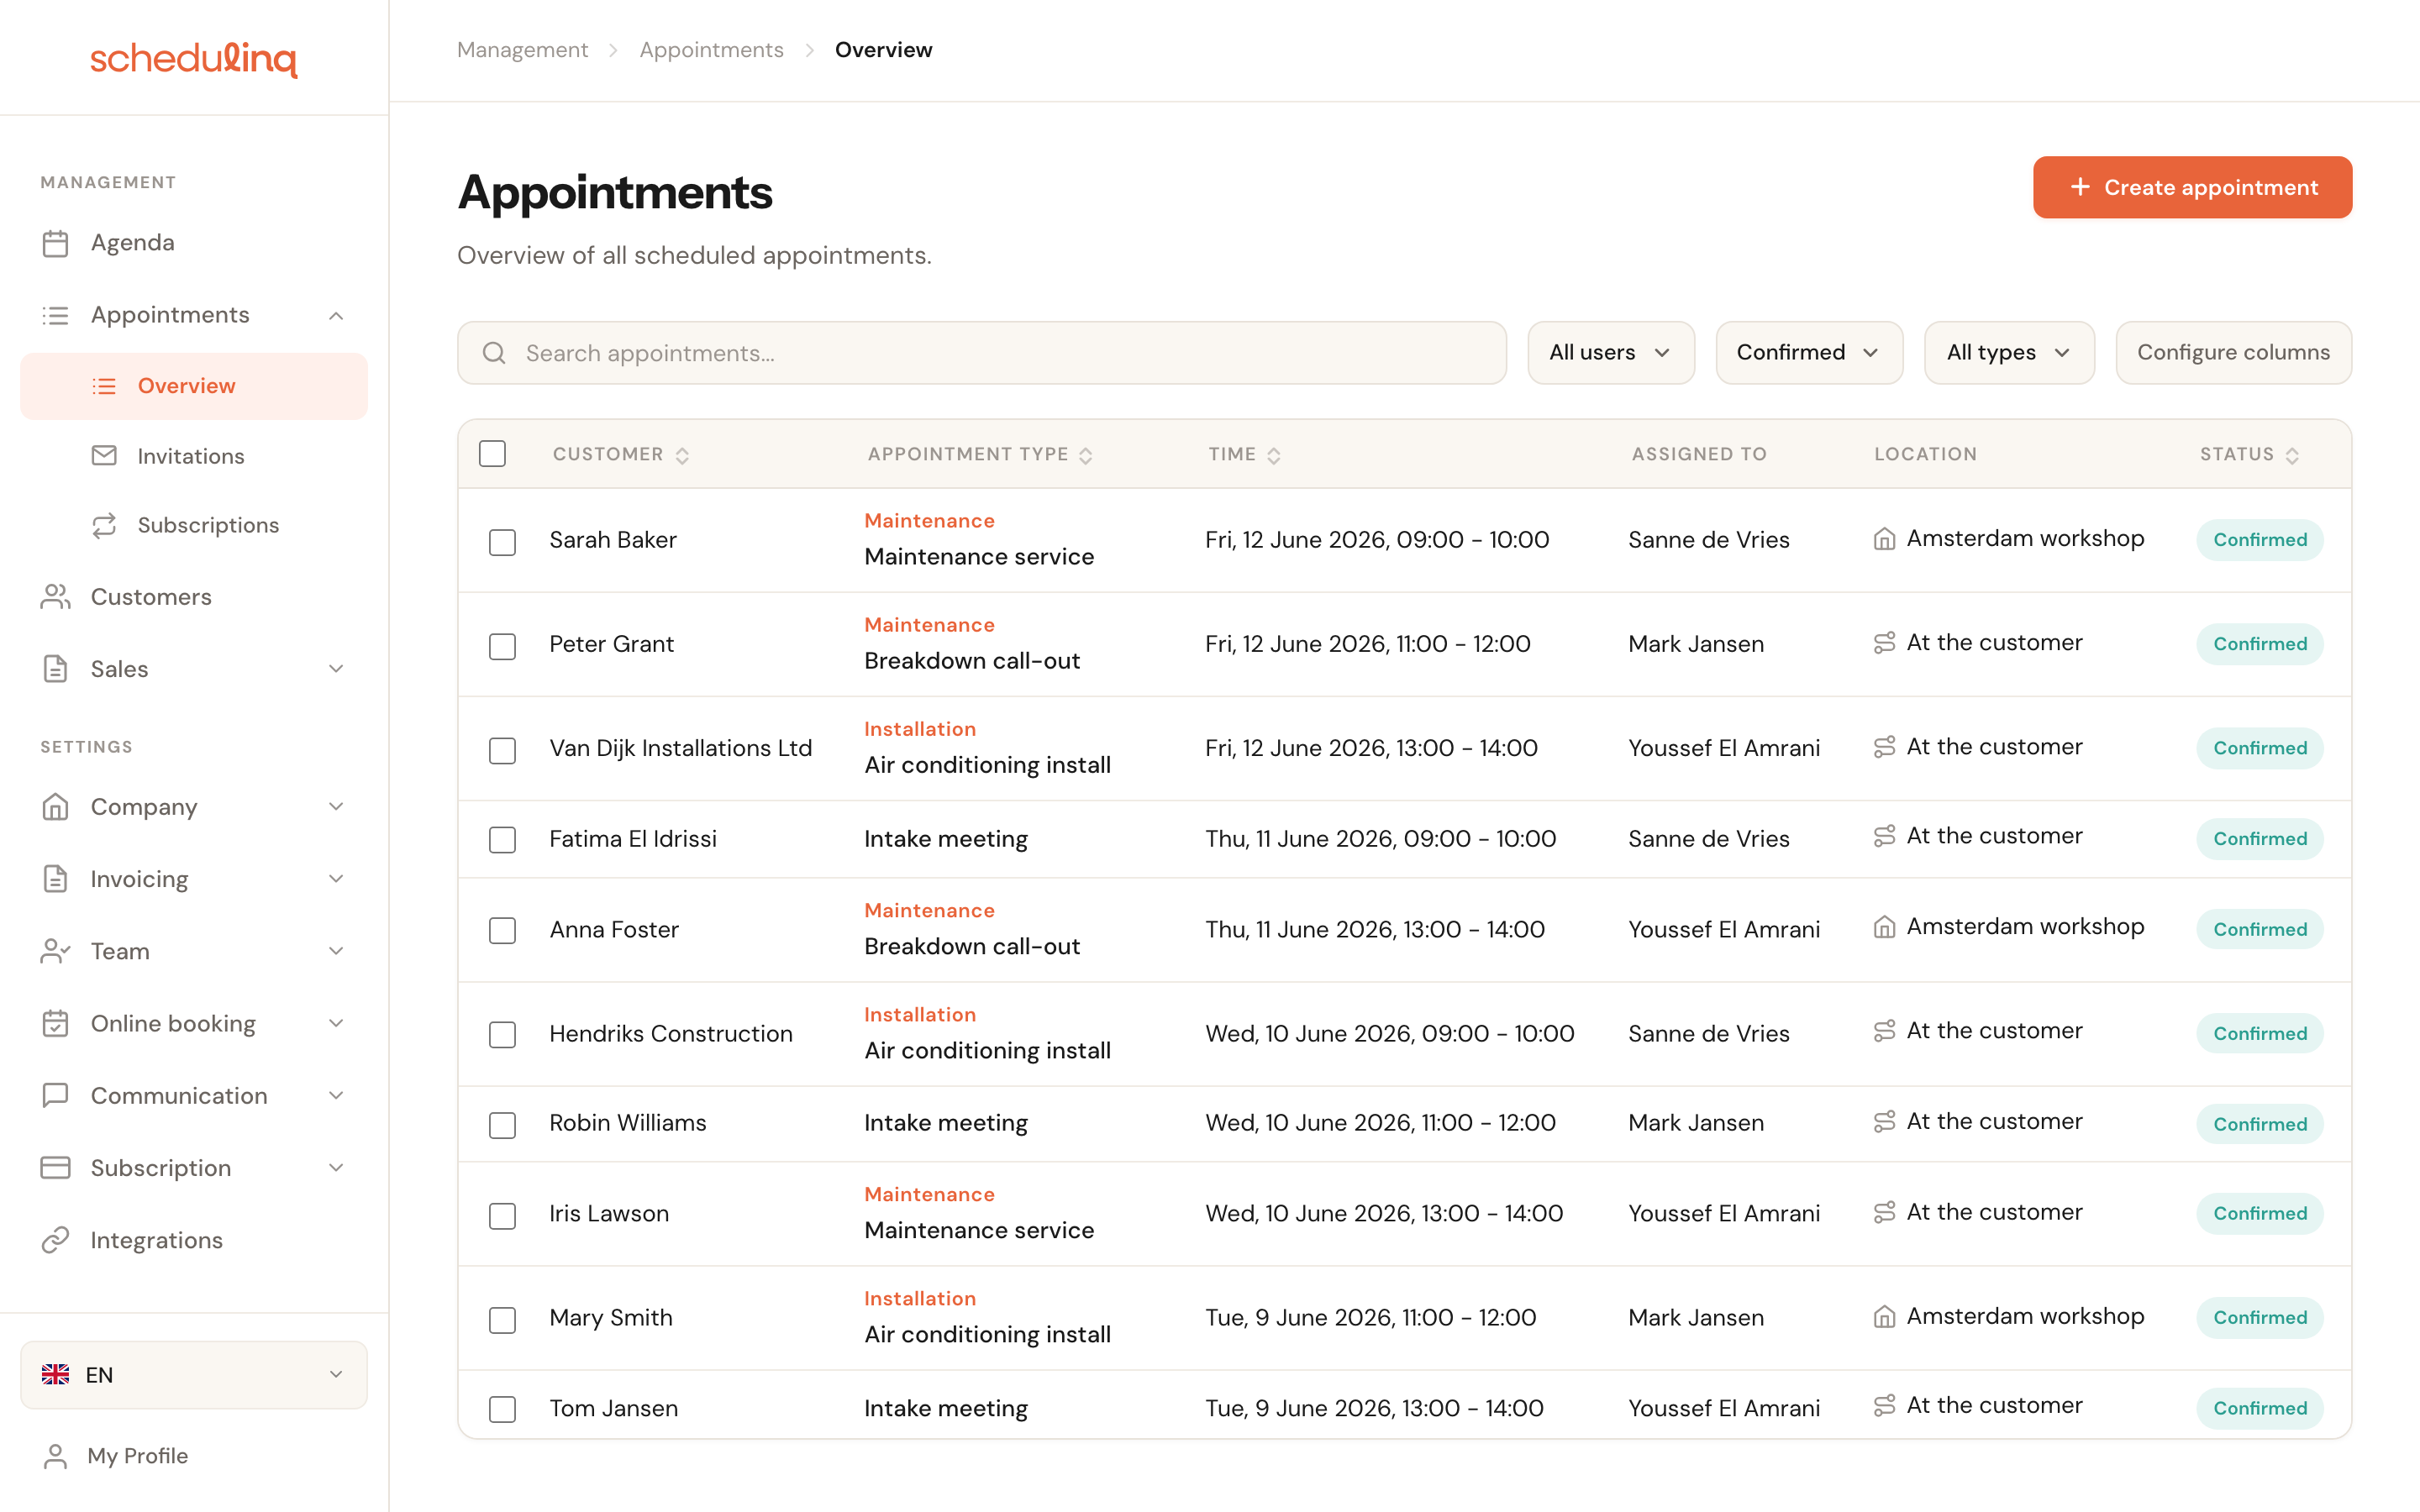
Each row is one appointment. Click it to open it.
The toolbar

- Search by customer name, company name or appointment type.
- Staff member — only shown if you may see your whole team's appointments. If you don't see this filter, the list shows only your own.
- Status — Confirmed, Completed, Cancelled, or everything.
- Appointment type.
- Configure columns — administrators only.
Searching
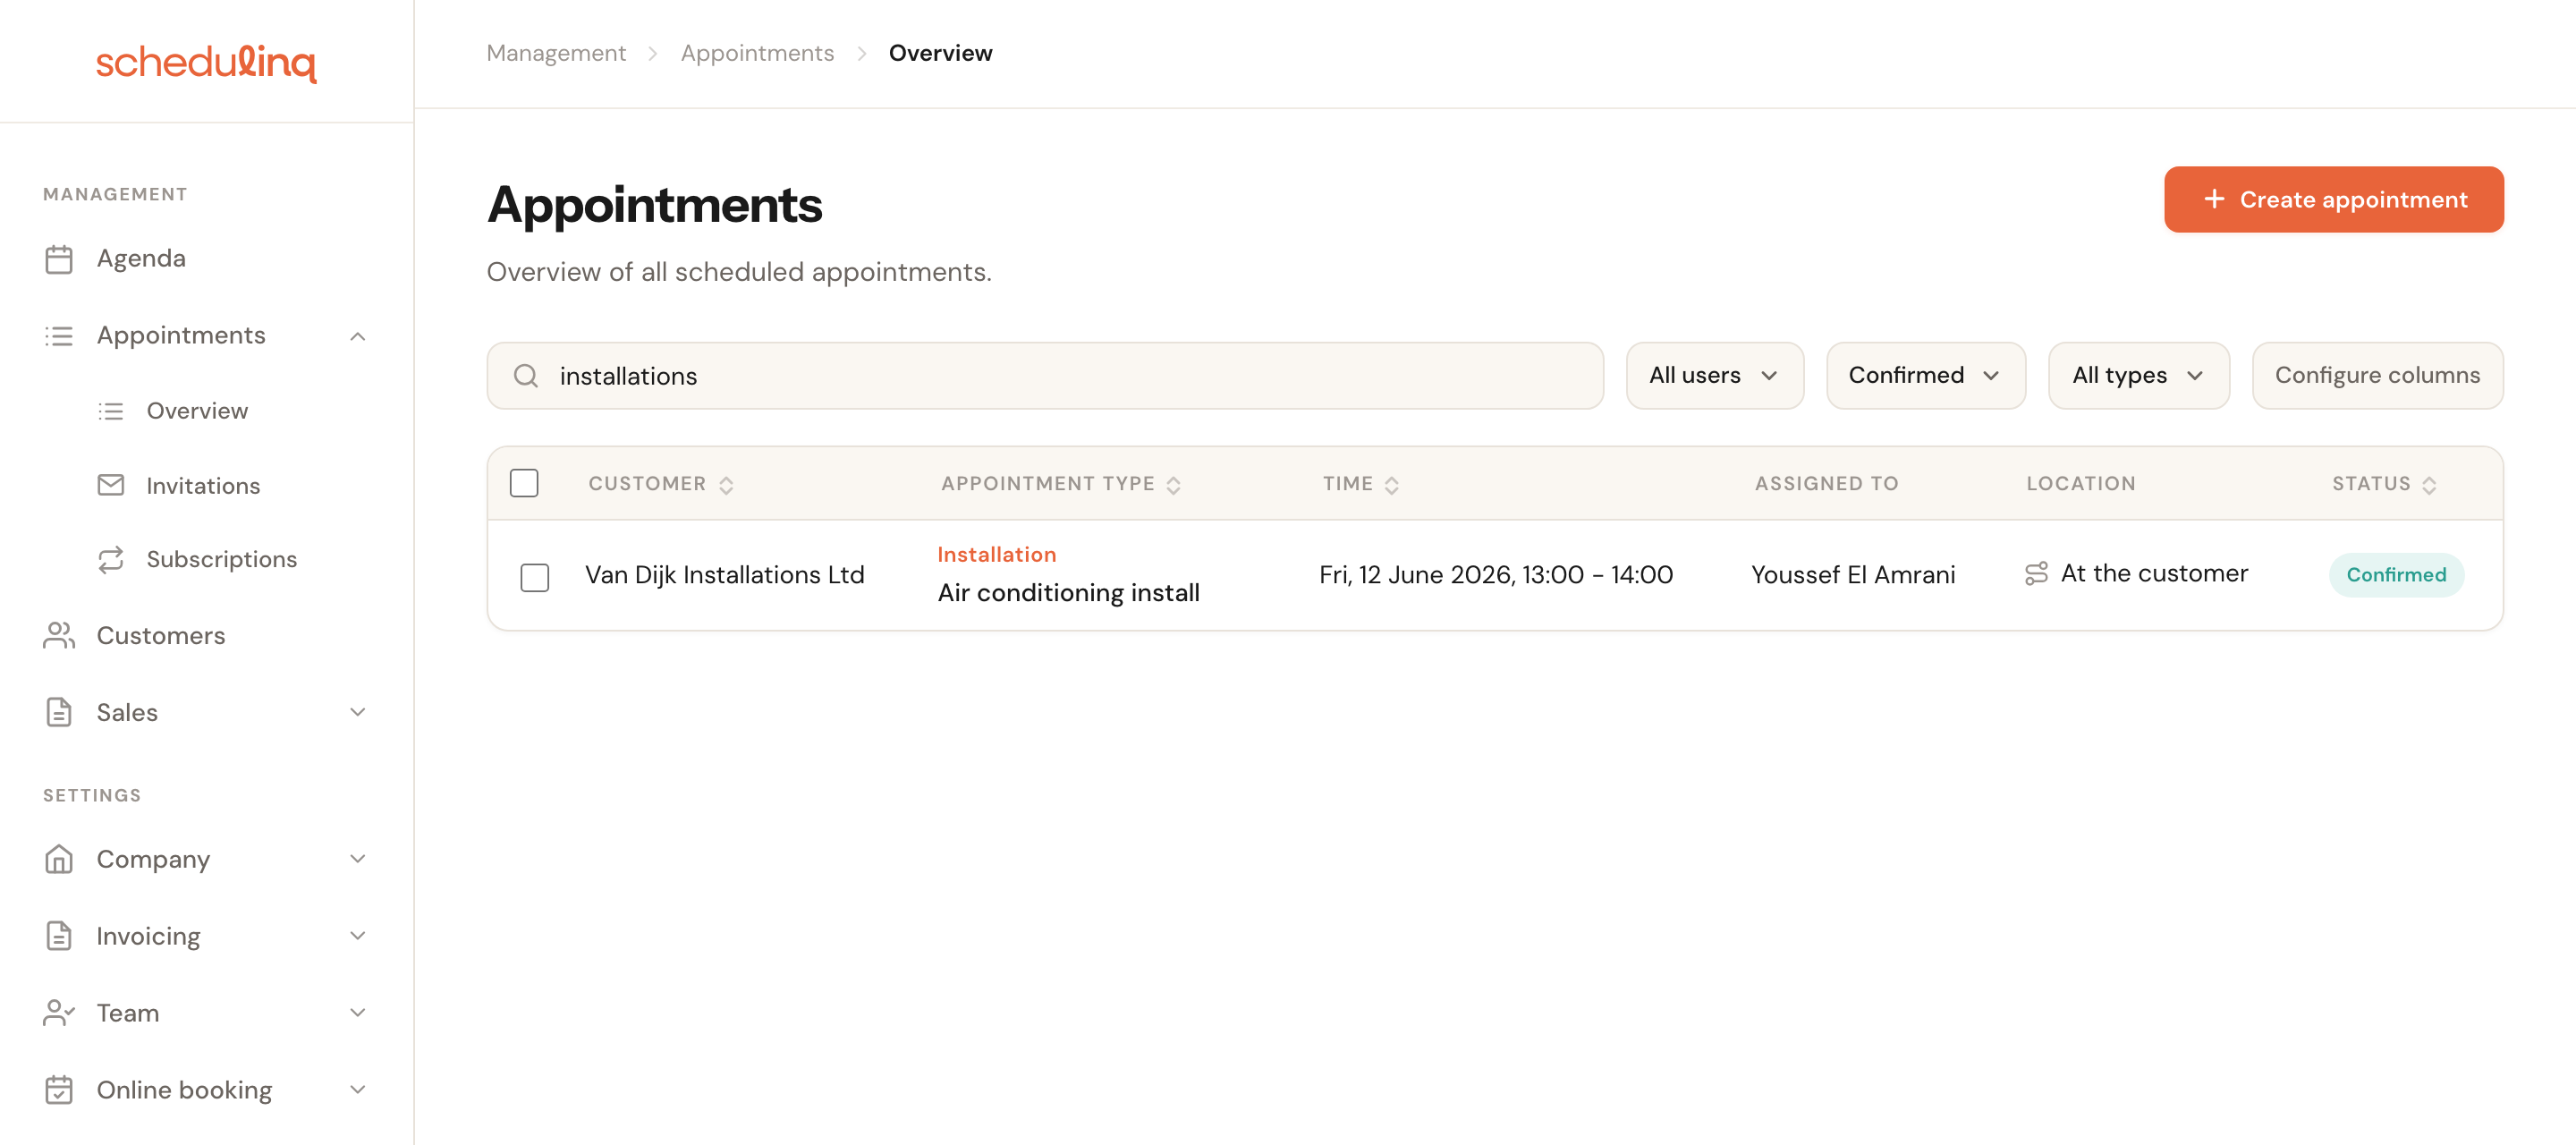
Filters stack: search for a name while the status filter is on Confirmed and you get only that customer's confirmed appointments.
Sorting
Click a column header to sort by it, click again to reverse the direction.
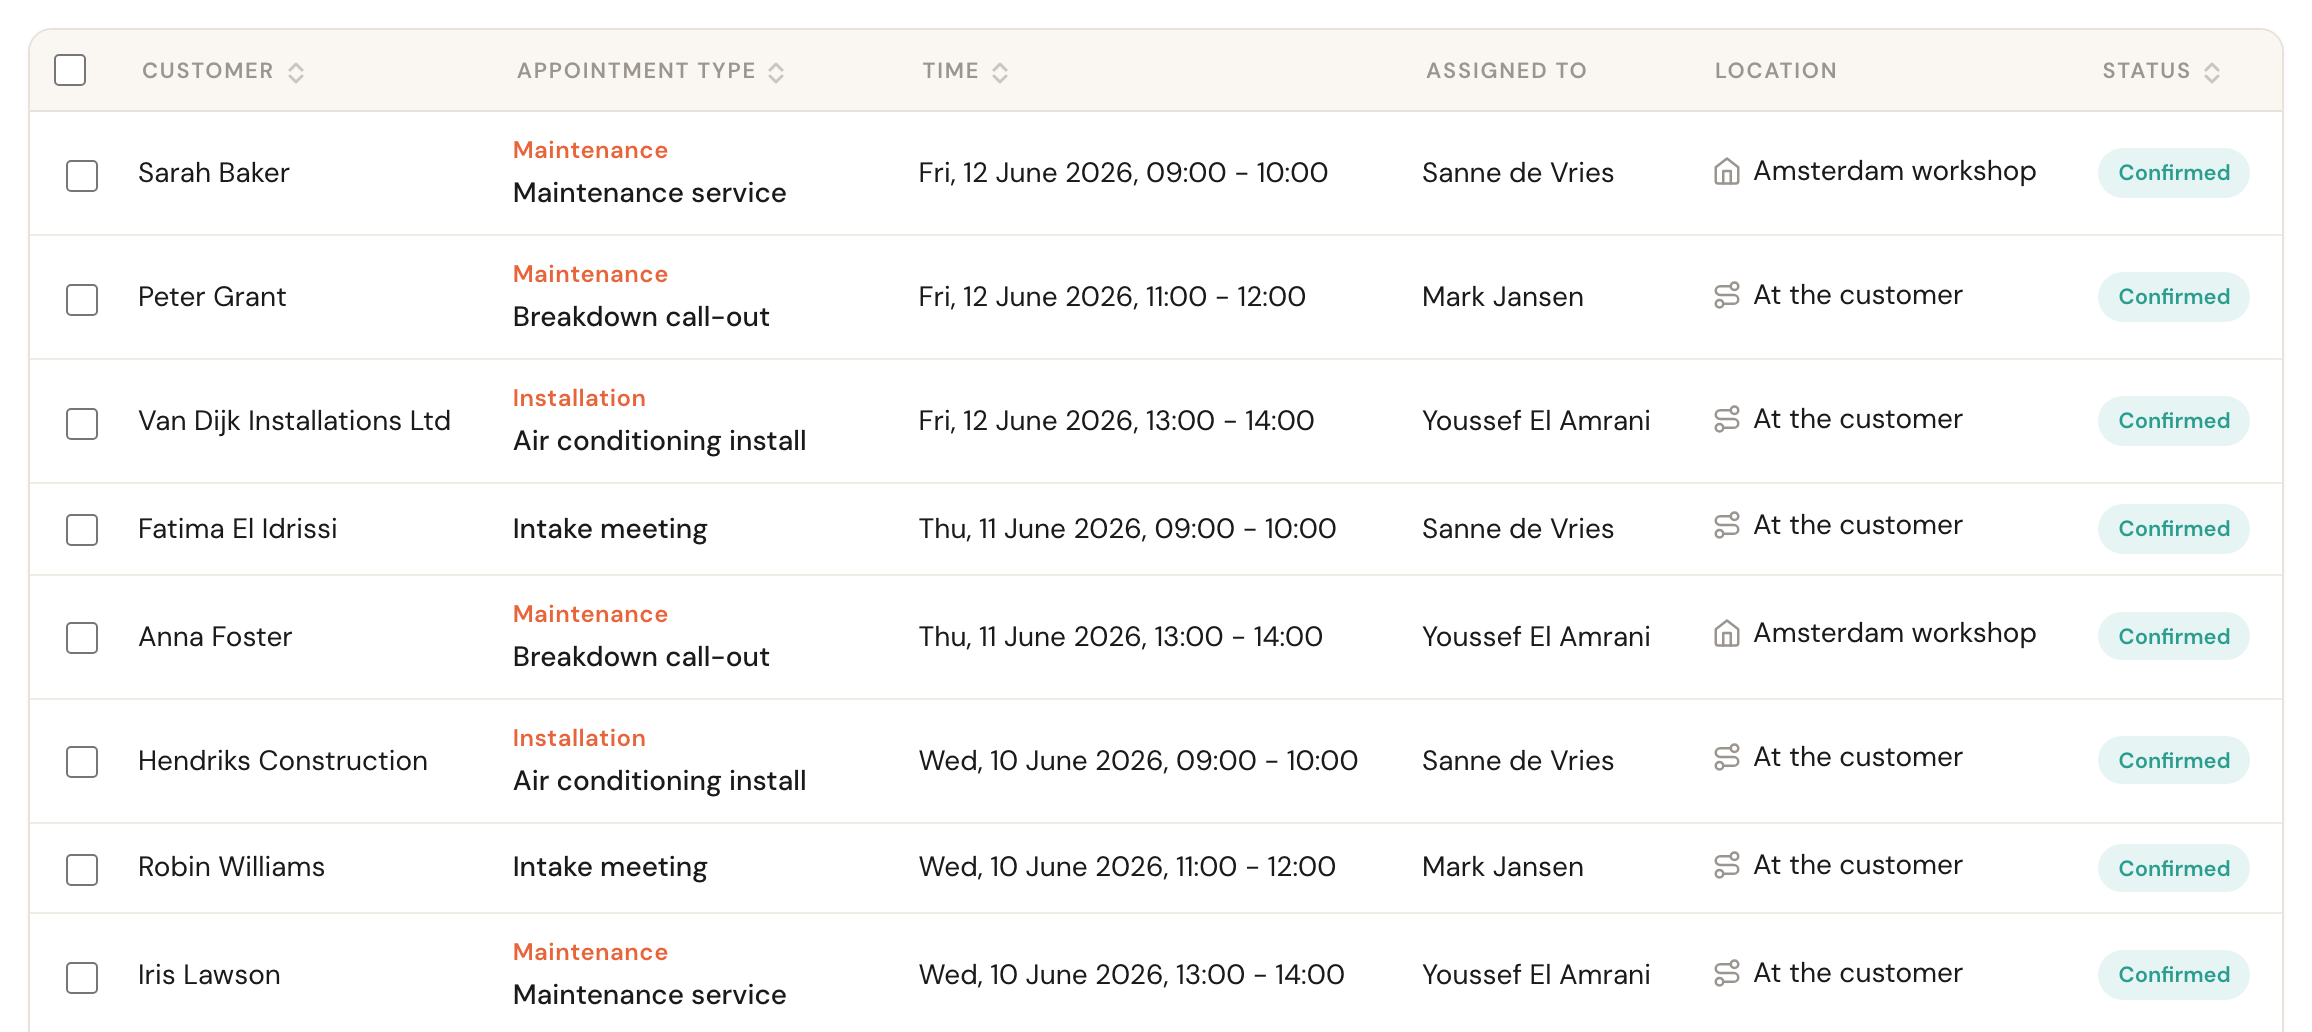
Not every column can be sorted. Assigned to, Location and Address have no sort arrow: an appointment can have several staff members, and then there is no sensible order. Your chosen sort is saved for your whole organisation, so next time the list opens the way you left it.
Choosing columns
If you are an administrator, Configure columns decides what the list shows. Tick columns on or off and drag them into the order that makes sense to you.
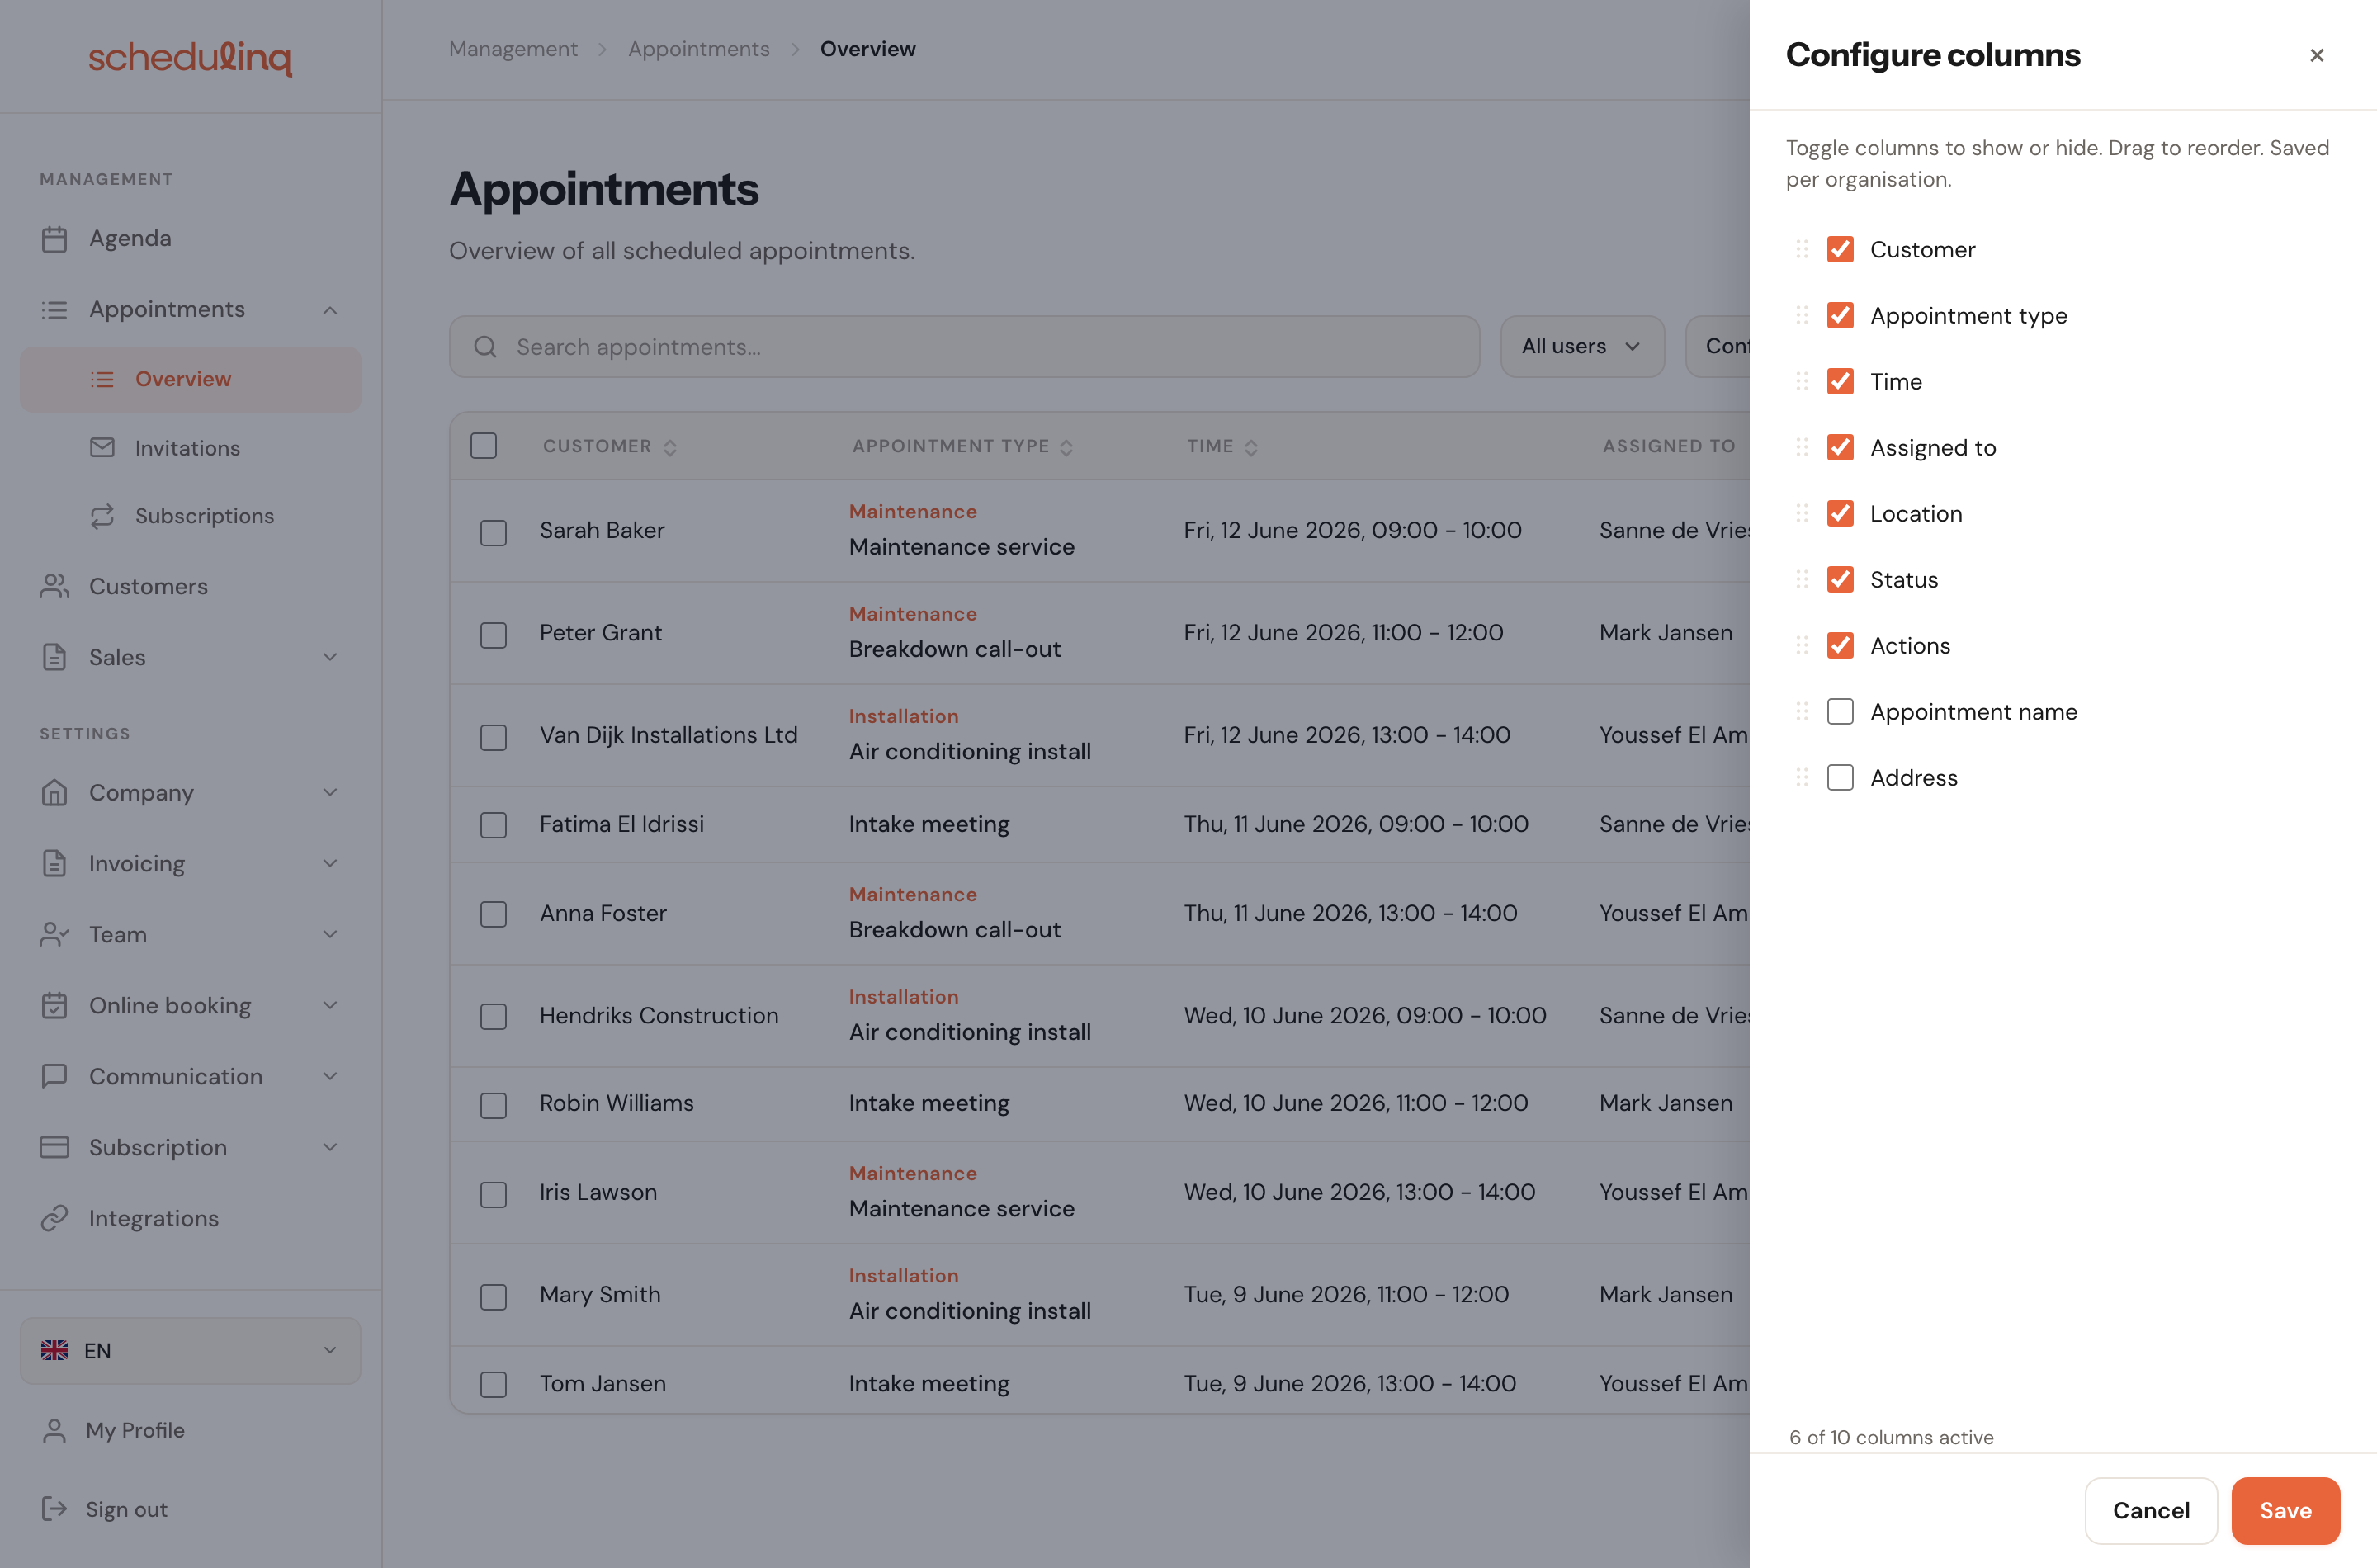
Your own fields are in there too: if you created a field for appointments under Company → Custom fields, you can switch it on here as a column.
Two things to know:
- The setting applies to your whole organisation, not just to you. What you switch on, your colleague sees as well.
- You can show at most ten columns at once. The counter at the bottom does not count the Actions column, so that one is always free.
Sharing a link to a filtered list
Everything you set — search term, filters, sorting and the page you are on — lives in your browser's address bar. Which means you can share the list exactly as it appears on your screen: copy the URL and your colleague opens the same selection.
It works the other way round too. Open an appointment, then press the back button, and you land back in your filtered list — not in an empty overview you have to set up all over again.
Deleting several appointments at once
Tick the checkbox to the left of a row. As soon as you tick one, a bar appears at the top.
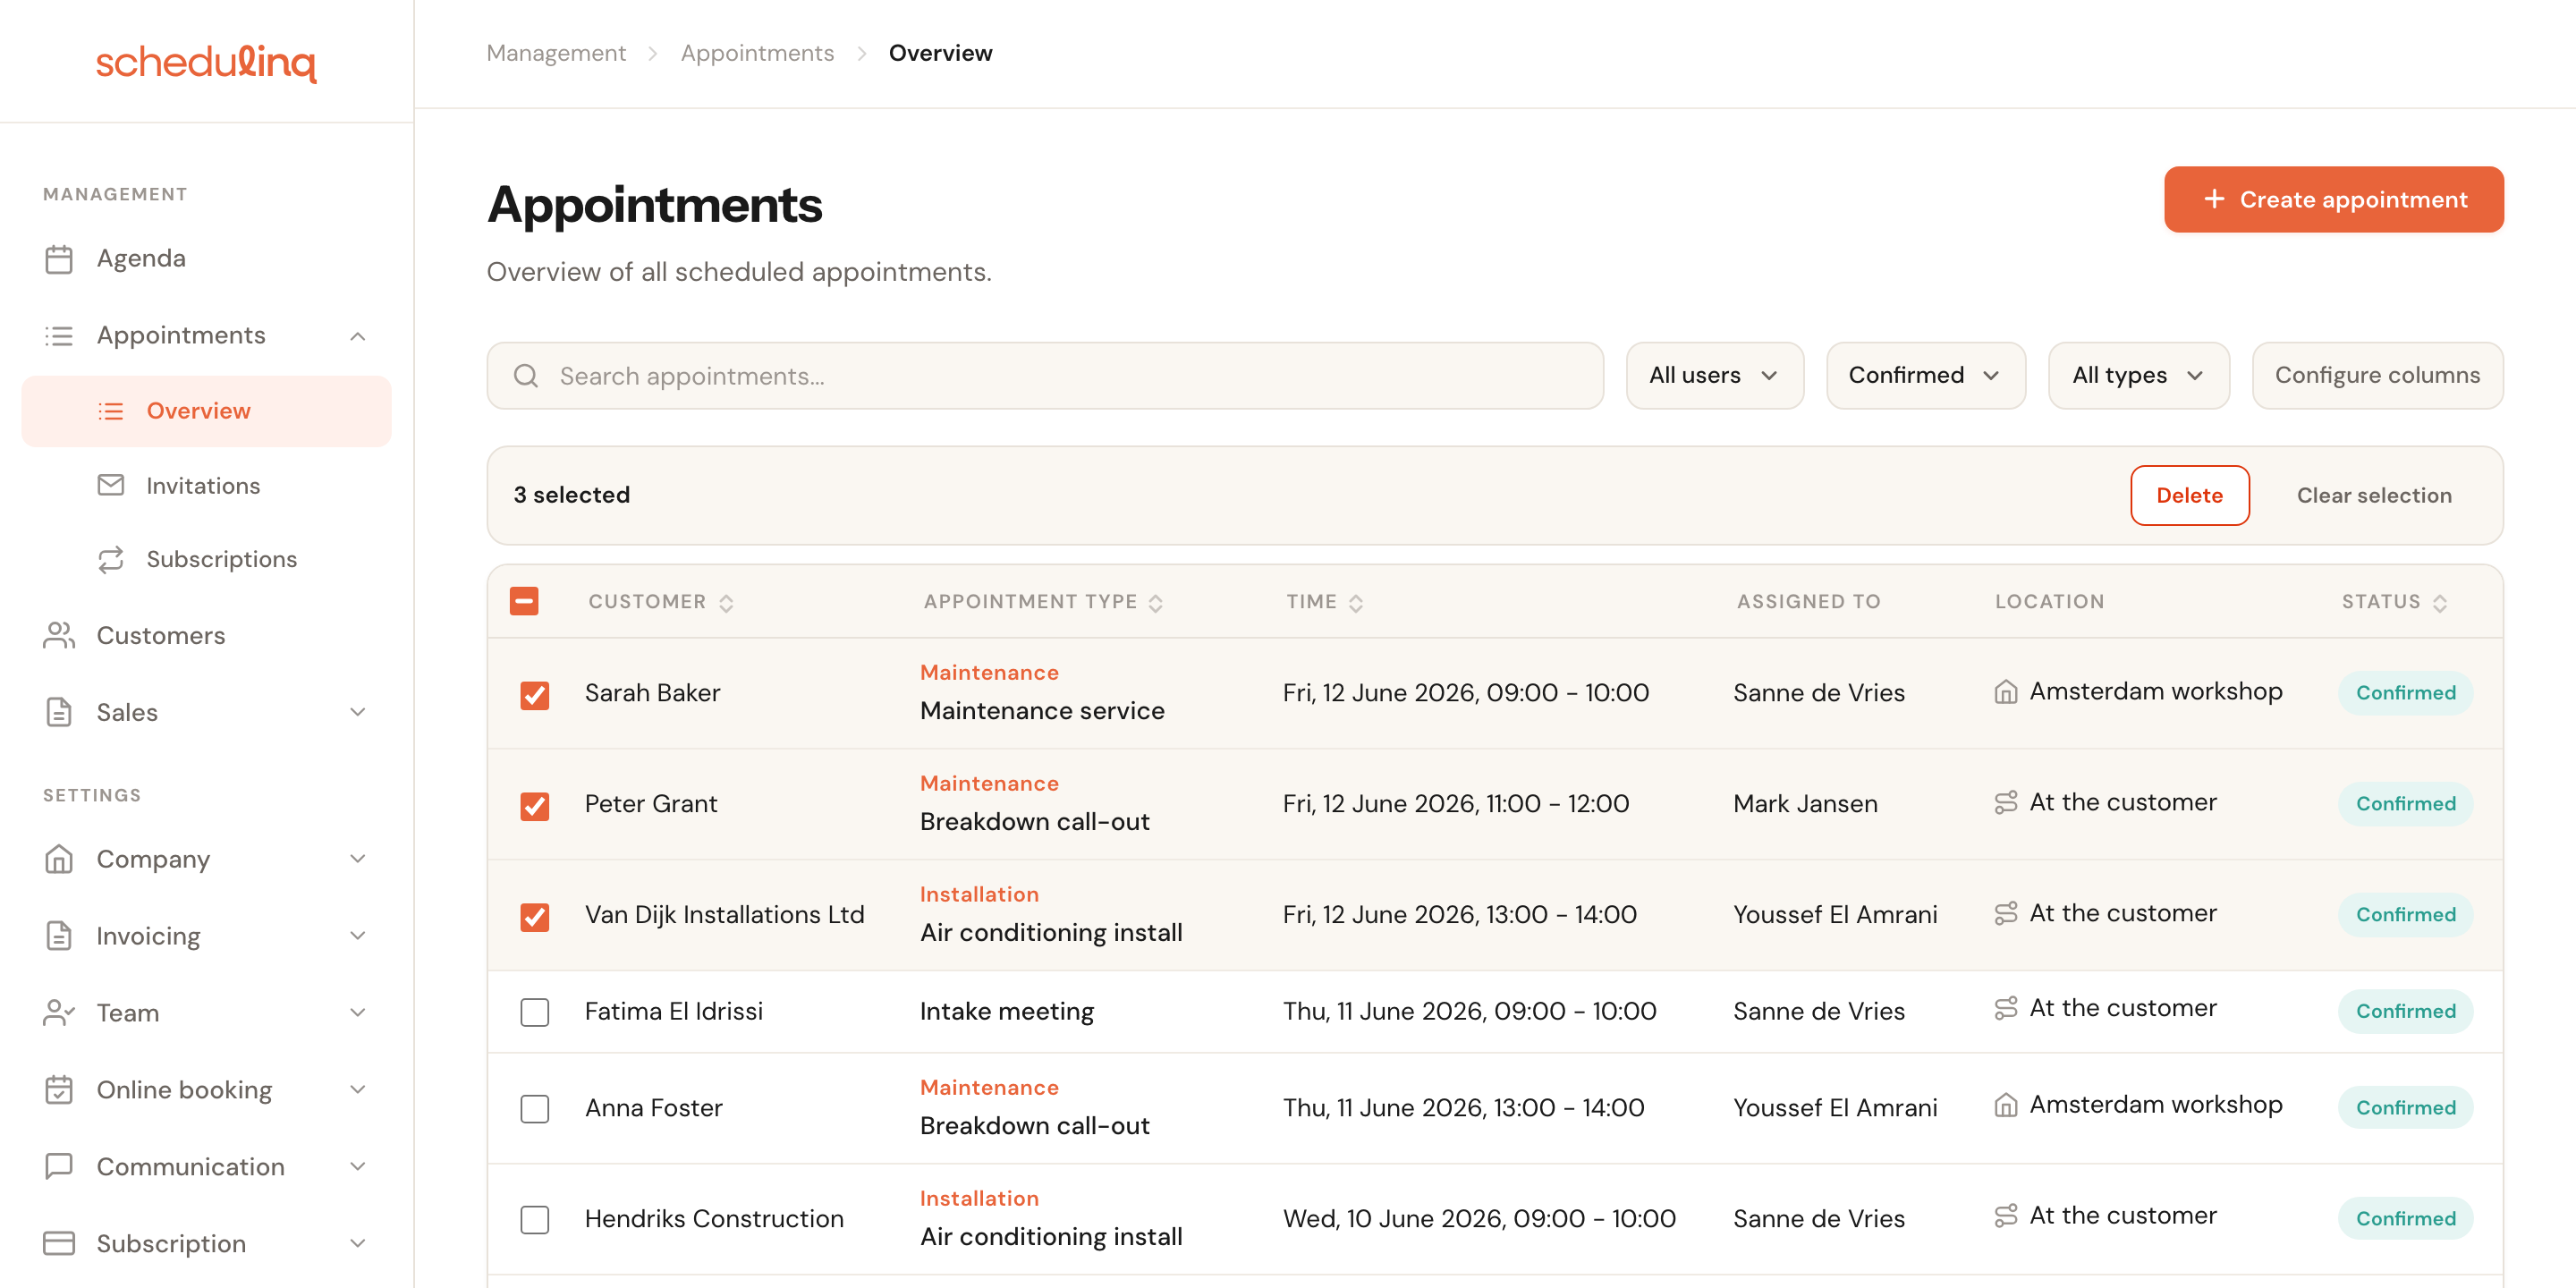

- How many appointments you have selected.
- Delete — asks for confirmation first.
- Clear selection.
Deleting here does exactly what the trash icon on a single row does: the appointment is cancelled, not erased from your history. Existing invoices and messages stay readable.
What you cannot select
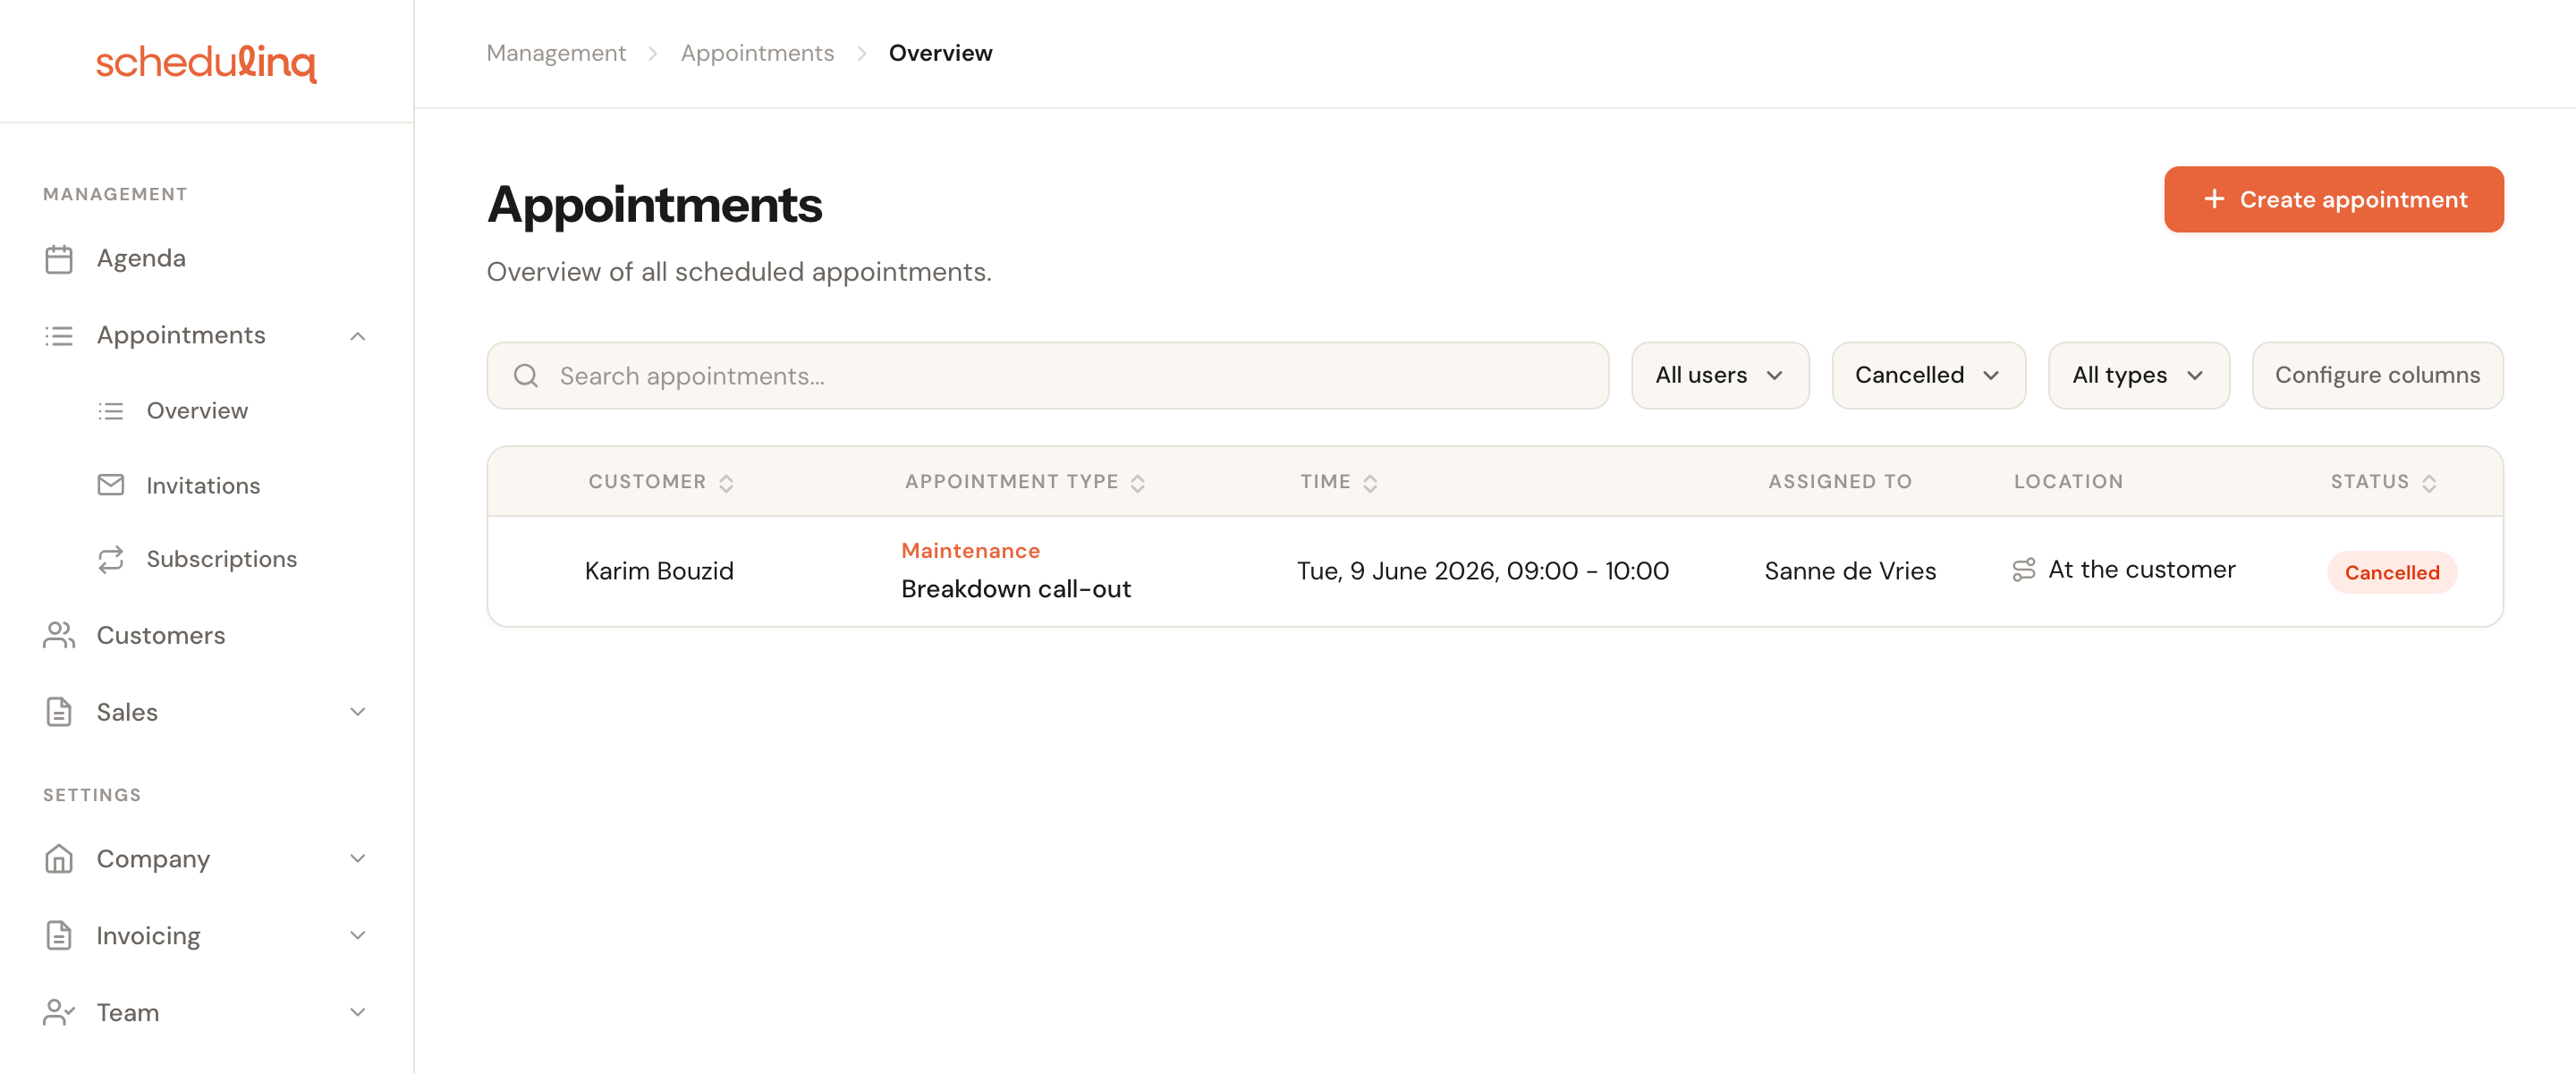
Appointments that are already cancelled or completed have no checkbox. That is deliberate: they have no trash icon on the row either, so "select all" can never tick something the batch would then refuse.
On a phone
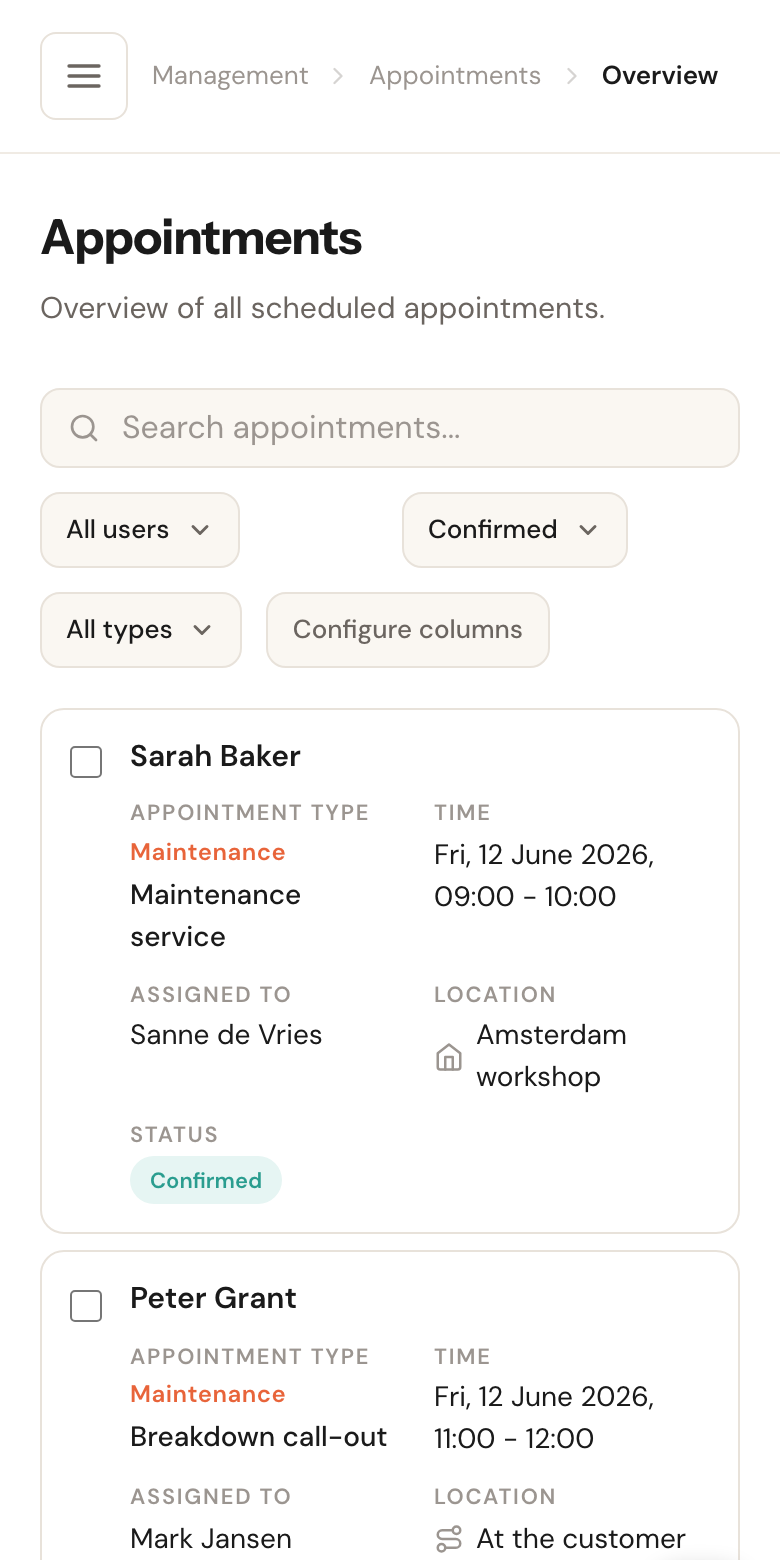
A table doesn't fit a narrow screen, so each appointment becomes a card with the same details stacked. Searching, filtering and selecting work the same way.
Frequently asked questions
I don't see the staff filter. Then you only have rights to your own appointments. The list shows what is yours; an administrator can change that under Team → Roles.
My search returns nothing even though the appointment exists. Two usual causes: you typed fewer than three characters, or the appointment has a different status than the filter (which starts on Confirmed).
A colleague sees different columns than I do. That can't happen — columns are saved per organisation. What does differ is rights: someone who is not an administrator cannot change the columns, but sees the same ones.