
Create an invoice
From completed appointment to sent invoice — including what changes the moment you issue it.
An invoice always starts as a draft. While it is a draft you can change anything about it: add lines, adjust amounts, switch the customer. Only when you issue it does it get a final number and lock. That distinction explains almost everything this screen does.
In short
- Go to Sales → Invoices and click New invoice.
- Pick the customer.
- Add lines — usually through Add from appointments.
- Check the amounts and click Create. You now have a draft.
- Click Issue once it is right, then Send.
Step by step
Open your invoices
Sales → Invoices lists every invoice, newest first. You can search, filter by status and by year, and use the switch at the top to move between Invoices and Credit notes.
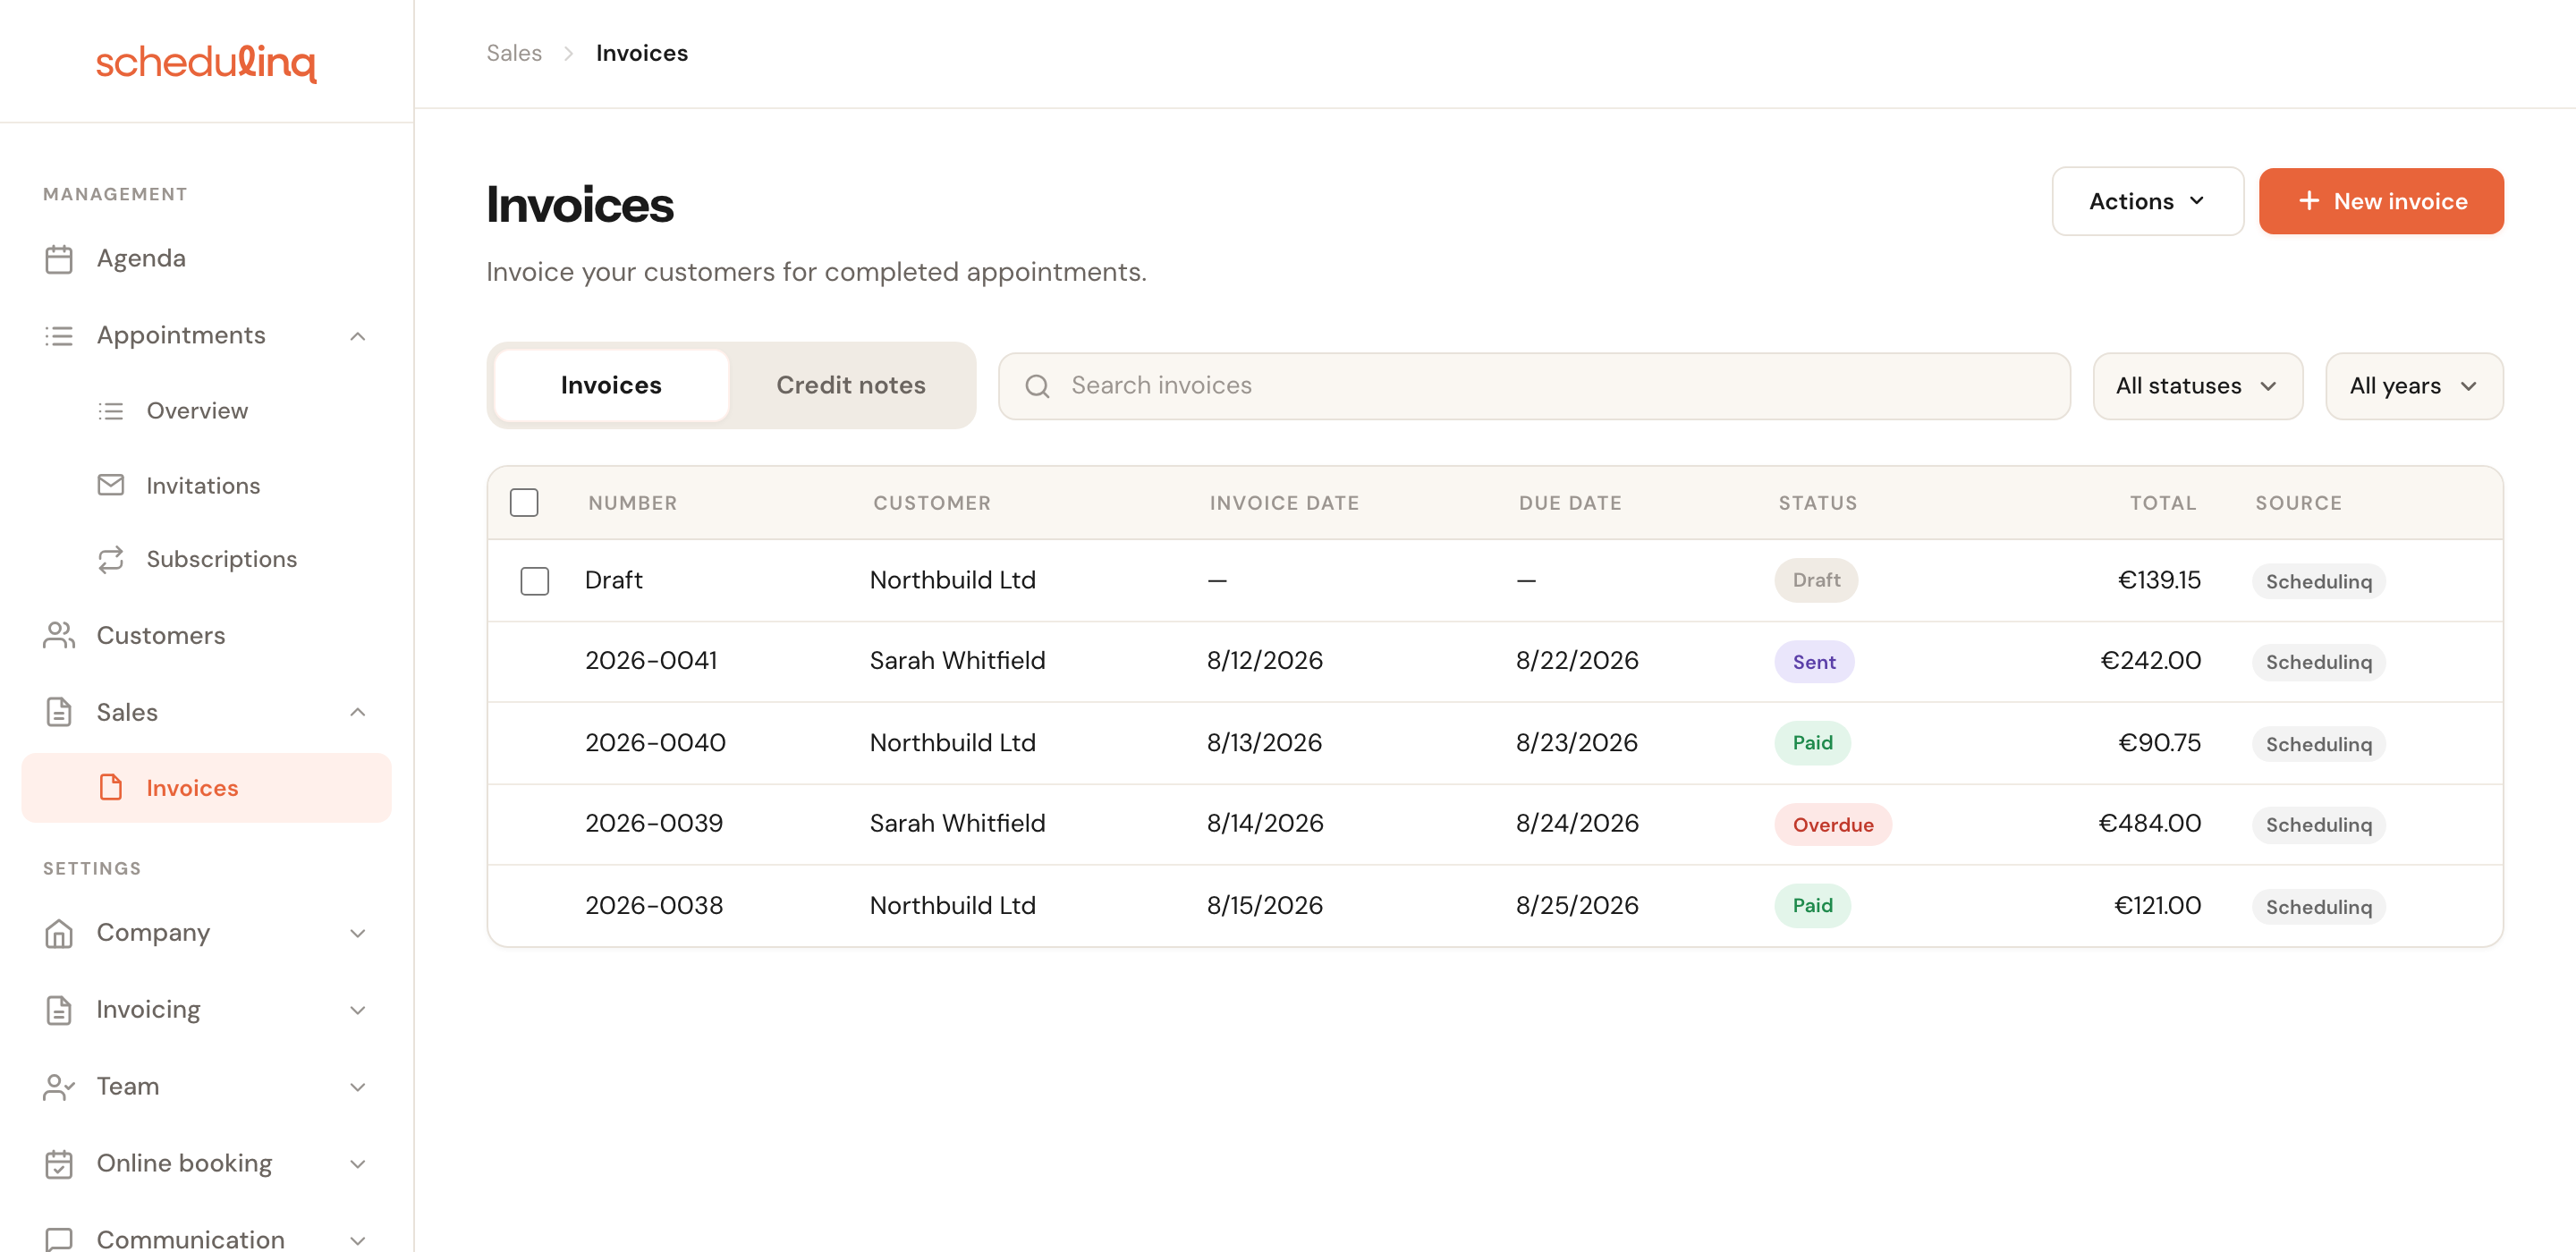
Only drafts have a tick box: issued invoices cannot be bulk-deleted. Why, is under Numbering.
Start a new invoice
Click New invoice at the top right. You get an empty form with one blank line.
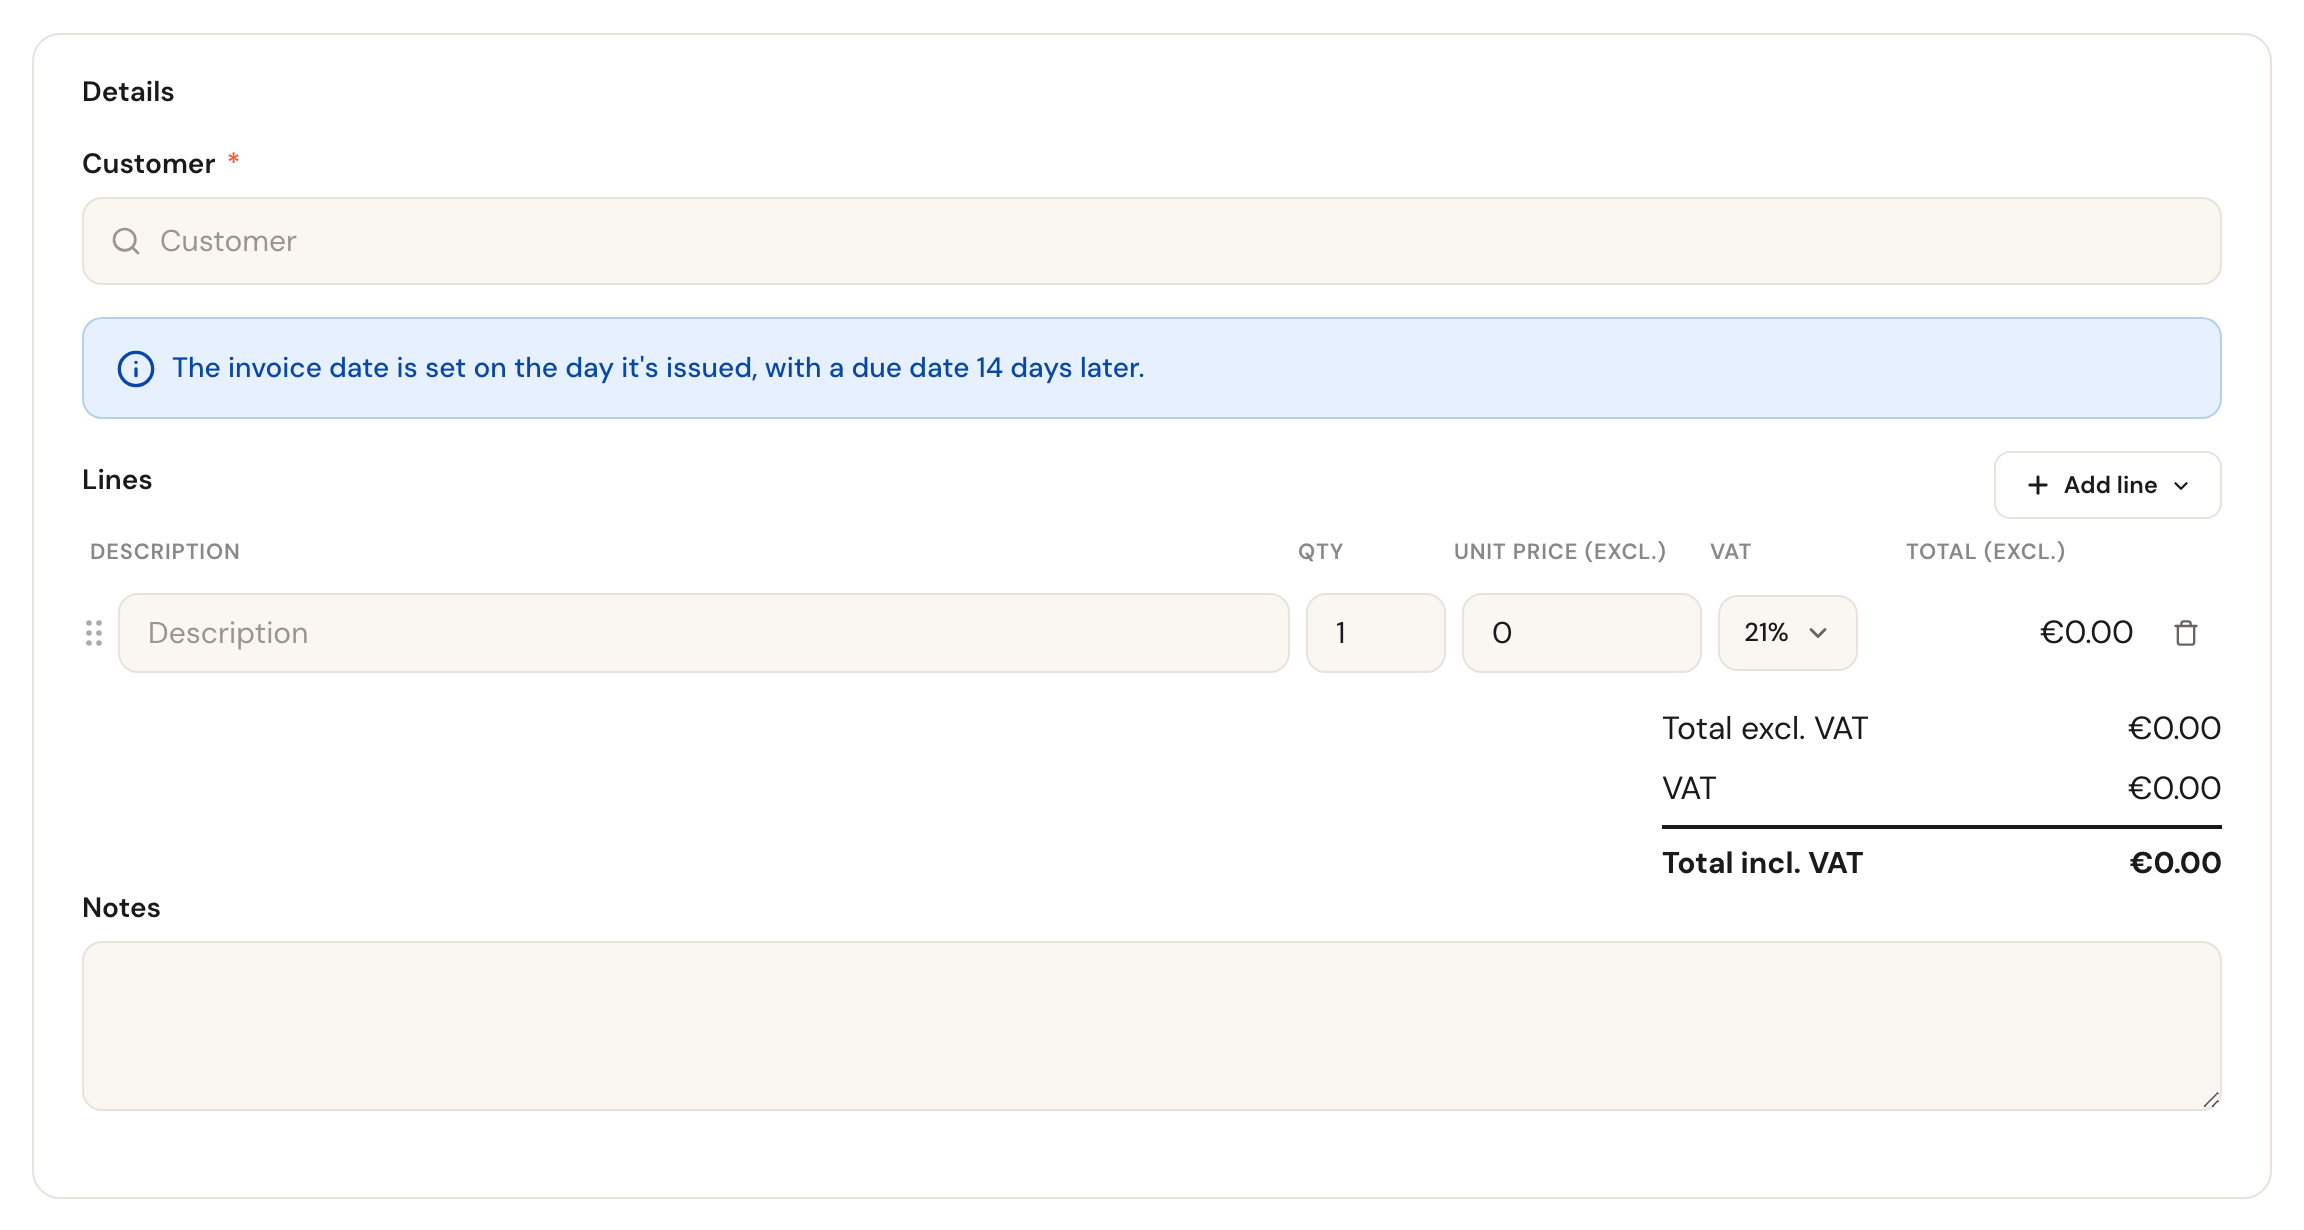
That blue note says something important: a draft has no dates yet. The invoice date is set on the day you issue it, and the due date follows the payment term you set under Invoicing → Invoice settings. So there is nothing to fill in — and a draft that sits around for a week simply gets the date of the day you finally issue it.
Pick the customer
Start typing in the Customer field. You search by name, and each suggestion shows the address so you can tell two customers with the same name apart.
The customer's details are captured onto the invoice at the moment you issue it. If your customer moves next year, this invoice keeps today's address — which is exactly what you want, because a sent invoice should not change retroactively.
Add lines
Click Add line. There are three ways, and they genuinely differ.
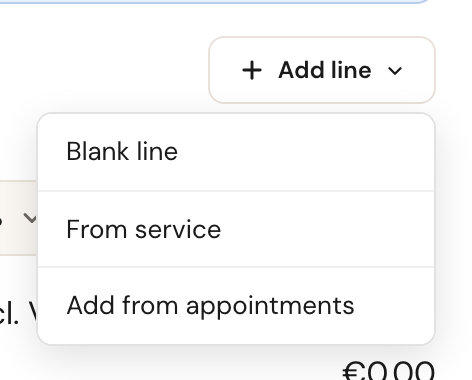
- Blank line — you type the description, quantity, price and VAT yourself. For call-out charges, materials or a manual discount.
- From service — copies the description and price from a service in your catalogue, without tying it to an appointment.
- Add from appointments — the one you will use most. It only works once you have picked a customer.
Add from appointments shows every completed appointment for that customer that has not been invoiced yet. Tick the ones that belong on this invoice.
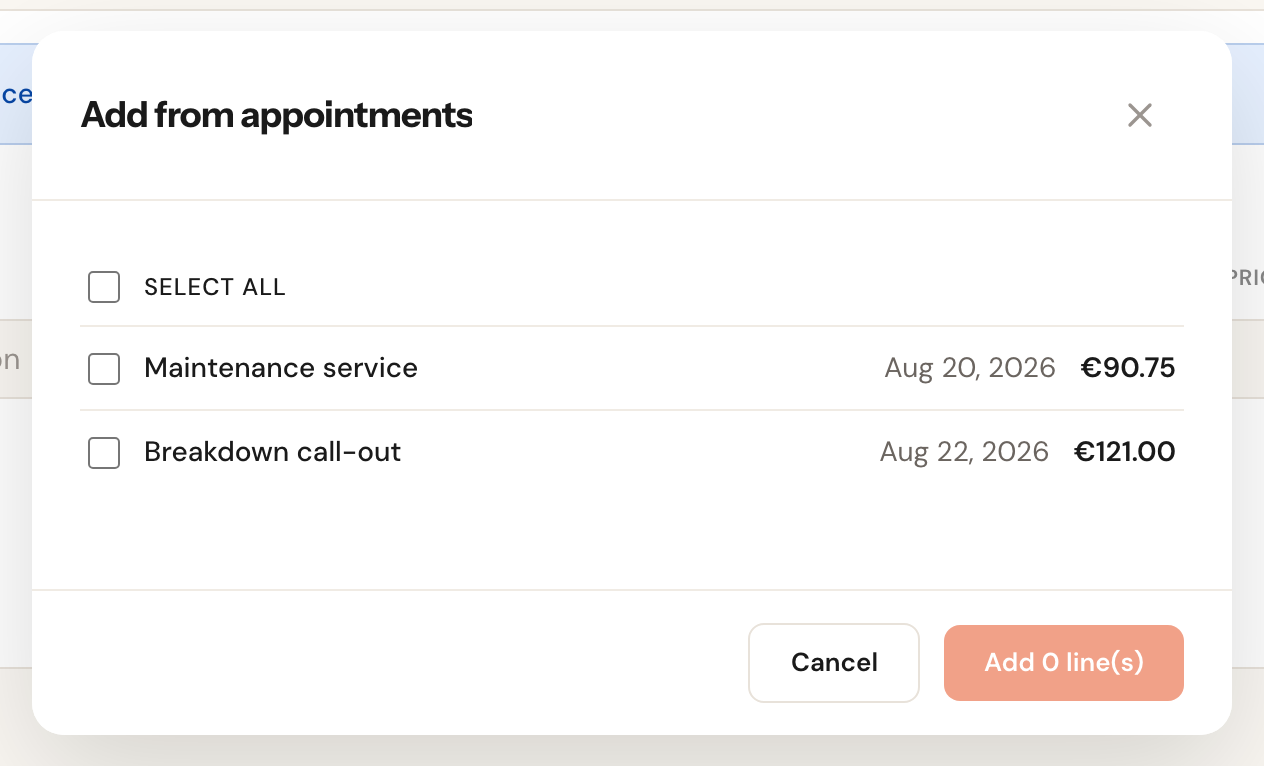
Each appointment becomes one line, with that appointment's add-ons indented underneath. Drag the handle on the left to reorder; an add-on stays attached to its appointment.
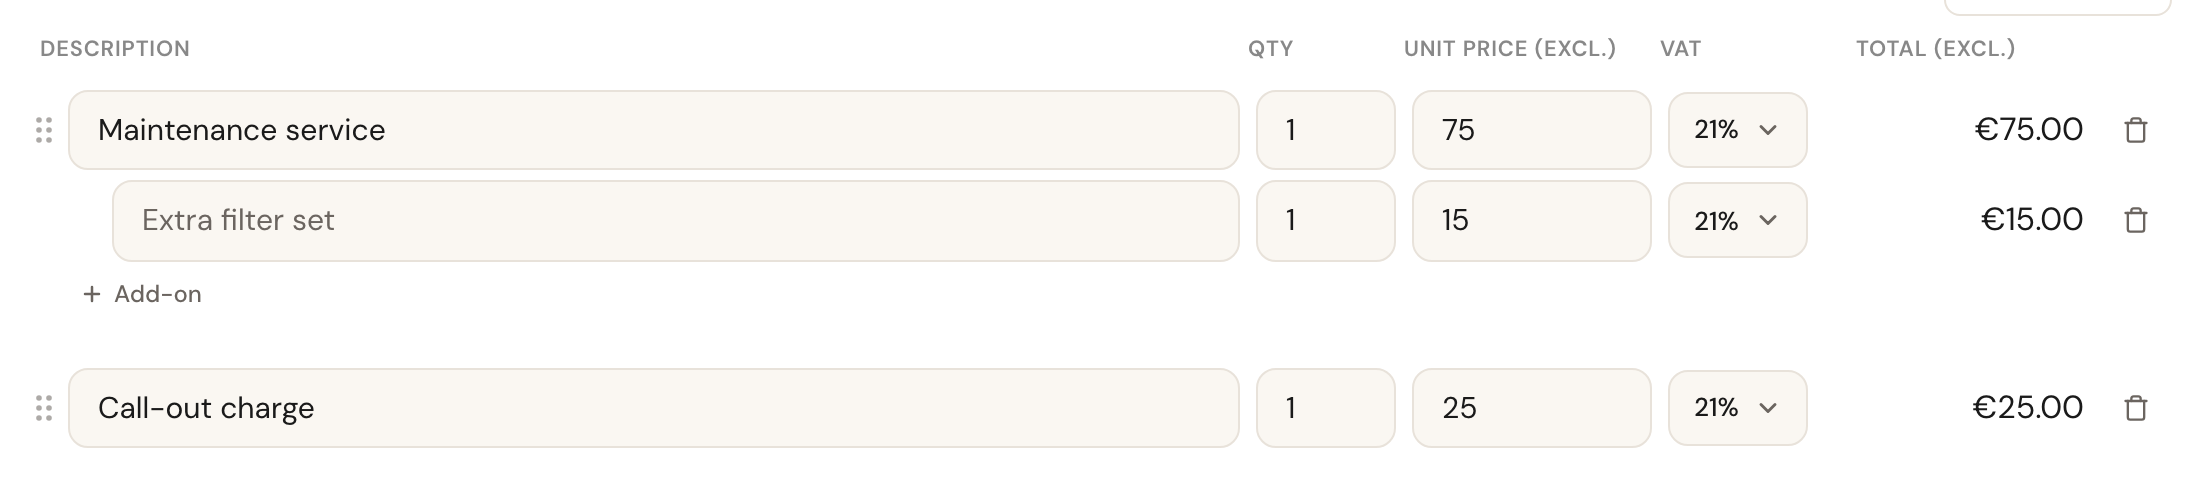
Check the totals and save
Schedulinq totals everything up live, underneath the lines.
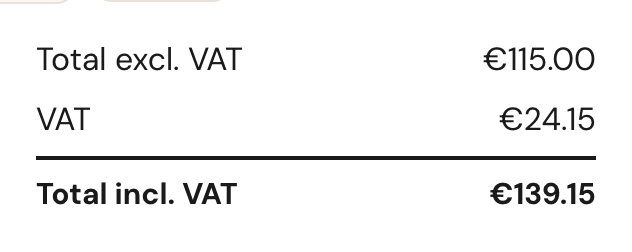
If it looks right, click Create. You now have a draft: saved, but without a number or dates, and still fully editable.
The lines, field by field
Description
RequiredWhat your customer reads on the invoice. A line taken from an appointment arrives with the service name already filled in; you may change it.
This is the only text your customer sees about what was delivered. "Maintenance service" is clearer than the appointment type's internal code, and saves questions from your customer's bookkeeper.
Qty
One by default. Raise it for something you deliver more than once.
Two identical lines of one and a single line of two add up the same, but the second reads better on the PDF — and is less work when you need to change it.
Unit price (excl.)
The amount excluding VAT, per unit.
Prices in your catalogue can be stored including or excluding VAT, but an invoice always builds up from the amount excluding VAT — that is how an invoice is meant to be composed. A line taken from an appointment is converted for you.
VAT
The rate for this line. Every line carries its own.
Per line, not per invoice — so labour at the low rate and materials at the high rate can share one invoice. The totals are broken down per rate at the bottom.
Draft or final
An invoice moves through a few states, and only the first is freely editable.
| Status | What you can do |
|---|---|
| Draft | Change anything, or throw it away. No number, no dates. |
| Issued | Locked. Send, mark paid, credit. |
| Sent | The same, and the customer has received it. |
| Paid | Done. |
| Overdue | Past its due date and unpaid. |
| Credited | A credit note has been raised against it. |
This is what a saved draft looks like. There is no number above it yet, the top-right button reads Issue, and Actions holds whatever else is possible.
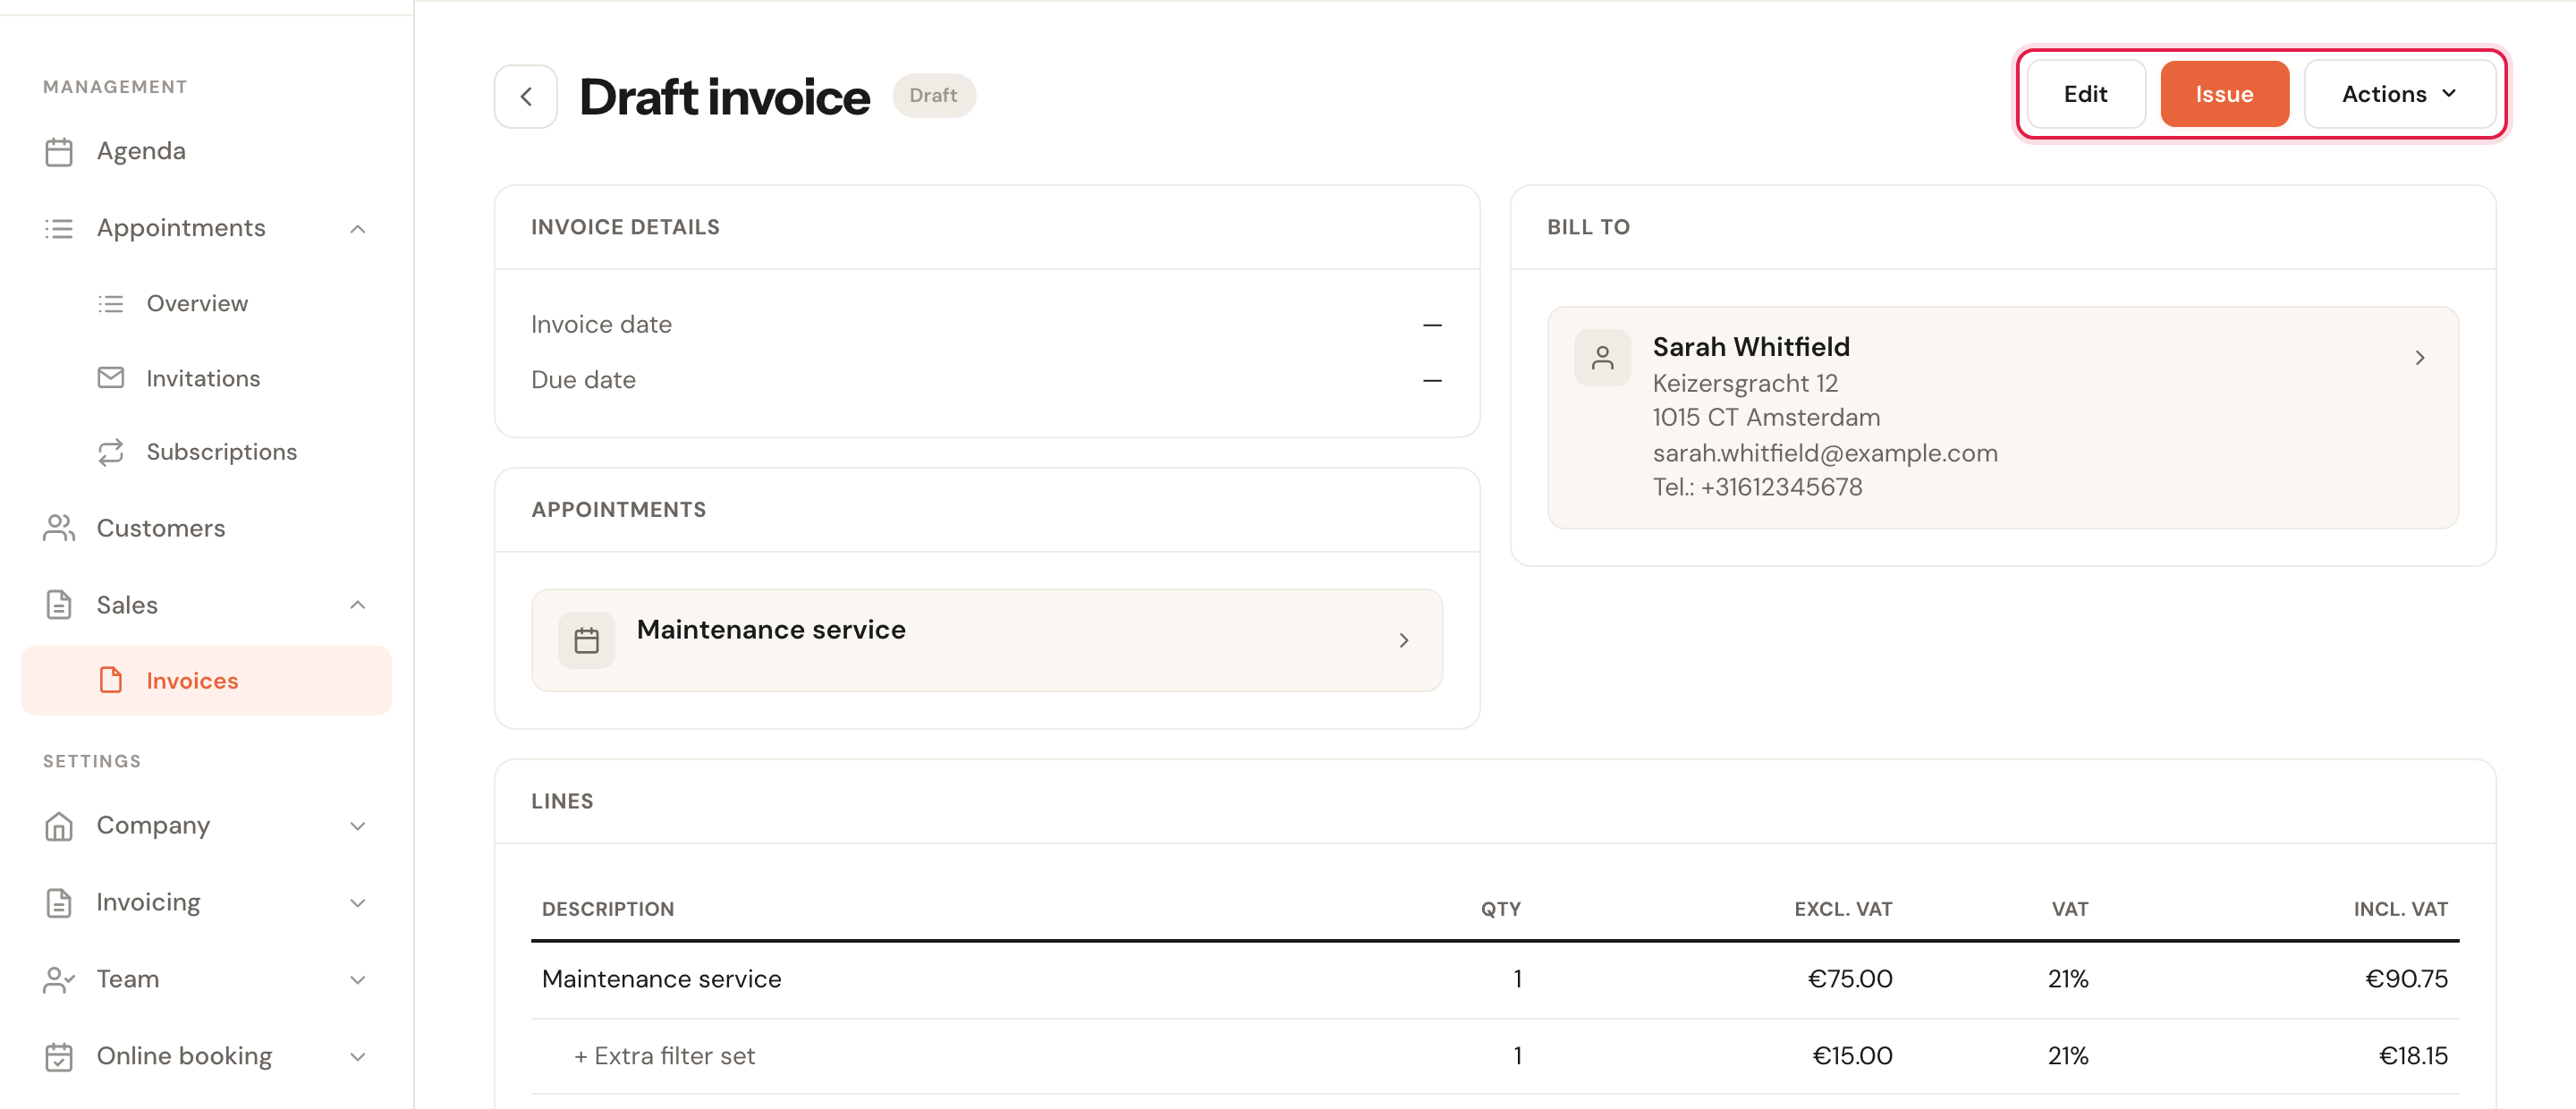
Issuing is the point of no return, so Schedulinq asks explicitly:
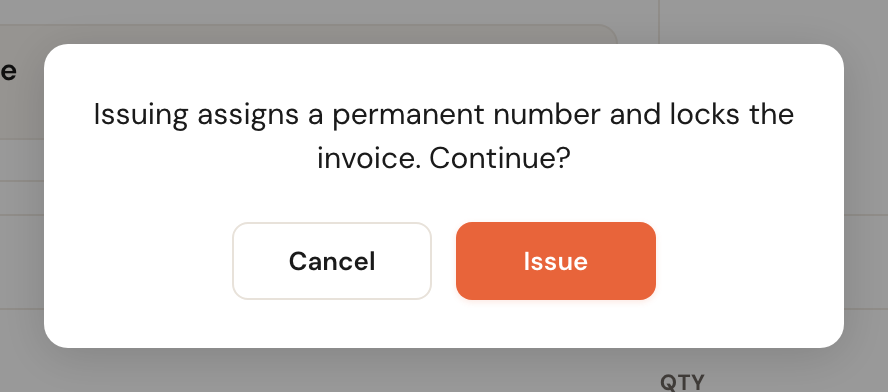
Three things happen at once: the invoice takes the next number in the sequence, the invoice date becomes today, and the due date is your payment term after that.
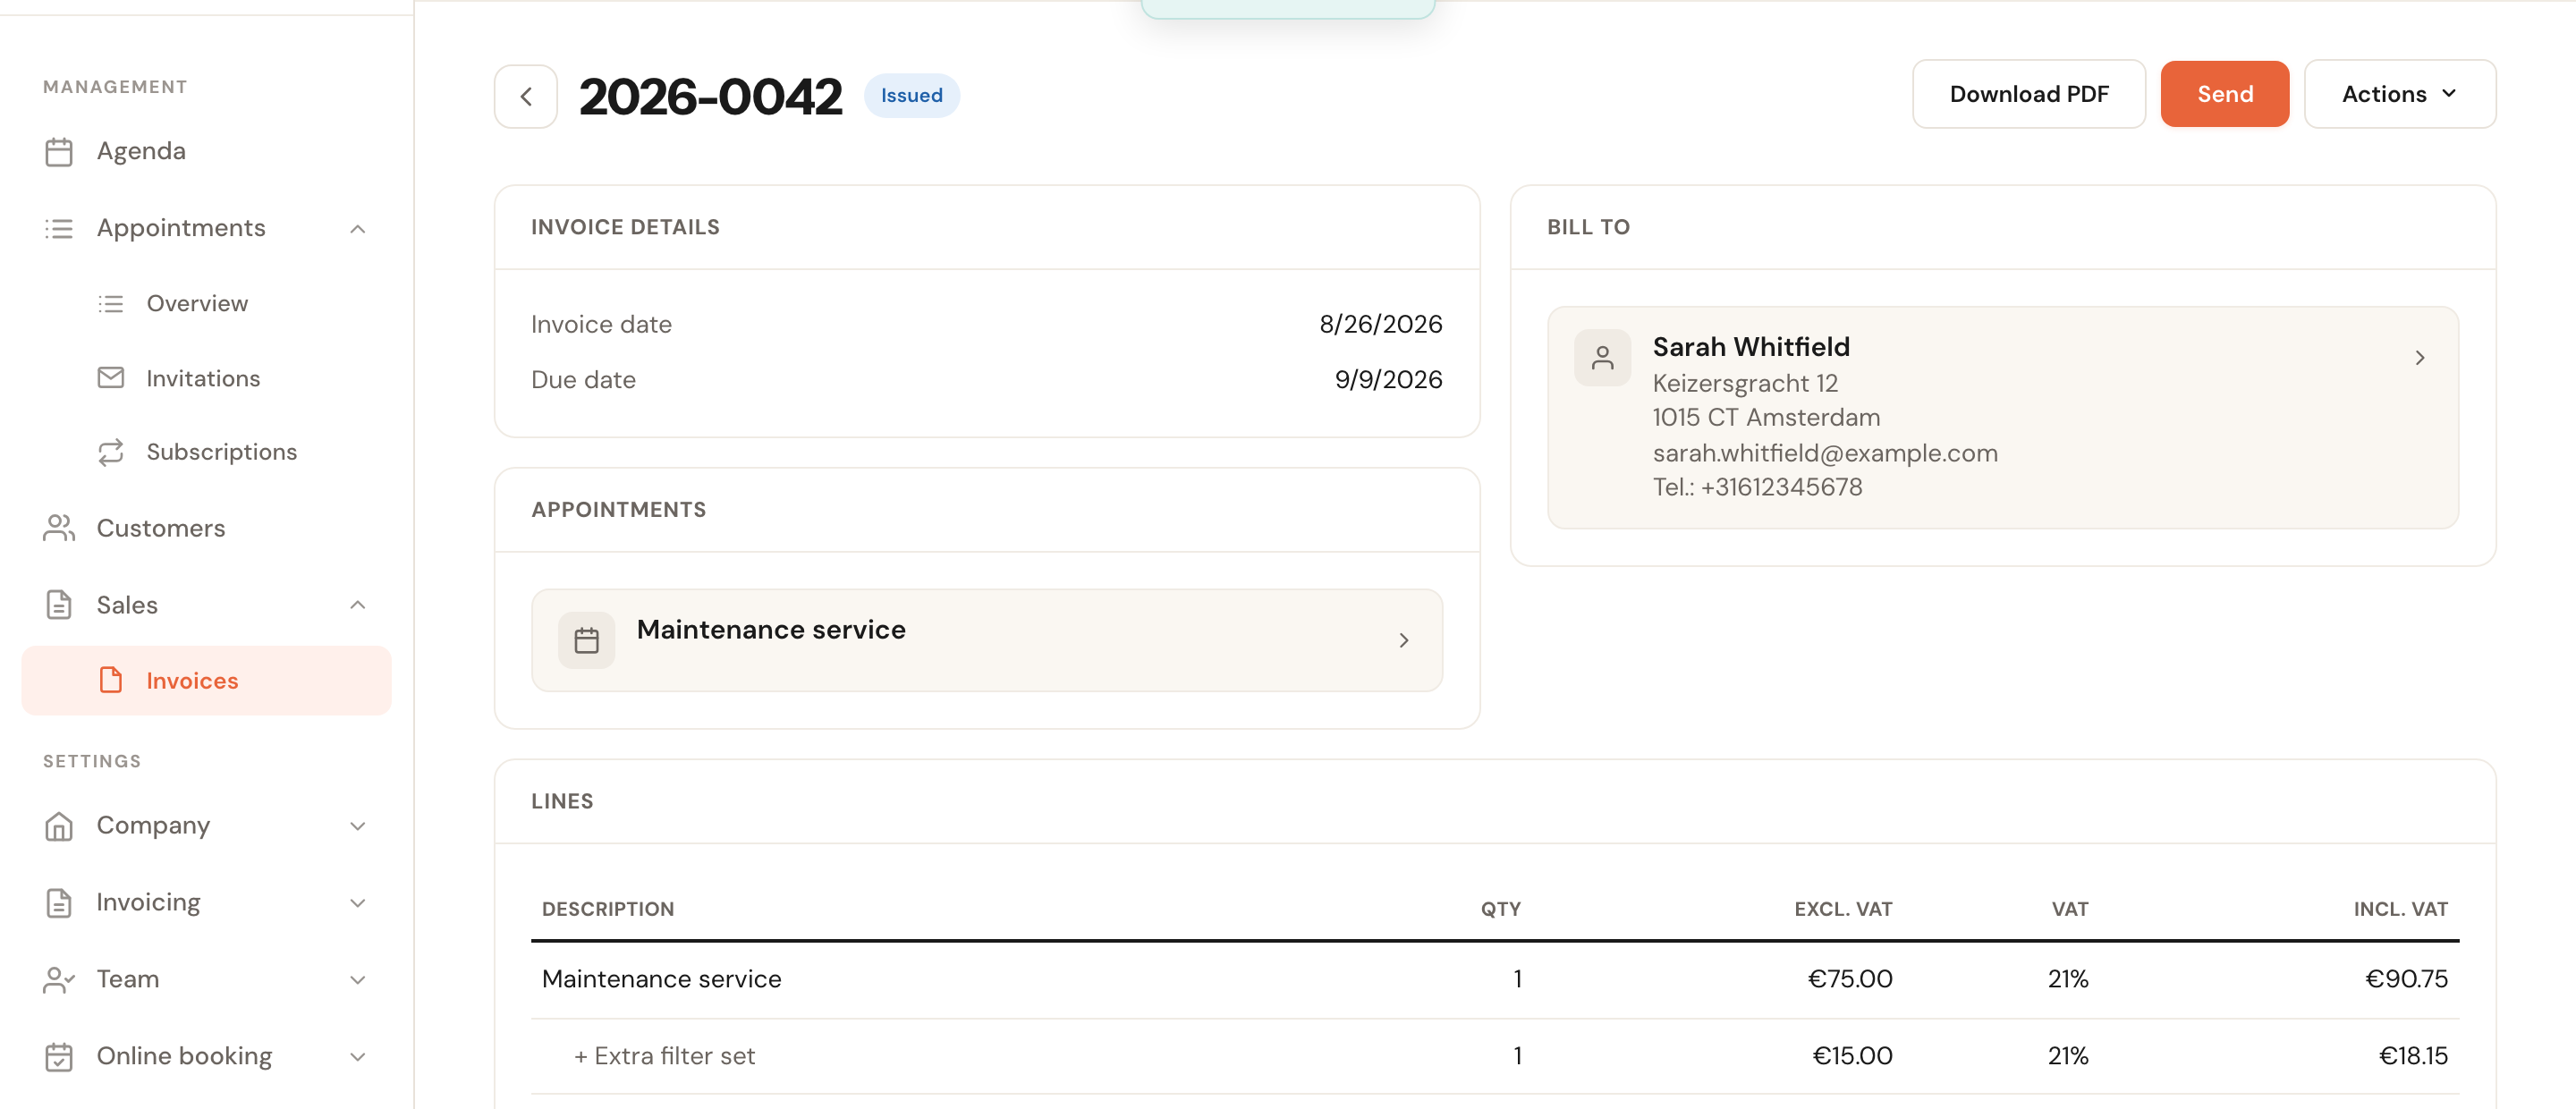
After issuing, the top-right button becomes Send, and Download PDF appears.
Numbering, and why you cannot simply delete
Invoice numbers must form an unbroken sequence. Every deletion rule on this screen follows from that:
- A draft can always be thrown away. It has no number, so no gap appears.
- An issued invoice can only be deleted if it is the highest one. Its number rolls back and gets reused.
- Any other issued invoice cannot be deleted. If something is wrong, raise a credit note.
That is also why only drafts have a tick box in the overview: bulk deletion could break the sequence.
Frequently asked questions
Can I invoice without an appointment? Yes. Pick a customer and add blank lines. Useful for materials, a deposit, or anything delivered outside your calendar.
Why is there no payment link on my invoice? Online payment is not switched on in Schedulinq yet. For now, put your bank details on the invoice — they live under Invoicing → Invoice template.
I sent an invoice with a mistake in it. Credit it and raise a new one. A sent invoice cannot be edited or deleted, and should not be.
Where do I change the invoice number or the payment term? Under Invoicing → Invoice settings. The look of the PDF is under Invoice template.