
Configure columns
Choose which columns the customer overview shows and in which order — including your own fields.
The customer overview does not show everything Schedulinq knows about a customer. Which columns you see, and in which order, is up to you. Your own fields appear here as columns too, once you have created them.
Opening the panel
Click Configure columns at the top right of the overview.
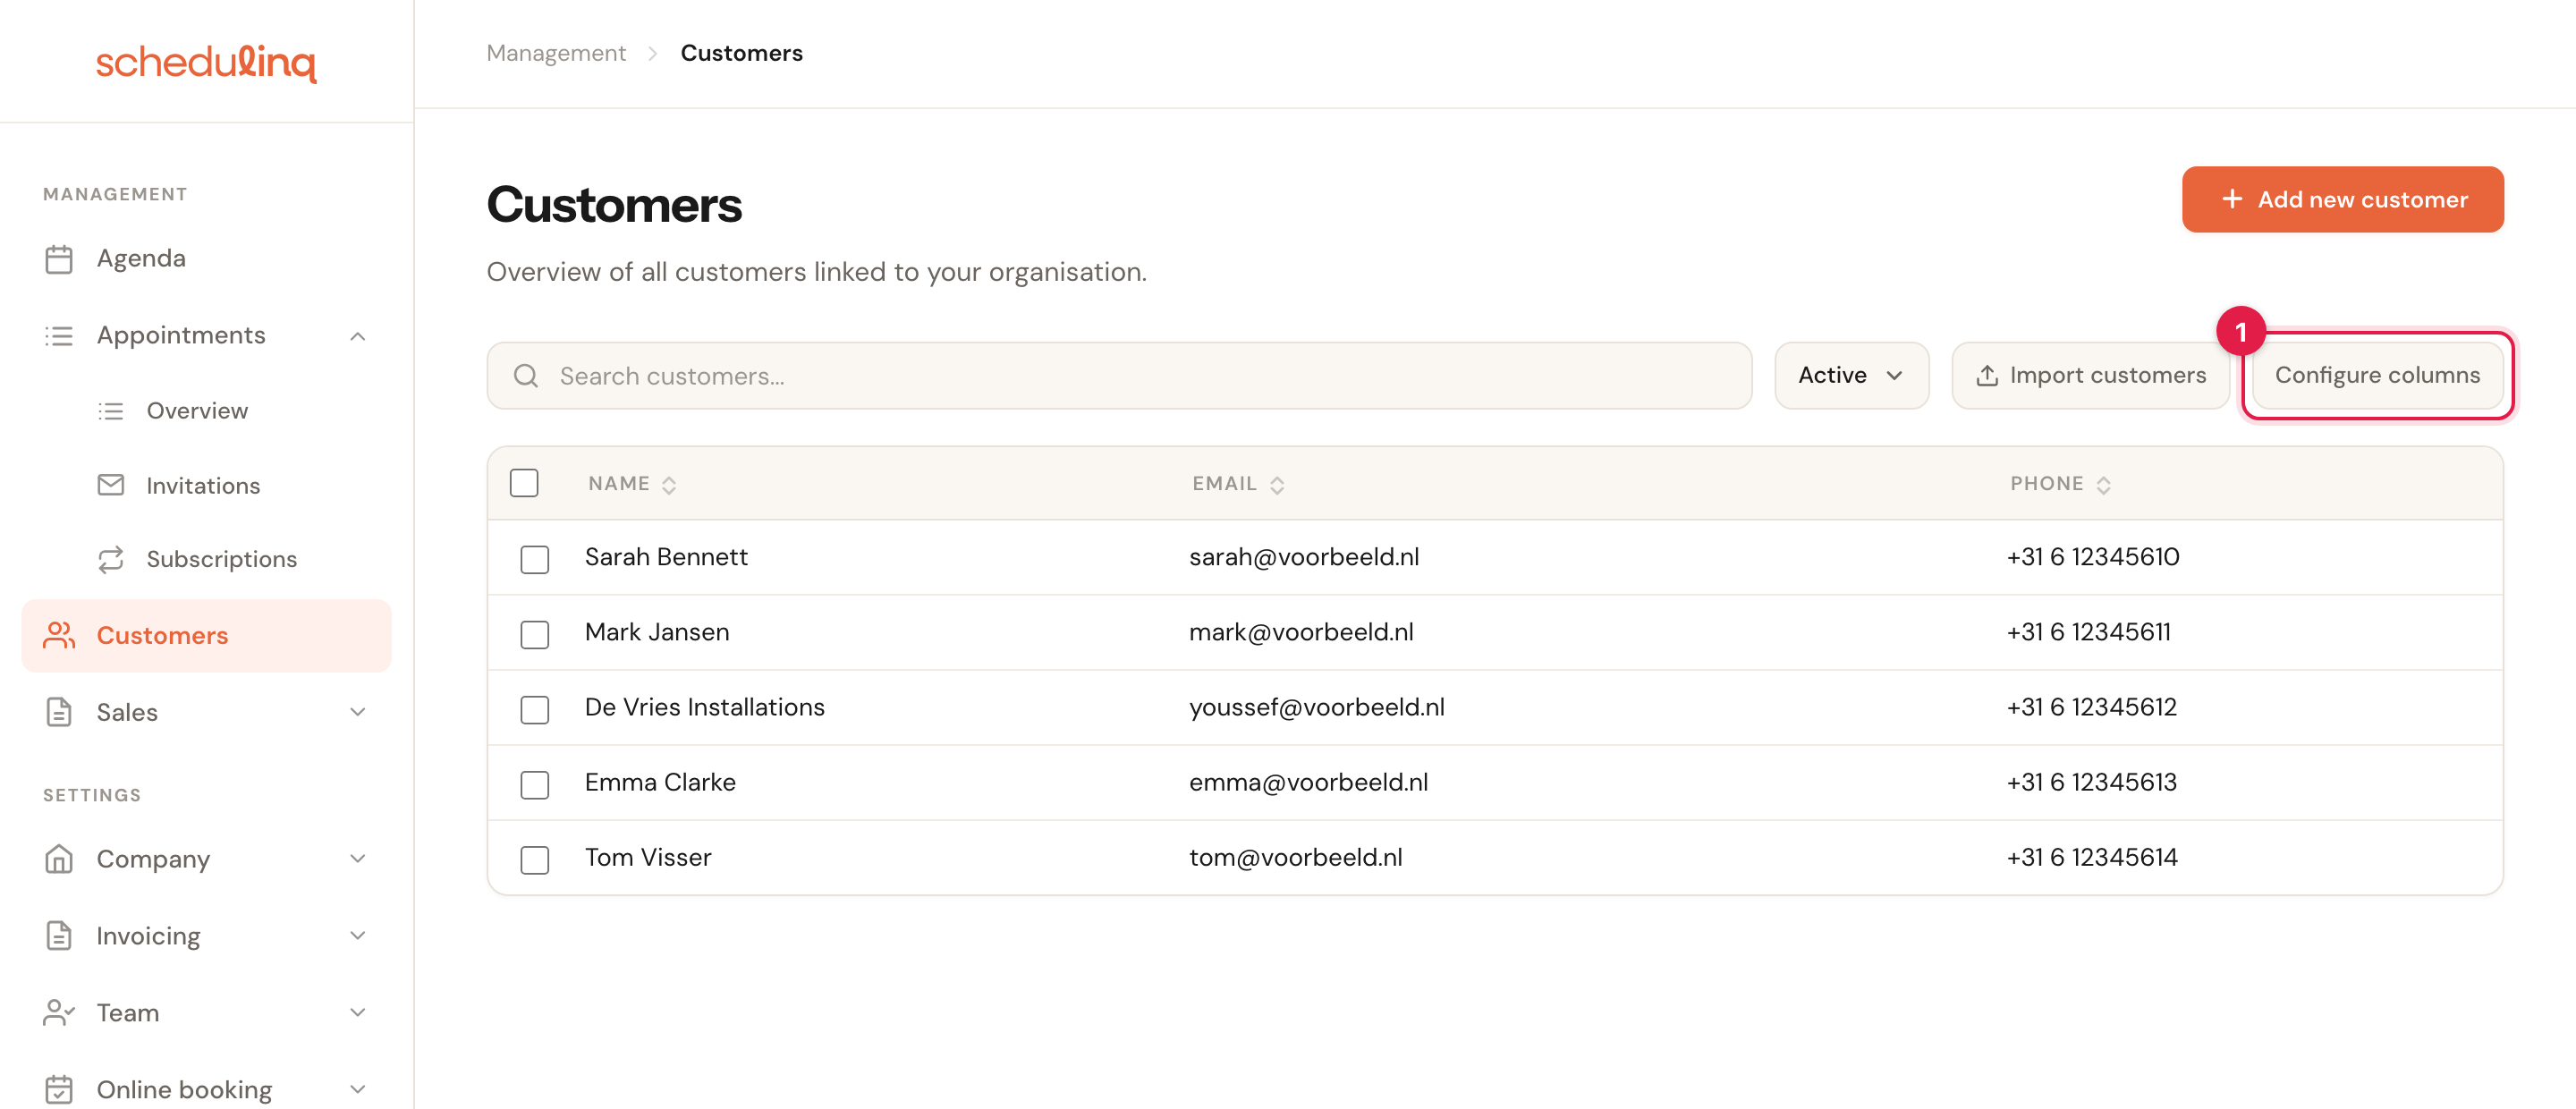
No button? Then you are not an administrator. A colleague who is can change the columns for everyone.
A panel slides open listing every column the overview is able to show. A tick means visible.
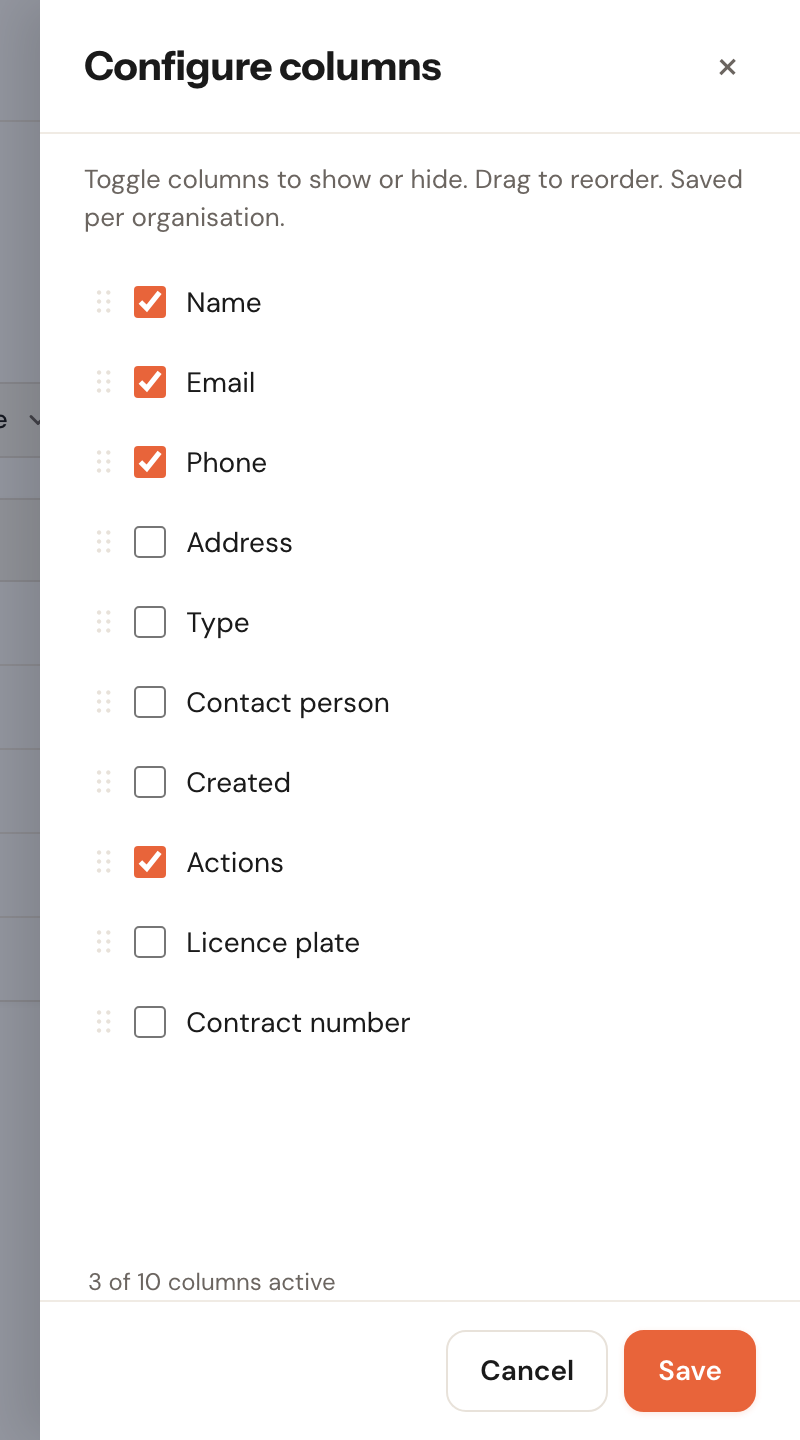
Turning columns on and off
Tick what you want to see, untick what you never use. A counter at the bottom keeps track of how many columns are active.
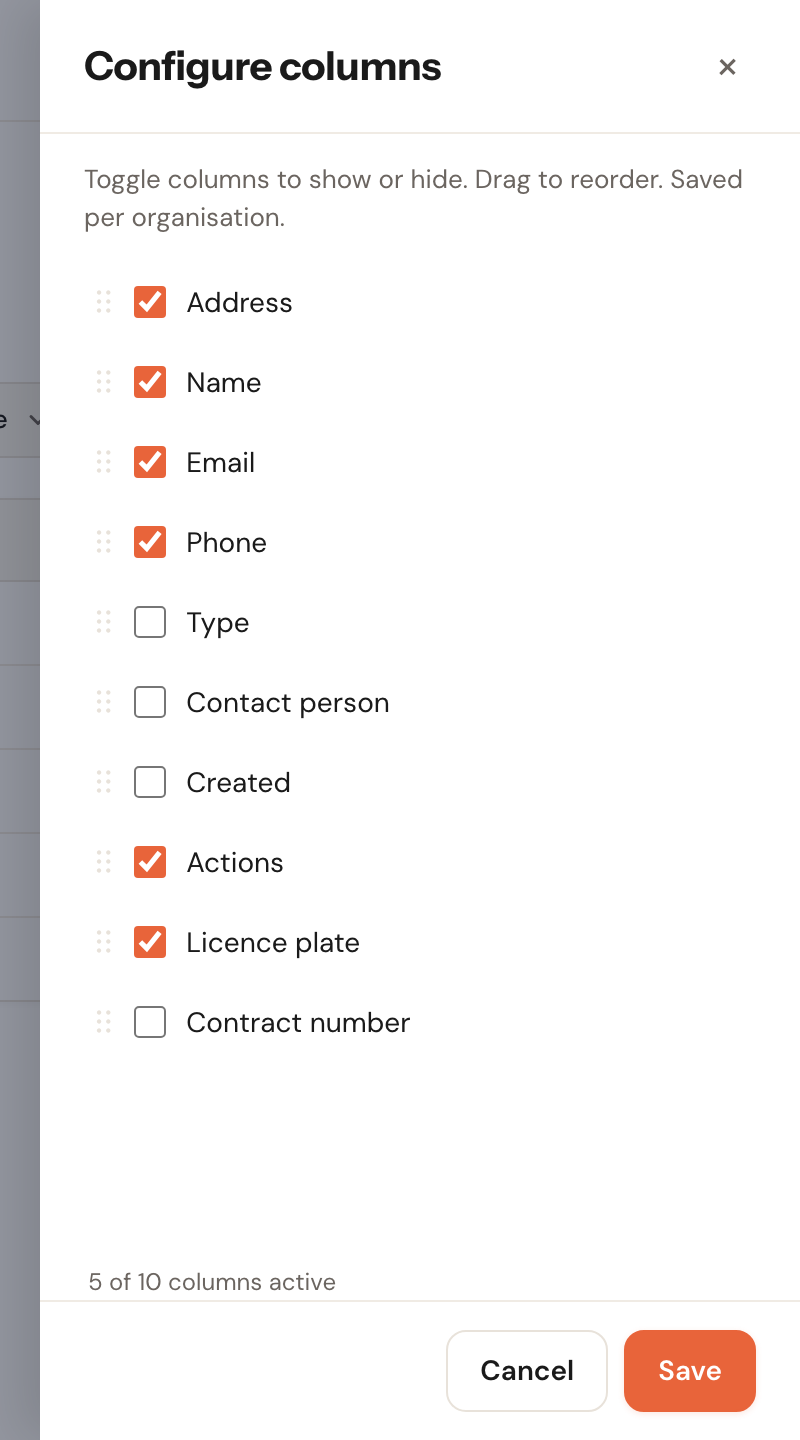
Ten columns maximum
Counter at the bottomYou can show up to ten columns at once. At the maximum, the tick boxes of the disabled columns grey out: you have to turn something off before you can turn something else on.
Nobody reads a table with twenty columns — you end up scrolling sideways past information instead of taking it in. The limit forces you to decide what you really want to see for every customer; the rest is still on the customer record itself.

Your own fields as columns
If you have created your own customer fields, they sit at the bottom of the same list under your own label.
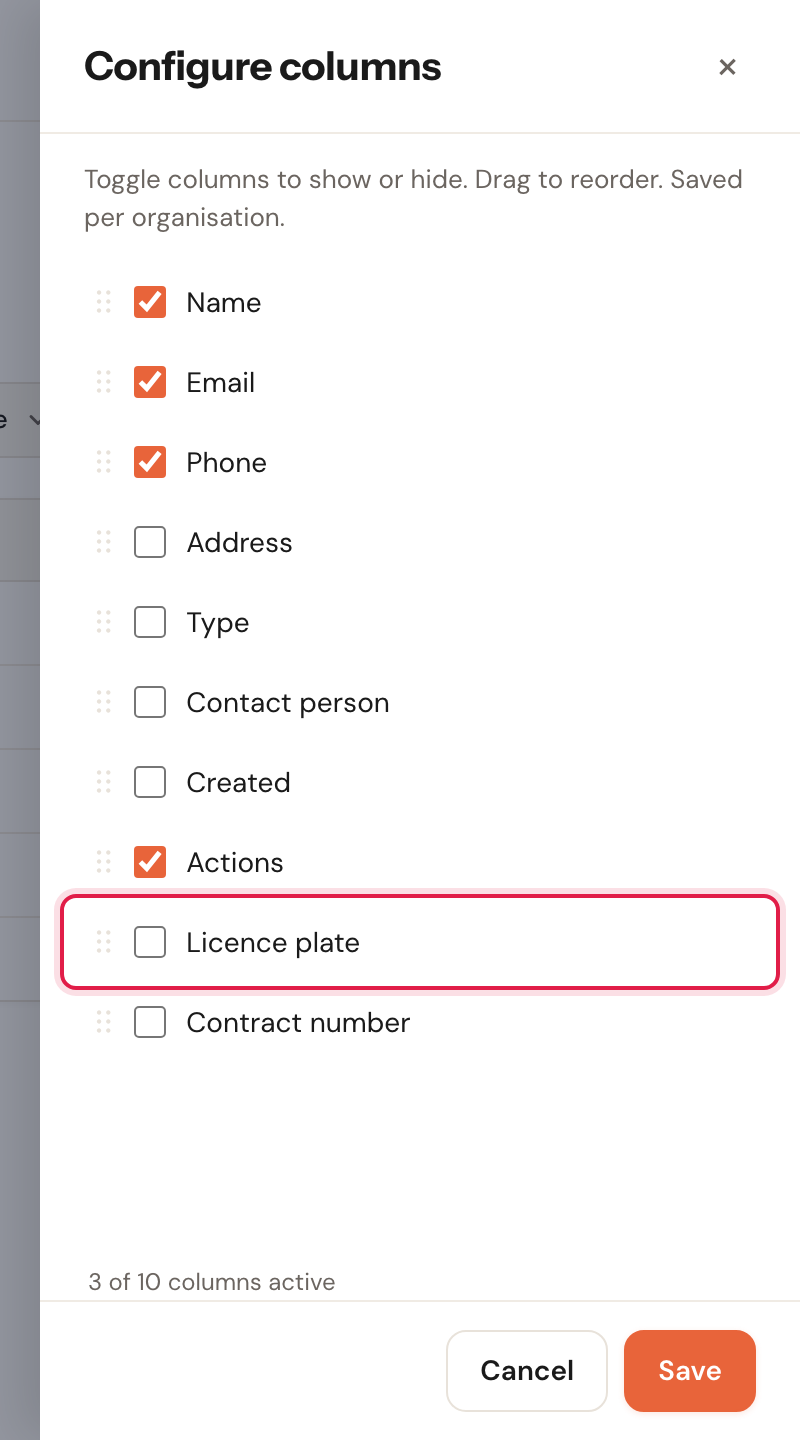
This is the reason to create a custom field in the first place: information specific to your work — a licence plate, a contract number, a membership number — visible directly in the overview instead of having to open each customer separately.
Setting the order
Drag a row by the handle on the left to move it. The order in the panel is the order of the columns in the table, from left to right.
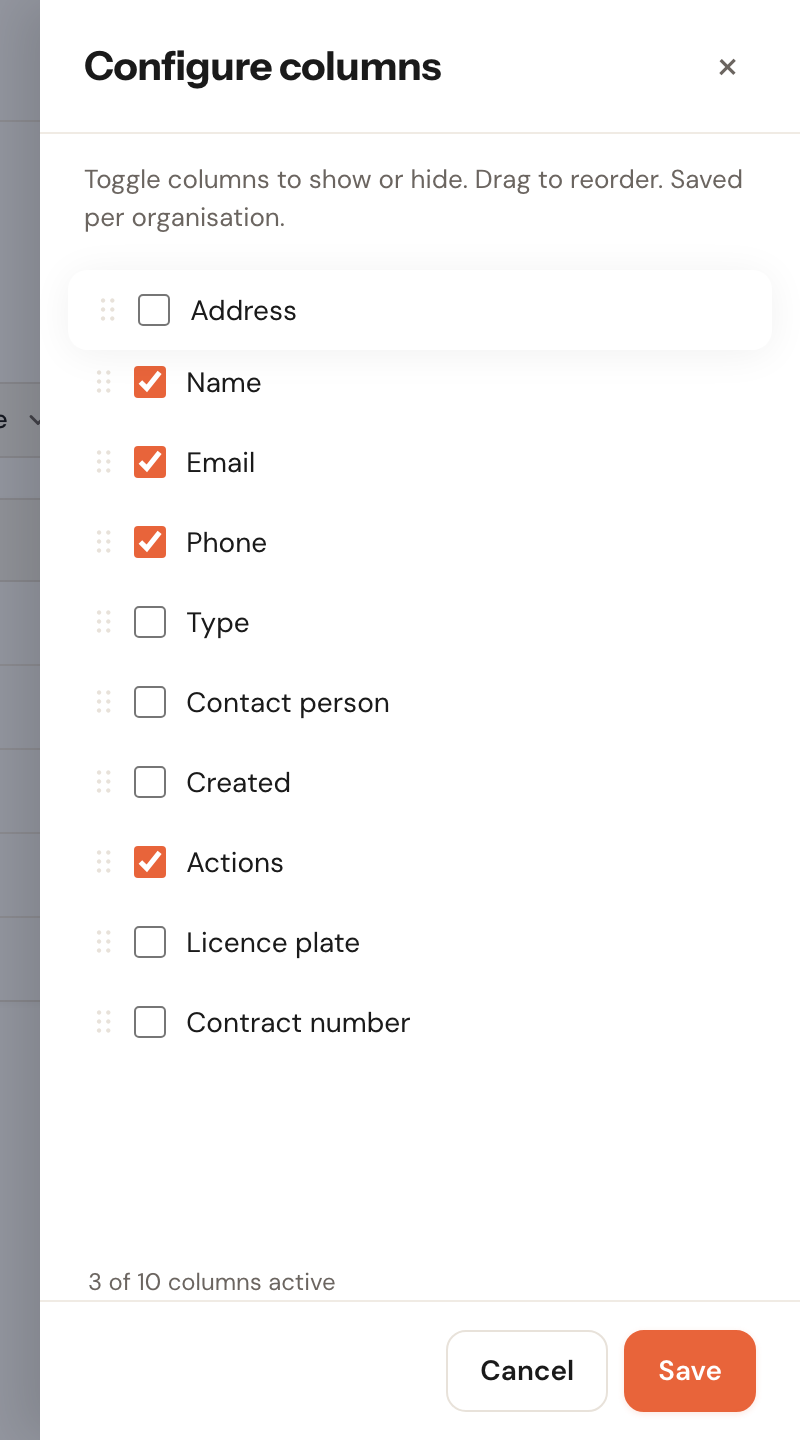
Whatever you put at the top becomes the leftmost column.
Saving
Click Save. The overview refreshes immediately with your new columns.
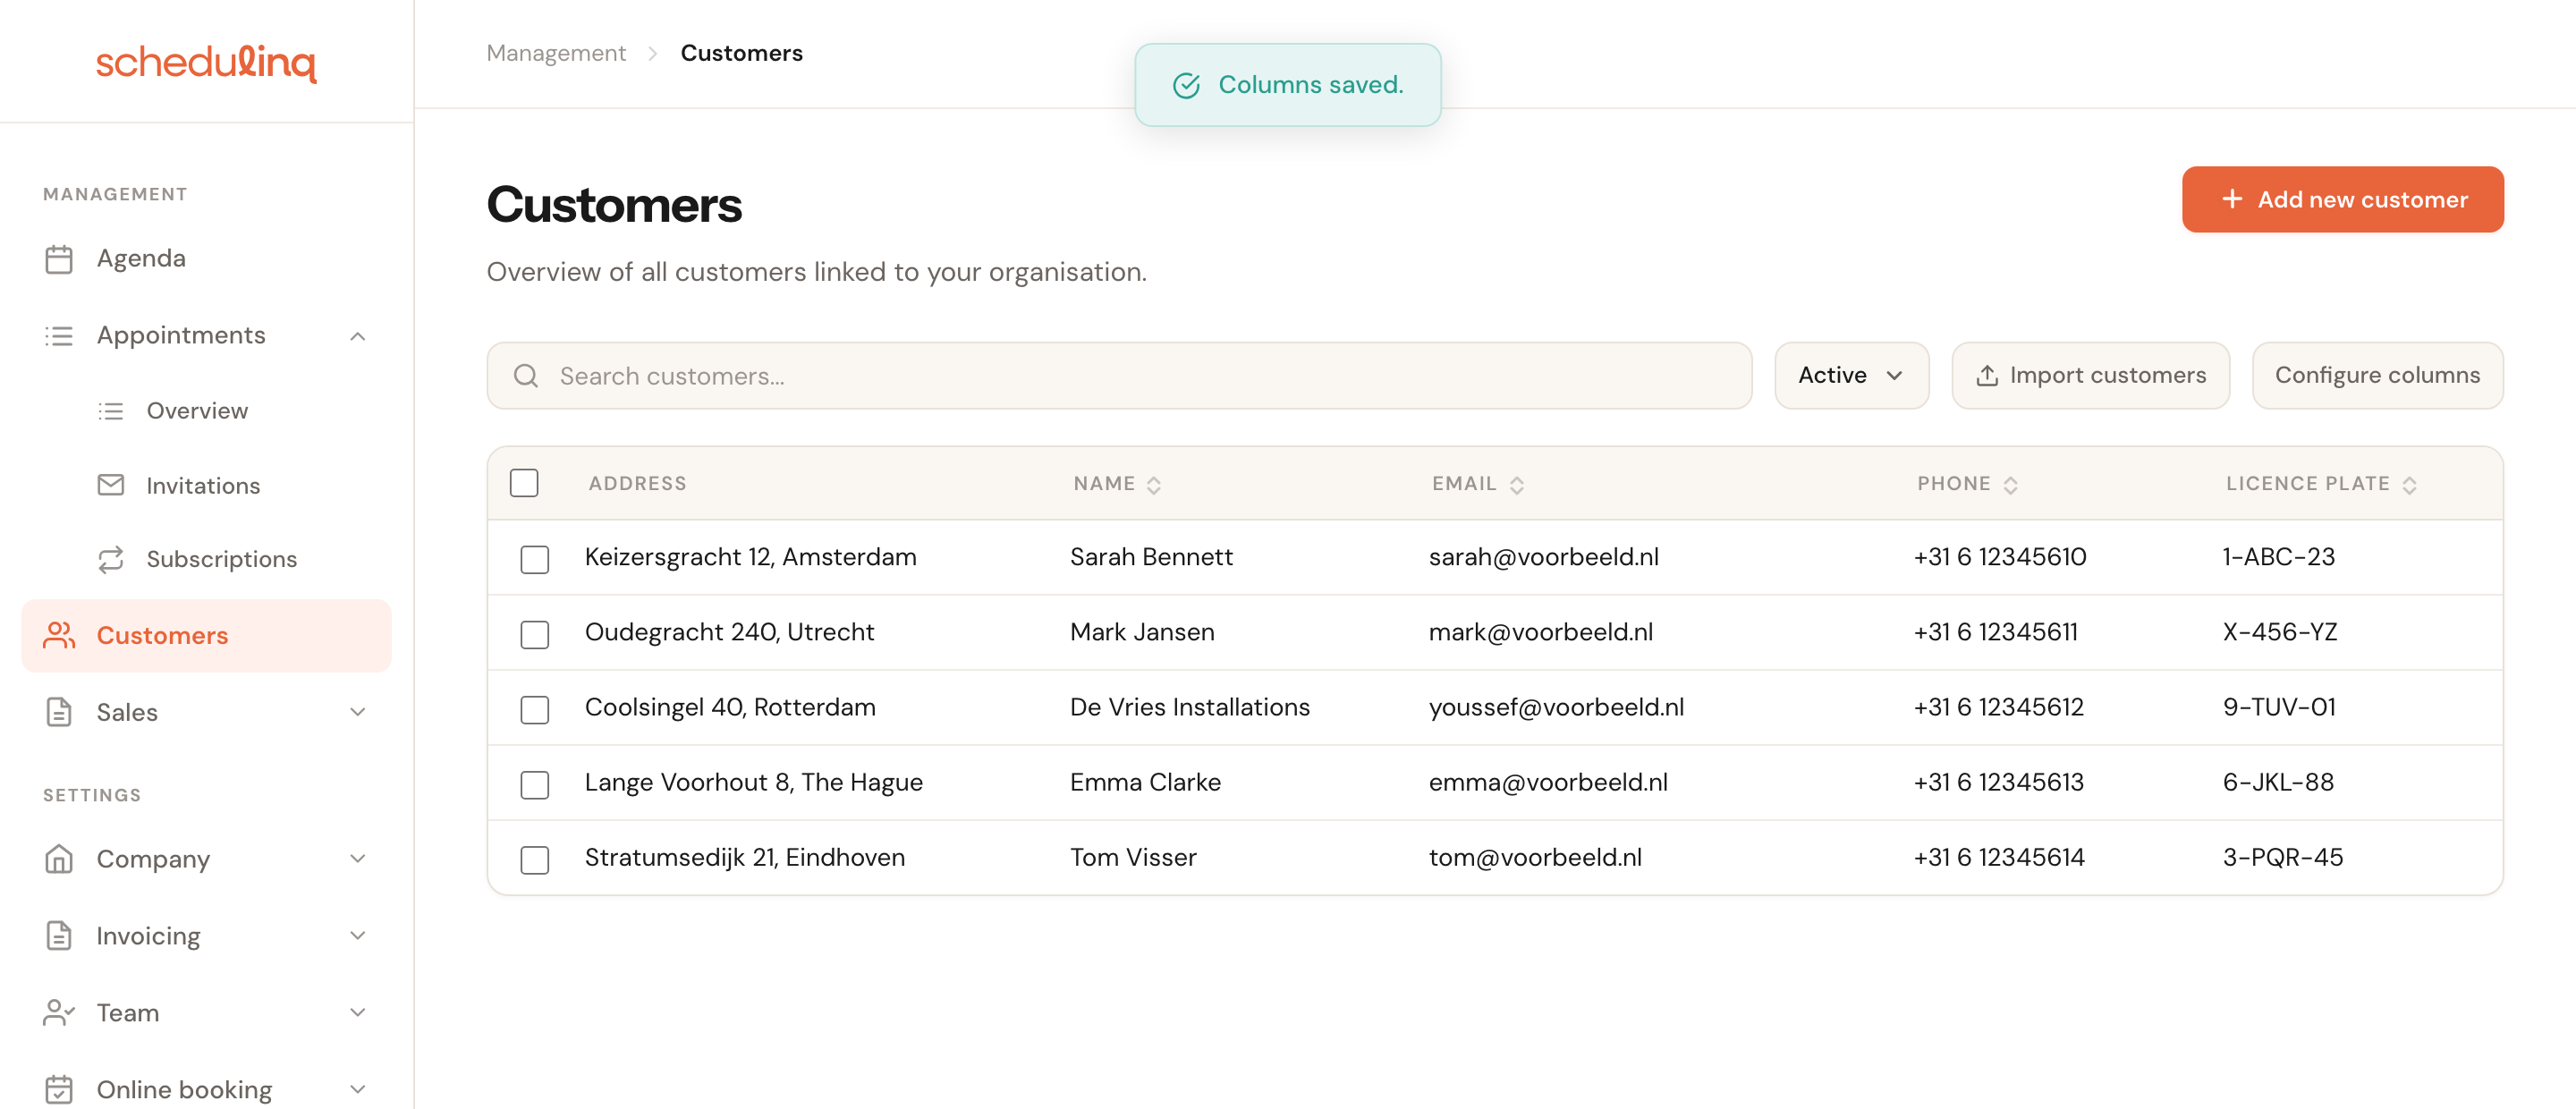
Address is now first because we dragged that row to the top, and Licence plate has been added as the last column.
Clicking Cancel loses nothing — your changes simply are not saved.
Frequently asked questions
Does this apply to other overviews too? No. Columns are set per overview. What you configure here for Customers changes nothing about the appointments overview, invitations or subscriptions — each has its own column configuration.
Where are search and filtering? They are separate from the columns: you can search for a customer without the matching column being visible. Searching and filtering belong to the customer overview itself.
I cannot see the Configure columns button. Only administrators can change the columns, precisely because the setting applies to the whole organisation. Ask a colleague with administrator rights to make the change.